Sign up for the Family Tree Newsletter Plus, you’ll receive our 10 Essential Genealogy Research Forms PDF as a special thank you!
Get Your Free Genealogy Forms
"*" indicates required fields

We’ve experienced almost every kind of natural disaster in North America: blizzards, droughts, earthquakes, floods, hurricanes, landslides, lightning, superstorms, tornadoes, tsunamis, volcanic eruptions, wildfires.
No matter what state or province you call home, these catastrophes happen, endangering lives, ruining belongings and kicking people out of their homes. For genealogists, natural disasters can reach into the past and destroy a lifetime of family history research, along with precious photos, documents and heirlooms.
Scanning plus a regular computer backup routine is a great start to protect your research. But would your data, paper materials and heirlooms survive a fire, flood or other disaster? Could you quickly grab your genealogy life and run if you had to evacuate?
Get ready for the next Big One with this guide to creating your own Genealogy Disaster Plan. These 11 steps will show you how to preserve your genealogy files and research.
1. Learn Your Risks
Most of our homes are at risk of three common hazards: house fire, water damage, and power failure. Depending where your home is located, such as in a flood plain or fault zone, you may also need to prepare for unique perils—floods, tornadoes, earthquakes, tsunamis or even volcanic eruption.
If you’re new to an area, you may be blissfully unaware of risks. Longtime residents may find that new development has modified drainage, changing your risk factors. Locate your community on risk assessment maps to determine local hazards. Study flood maps and simulators, and check out wildfire danger on the USDA Forest Service site.
2. Gather Important Numbers
Staying in contact with family and news sources is critical in an emergency. Program your cell phone with emergency phone numbers and contacts, such as local utilities, repair people and your insurance agent.
A disaster may disrupt local landline phone service, but long-distance service or SMS text messaging often remains active. Designate an out-of-town family member or friend as a disaster contact for each of your family members to check in with in an emergency, and make sure you know how to use text messaging. Add a genealogy contact who can keep a backup copy of your digital files or safeguard some heirlooms for you.
Also include a contact labeled ICE (“in case of emergency”) with someone emergency personnel can contact if you’re incapacitated. Write down phone numbers, too, so you’ll have them if your cell phone dies. The FEMA Family EmergencyPlan contact card is a handy reminder.
3. Practice Prevention
Get a good surge protector for your computer and external hard drives to guard against power fluctuations. Unplug the computer and hard drives before storms. Store power chargers with your laptop and other devices. Keep devices charged, and consider purchasing a solar or car charger you can use during power outages.
Learn where your home’s water shutoff valve is so you can act quickly if pipes burst. Know how to handle small emergencies, such as cooking fires, before they turn into big ones.
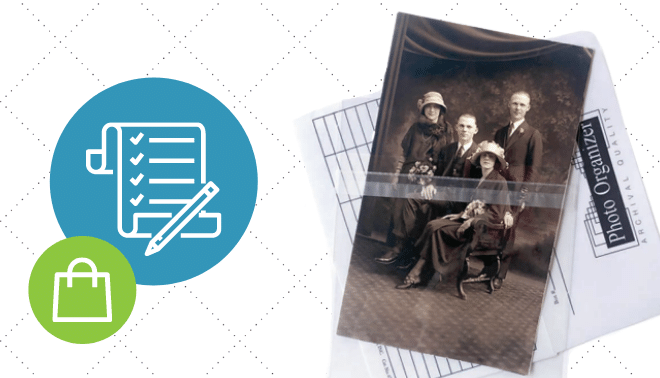
4. Prioritize Keepsakes
If you have boxes of family photos and keepsakes, or file drawers filled with records, prioritize what to save first. Use our Heirloom Inventory Sheet to list and prioritize your treasures. Start by listing irreplaceable family keepsakes. Remember to include heirloom furniture, jewelry, quilts and large items that may be a part of your home furnishings or decor.
Add your genealogical research materials to the Inventory Sheet, noting which files or binders should be digitized first. You may already have most records and notes scanned or in digital format, but double-check to be sure you’re covered.
When every genealogical keepsake, document and resource is inventoried, give each item a priority of 1, 2 or 3:
- No. 1: your most treasured keepsakes, such as your grandmother’s handmade quilt or a family scrapbook. These will be tops on your Genealogy Grab-n-Go List (see below), and you’ll digitize them first.
- No. 2: items you’ve already digitized, but you want to save.
- No. 3: items that have been digitized and can be replaced, such as printouts of research notes or census records.
5. Digitize to Safeguard
Select the best way to digitize your keepsakes and research, starting with the No. 1 items on your priority list. Use a flatbed scanner for heirloom documents and photographs. You can photograph oversize documents, scrapbooks and three-dimensional objects with a digital camera (use a tripod for a crystal-clear shot). A sheet-fed scanner lets you quickly digitize research papers and notes.
Save a high-resolution (at least 600 dpi) digital master of heirloom images. Archivists recommend using the TIFF format. Leave your masters alone and make a JPG copy if you need to work with or share a file. Get in-depth information on scanning family heirlooms and research in my book How to Archive Family Keepsakes (Family Tree Books).


6. Get an Insurance Checkup
Contact your insurance agent about extra coverage you might need for heirloom items. Find out exactly what emergencies you’re covered for, and whether archival restoration is included in your policy. Upgrade if needed. Take photos of valuable heirlooms, along with electronics and jewelry, for insurance purposes. Store them in the cloud, along with a copy of your insurance policy and a list of the serial numbers on your electronics.
7. Back Up Computer Files
The files on your computer are working files. You should store backups off site so you can get them back in case an emergency wipes out your hard drive. Having lots of copies on hand gives your data more chances for survival.
I recommend keeping three backups, including a rotating system of two external hard drives. Buy the largest capacity you think you’ll need and keep one at your house and one in a separate location, such as with your genealogy contact or in a safe deposit box. After your monthly file back up to the drive at your house, switch it with the one in the remote location and then back up that one. Your third backup is a complete set of files saved on an online storage site such as Backblaze or Carbonite.
8. Save Passwords
Remember to save all the user names and passwords you use to access genealogy websites, bank accounts, Facebook and file backups. You’ll need to retrieve them if your computer is destroyed or unavailable. One way to do this is with an online password management app such as LastPass or OnePassword. These tools encrypt your passwords and let you use one master password to access them all from any internet-enabled device. Know how to retrieve your cloud backup storage in case you need to restore everything to a new computer.
9. Practice Smart Storage
Digital copies preserve information, but what about the original 19th-century photographs and documents that you cherish? Use archival storage containers made of archival-quality, acid-free materials to protect photos, letters, old scrapbooks and other heirlooms.
Your choice of archival storage containers may depend on funds, space and potential hazards. Plastic might seem like a good choice, but lids can become dislodged, allowing water inside that can’t evaporate. In addition, a plastic container will melt in the high heat of a fire, destroying the contents. Archival board boxes aren’t waterproof or fireproof, but the material will breathe, allowing moisture to evaporate.
After Superstorm Sandy hit the East Coast in 2012, one family was relieved that a fire-proof safe box protected their mother’s genealogy research even though a flood and fire destroyed their home. A fireproof and waterproof safe might be a good option for storing small keepsakes and research notes.
Put your home archive in a spot free from dust, pests and smoke, and where temperature and humidity are fairly constant. An interior closet in the living area of your house is a good choice. Avoid basements, garages and attics. Store boxes at least a foot off the floor in case of flooding. Keep them away from windows, vents, pipes and electric wires.
10. Make a Genealogy Grab-n-Go List
In the event of disaster, having a genealogy disaster plan will let you focus on your family’s personal safety, not your family history research. In case you must evacuate, you’ll know what to retrieve so you don’t spend precious minutes trying to remember where you’ve stored your family keepsakes.
Make a short genealogy grab-and-go list that includes specific items. Start with the inventory you made in Step 4—the items you marked top priority will also top your grab-and-go-list. Also consider listing your family’s important records (birth certificates, passports, insurance policies), a portable hard drive with your digital media backup, your laptop and power cord, and heirloom items. If possible, group items in storage together so it’ll be easier to get them. Mark the location(s) of these items on your list and post it in an easy-to-find spot on a bulletin board or inside a cupboard.
11. Create a Genealogy Disaster Kit
You’ll be ready to start damage control as soon as it’s safe to re-enter your home if you assemble a simple genealogy disaster kit and store it near heirloom items. Include these items:
- disposable gloves
- protective coverall and face mask
- large plastic tubs
- wax paper to interleave wet papers and photos so they don’t stick together
- paper towels, clean rags or other blotting material
- large plastic tarps or cotton sheets as a drying surface
- circulating fan to facilitate drying
- large garbage bags
- resealable plastic freezer bags for refrigerating or freezing wet photos
- bottled water to rinse soiled items
- instructions for handling wet or damaged items, such as the tips on on Archives.gov
- contact information of a local conservator for professional assistance. You can find one through the American Institute for Conservation.
A version of this article appeared in the September 2014 issue of Family Tree Magazine.
Last updated, September 2023
ADVERTISEMENT