Sign up for the Family Tree Newsletter Plus, you’ll receive our 10 Essential Genealogy Research Forms PDF as a special thank you!
Get Your Free Genealogy Forms
"*" indicates required fields
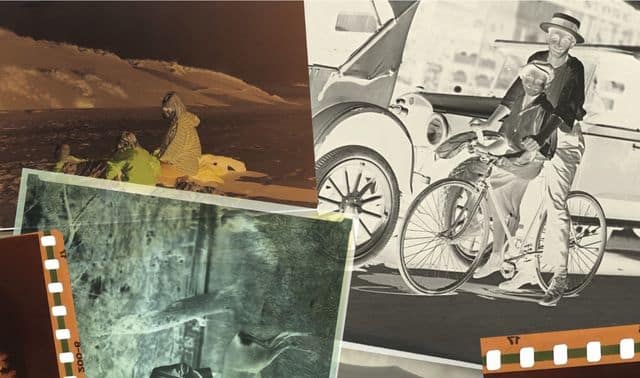
Here’s a riddle for you: When is a negative actually a positive? The answer: when you find actual negatives in your family photo collection.
Prior to digital imaging, photographers and developers required a negative to create a printed image. So along with all those print images in your shoeboxes of photos, you probably have negatives: film, glass, different-sized sheets, or even odd-sized formats. Regardless of format, all negatives have something in common: They’re the reverse of the desired print image, meaning light areas of the negative represent dark sections of the photo, and vice versa.
After prints, negatives make up the most-significant part of many family photograph collections. But photo negatives are often misunderstood and thrown away—you’ve probably wondered yourself what to do with them.
Instead of discarding these ghostly items, save them for the next generation, and take advantage of the high-res images they hold. Here’s how to identify, preserve and share photo negatives, including how to scan them and have negatives developed.
Types of Photo Negatives
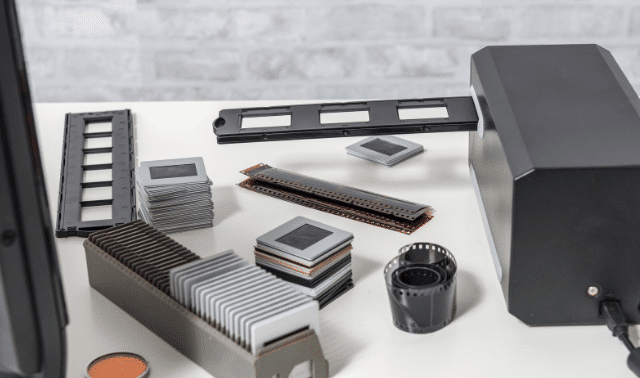
As photography tech has evolved, so too have formats for the negatives. Here are the most-common types, and what you should know about preserving them.
Glass Negatives

If you’ve seen a piece of glass that has a coating and light and dark areas, then you’ve found a glass negative. Glass negatives led to the wider availability of photography, as well as new photo formats: carte des visite, cabinet cards, and paper stereographs.
There were two primary types:
- Collodion (or wet plate) negatives are on thick glass and have a gray coating. These were produced by individual photographers as needed in the field from the 1850s to about 1880.
- Gelatin dry plate negatives are distinctive for their thin, uniform thickness. Factory-produced, they were sold by the box. They were available from the 1880s through the 1920s, though you can still find negatives at antique shops and through collectors.
Light-sensitive silver halides in the collodion captured and preserved an image during the photographic process. Photographers then stored plates in wooden boxes that had dividers to protect the glass from breaking.
The size of the print corresponded to the size of the negative, and contemporary cameras used specifically sized negatives. For instance, a 5×9-inch negative from the 1870s would produce a print that had the same dimensions. Later, enlarging and reducing devices allowed for photos to be developed at different sizes than the original.
While film negatives gradually replaced glass, glass negatives persisted into the 20th century. Most of our 19th-century family pictures were taken by professional photographers using glass, but amateur photographers also used glass plates. For instance, an 1898 Korona special series camera required a 4×6-inch glass plate. Check out a Facebook group dedicated to glass negative collectors.
Storing and preserving glass negatives
Be careful when handling glass negatives, as they’re fragile and have potentially sharp edges. Hold them only by the edges to prevent damage to the emulsion (coating).
Glass plate negatives, being both heavy and fragile, require special storage care. They should be stored upright in a cool, dry place in reinforced archival boxes with dividers to protect the glass from breaking. Because of the cumulative weight, avoid putting too many in a single box, and make sure that the shelf you are storing them on provides adequate support.
Gaylord Archival sells archival boxes for glass negatives in standard sizes. Volara foam lines the bottom and sides of the box to cushion the negatives, and the boxes also feature heavy-weight dividers to prevent negatives from touching each other. You can purchase additional inserts separately.
In addition to breakage, glass negatives are also susceptible to mold. Mold can adhere to glass if the negatives are stored in a damp place, if the emulsion separates from the glass, or the glass chips or cracks. A professionally trained photo conservator can fix some of these issues; the American Institute for Conservation has a finder tool.
Film Negatives
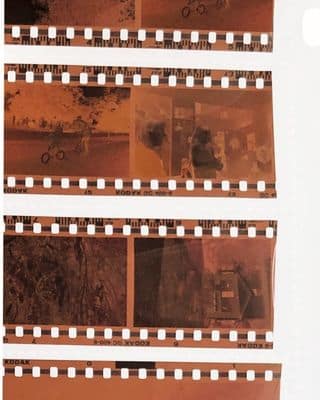
The “You push the button, we do the rest” era of amateur photography ushered in the use of film negatives. This is a format familiar to anyone who took pictures in the 20th century as well.
Different cameras required different film sizes. The standard 35mm negative stock survives today (and is, in fact, experiencing a resurgence), but not all formats maintained their popularity or usefulness. The short-lived disc film of 8mm negatives, for example, was first available in 1982, only to be discontinued due to poor picture quality in 1999. By contrast, the Kodak 101 was offered from 1895 all the way until 1956.
Camera-Wiki.org has a chart of film sizes and designations, along with years each was introduced and discontinued. And Nostalgic Media has a similar guide that goes in more detail about popular formats.
In addition to sizes, film negatives have also been made of several different materials over the decades. Here are some of the most prominent from the mid-1880s, with approximate years of use:
- Gelatin film from Eastman American (1884–1890): This film has uneven edges and is brittle.
- Nitrocellulose roll film (1889–1903): The first roll film was on clear acetate coated with flammable nitrocellouse. It is thin, and prone to curling and wrinkling. (See the separate section on nitrate film.)
- Gelatin roll film (1903–1939): Also made with a clear plastic base, this film was coated on both sides with gelatin to prevent curling.
- Plastic roll film (1913–1939): This was cut from a sheet by machines. Edges were usually stamped.
- Modern film (1939–present): Film in more-recent decades has been coated with clear cellulose acetate or (after 1955) polyester, and marked with “safety” dates. In later decades, both color and black-and-white formats were available.
Storing and preserving film negatives
Many photo-storing guidelines for prints also apply to negatives: Avoid heat and humidity, and store carefully. High humidity allows mold to grow on negatives, and improper storing can cause negatives to deteriorate faster.
More-detailed guidance depends on the type of negative. Mishandling film negatives isn’t as dramatic as dropping a glass plate, but the oils from your hand can leave fingerprints and smudges. (Hold negatives only by the edges, and consider wearing non-latex, powder-free gloves.) In addition, acetate becomes brittle and shrinks, developing bubbles and an odor.
Cool, dry storage is best for all images and negatives; shoot for 50% relative humidity and a stable 68 to 70°F. You obviously can’t make your home into a museum, but there are steps you can take to mitigate temperature and humidity shifts. For instance, avoid storing materials in attics, garages or basements.
Color film negatives can be stored in a conventional freezer with Gaylord’s Photo & Negative Cold Storage Kit, which includes an exterior humidity indicator that checks conditions. This will slow deterioration. Materials stored in a freezer take approximately three hours to safely warm to room temperature.
As with prints and glass negatives, film negatives should be stored in archival-safe sleeves, then vertically in boxes. Negatives vary in size, but try to purchase non-PVC, polyester sleeves of approximately the same size. Print File offers polyethylene sheets for 35mm negatives that can be stored in a notebook.
Nitrate Negatives
Though technically a kind of film, nitrate negatives warrant a section of their own. Unstable and flammable, nitrate includes a chemical that’s also used in explosives—making it a format to be wary of.
How dangerous is nitrate? The United States Department of Transportation restricts shipping nitrate because it’s considered a fire hazard. And Gaylord Archival advises that nitrate-based film be stored in an appropriate container for flammable materials or an explosion-proof freezer. Proper storage and handling diminish the danger.
Your first step should be identifying nitrate film, if possible. Some film actually has the word nitrate printed on its edge, but most doesn’t. If you suspect you have some, have well-preserved nitrate negatives copied by a local reputable photo-conservation lab. (Confirm that the lab accepts such materials first.)
Signs of deterioration include discoloration, brittleness, and bubbling, as well as a vinegary smell. Nitrate that’s sticky and powdery should be immediately discarded. For more information, see “Film Preservation 101: Is Nitrate Film Really Dangerous?” on the National Archives website.
Do not try to set a controlled burn on a piece of nitrate film. In fact, don’t expose nitrate film to heat or humidity at all. Fire codes in most communities specifically mention how to dispose of nitrate.
Scanning and Reversing Negatives
In addition to simply storing negatives, you can also use them to bolster your photo collection. Nancy Desmond of MemoryWeb advises keeping negatives because you’ll be able to make new prints of better quality than existing ones. For instance, 1970s prints are a bit fuzzy due to a linen pattern on their surfaces. But if you digitize the original negative and convert it to positive, you’ll have a crisp new image without discoloration or pattern.
In addition, you may not have prints of all the negatives in your collection. Start by matching up the negatives with existing prints to see what’s missing. Take note of any negatives that are missing a print, and develop a plan to scan the negative and print.
The wide availability of scanners today makes this possible. Anyone can scan negatives at home using a flatbed scanner or your smart phone. All-in-one machines (scanner, fax machine, and copier), and handheld scanners will not produce a good negative scan.

But some apps, such as Photomyne, have patented technology that allows one to reverse an image by photographing it. You can also reverse a negative using the edit feature on some smartphones’ camera apps, or within MemoryWeb.
Before scanning, clean your negative and the glass of your scanner with compressed air to remove dust. Be careful with the fragile surface of glass negatives; rather than using the compressed air, fix any flaws “in post” with photo-editing programs.
Many flatbed scanners have covers with a white undersurface. If yours doesn’t, cover the negative with a white paper to maintain contrast. You can scan the whole strip of negatives or the individual frames, but never cut apart strip negatives. Keep them as they are.
Scan all negatives at a minimum of 600 DPI, and save them as TIFF files. (Higher-res is better, if you can manage it.) You’ll need to back up these large files to either a portable SSD hard drive or cloud-based storage like Permanent.org or iCloud.
Developing Photo Negatives
Videos of people purchasing cameras and finding undeveloped film in them are all over social media. You might have undeveloped film yourself that you’ve forgotten about, or an ancestor’s camera that was used to take pictures over time but never developed.
The good news is that you can still develop certain film formats. But your success level in developing film to get good-quality prints will depend on the age of the film, the format it’s in, how it was stored, and whether a local store has access to the proper chemicals.
Given how popular digital photography has become, finding a store that offers photo-developing and -printing can be difficult, especially when it involves older stock. If you’re lucky enough to still live near a camera store, ask them if they offer that service.
The Darkroom is one service that specializes in developing older rolls of film. Once they scan your negatives, they offer a link for you to review your images before deciding what to do next. Look over The Darkroom’s website to learn more about their services and set appropriate expectations.
Don’t despair if you own some undeveloped disc film. Dwayne’s Photo can develop some of it. (Specifically, disc film of a certain type that was manufactured after 1973.) Like The Darkroom, they also offer processing for 110, 126, 127 and APS film, plus 35mm film.
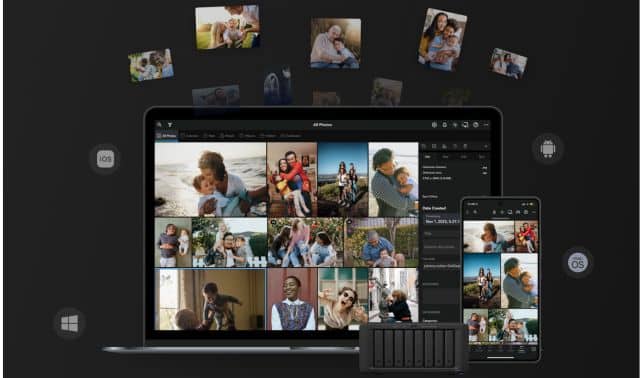
Once you’ve got digital images (either by scanning or having them developed), sharing your new photos online is easy. Attach them to an email, or post them on social media. Upload them to a shared collaborative file on a website like Permanent.org, or an app like MemoryWeb. However, you do it, your family will be grateful for your effort.
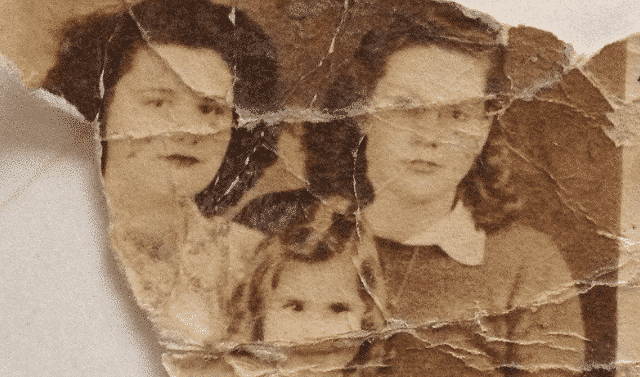
Negatives can reveal of piece of your family’s missing picture history, especially if the photographer never printed the images or the original prints have disappeared. They could be evidence of a long-deceased family member who captured everyday life in their family or their community. Revisiting the past by diving into photo negatives is well worth the effort.
A version of this article appeared in the January/February 2023 issue of Family Tree Magazine.
Related Reads

ADVERTISEMENT