Sign up for the Family Tree Newsletter Plus, you’ll receive our 10 Essential Genealogy Research Forms PDF as a special thank you!
Get Your Free Genealogy Forms
"*" indicates required fields
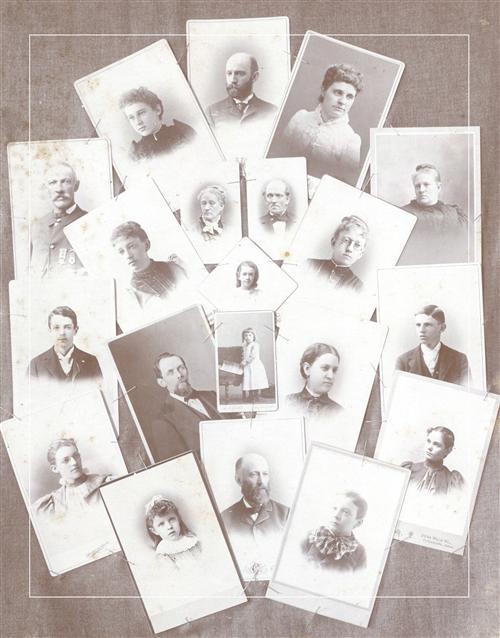
So your great-aunt Alma bequeathed a boatload of family photos to you, but she didn’t label them — now what? Whatever you do, don’t throw them away. Identifying and dating old pictures can be a challenge, but it’s also a good way to learn more about your relatives. Have you ever wondered where you got your curly hair and freckles? Now’s the time to find out. You might discover you’re the spitting image of Great-great-grandma Lucille. Are you curious which side of the family a group portrait depicts? With a little research, you can discover that, too.
By writing down everything you know about an image, you’ll uncover ancestral connections and ultimately save yourself plenty of genealogical grief. Just fill out the form at the end and attach a copy (not the original!) of your mystery photo for your future reference. We’ll walk you through the entire photo-identification process so you can start piecing those puzzles together like a pro.
1. Type of photograph
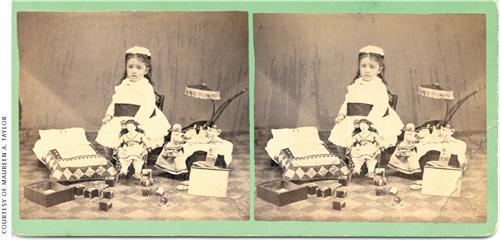
Paper stereographs, which you view through a special lens for a 3D effect, usually date from 1854 to 1938. Most stereographs were collectible scenes — it’s rare to find one showing a family member.
2. Type of enclosure
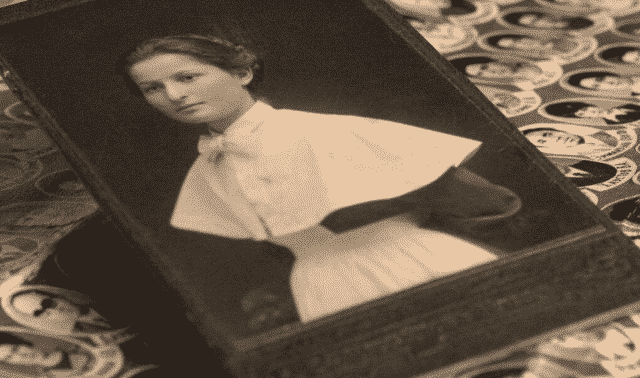
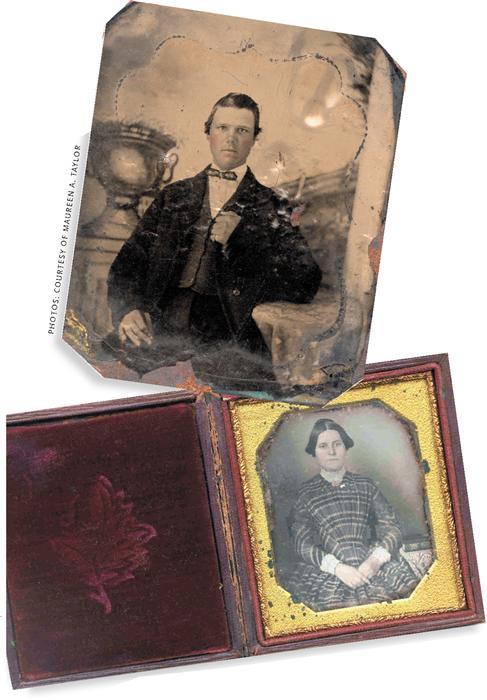
During the 19th century, daguerreotypes and ambrotypes generally came in cases. Consumers could buy tintypes in cases, too, though these images often had paper enclosures instead.
Cases came in a variety of sizes, shapes and designs — from simple to elaborate. Wood-framed cases, such as the one shown at left, were popular in the 1840s and 1850s. They were replaced by union cases, which were constructed from gutta-percha (a tree resin) and other substances that could be molded into sturdier cases with elaborate surface designs. Various shades of velvet line the insides of most cases. Brass mats (plain in the 1840s and embossed in later decades) frame the images.
To learn more about cased images, consult Adele Kenny’s Photographic Cases: Victorian Design Sources, 1840-1870 (Schiffer). Note the type of enclosure (case, paper mat or frame) on your worksheet.
3. Size
Measure your photograph in inches (width by height) and write down the dimensions. Cased images (daguerreotypes, ambrotypes and tintypes) were made in standard sizes, from the sixteenth plate (22× inches) to the mammoth plate (6½8×½ inches or larger). Diminutive 11×-inch tintypes, known as gems or thumbnails, came in paper enclosures.
Most 19th-and early-20th-century paper photographs were mounted onto cardstock or cardboard for support. These images also came in standard sizes. The carte de visite, which first showed up in the United States in 1859, measured 4¼×2½ inches; the cabinet card (1866) was 4½ × 6½ inches; the Victoria (1870), 3¼×5 inches; and the Promenade (1875), 47× inches. After you see how your mystery photo measures up, use these dates as a guide to when it could have been created.
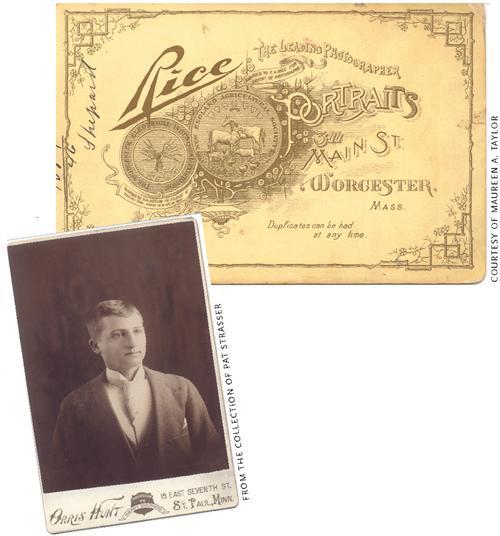 4. Photographer’s imprint
Finding a photographer’s name and/or address, known as an imprint, on a picture is like winning a prize. That one detail can tell you where and when a photograph was taken, narrowing the identification possibilities considerably. On cased images, you’ll likely find the imprint scratched into a plate attached to the case, or on the brass mat or velvet interior of the case. Bear in mind, though, that the majority of cased photos don’t have imprints. With paper prints, you don’t have to hunt quite as hard for the photographer’s name: You’ll see it on the front or back of the image. Study the photographer’s imprint carefully, and record the information exactly as it appears. Then see the next step.
5. Photographer’s dates of operation
Once you have a name, you can find out when the photographer was in business. Look him up in the surname section of an old city directory (a listing of a town’s residents, similar to today’s phone books. Use several directories to track his business over a period of time. You also might find him in Biographies of Western Photographers by Carl Mautz (Carl Mautz Publishing) or a similar directory. And check out Photographers: A Sourcebook for Historical Research edited by Peter E. Palmquist (Carl Mautz Publishing) and the Finding Photographers Web site <www.findingphotographers.com> for a list of books and online resources arranged by geographic focus.
6. Subjects and caption
A caption such as “Aunt May” or “Aunt May’s sister” gives you a possible identification — but take it with a grain of salt. You don’t know who wrote the caption or how reliable the information is. Copy the caption onto your worksheet and then try to confirm it. Start by comparing your photograph to identified images of Aunt May or her sister, and see if the facial features match up. Examine the handwriting:Does it resemble other writing samples in your collection? Try to figure out whose it is.
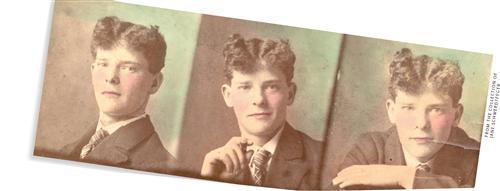
7. Costume descriptions
Take out a magnifying glass and look closely at your ancestors’ outfits. Notice the shapes of their sleeves, the lengths of their skirts, the widths of their trousers, their hairstyles and accessories. Fashion constantly evolves, and clothing clues such as these can tell you if you’re looking at a picture of your great-grandparents or your great-great-grandparents. Write down everything you see. In the next step, we’ll explain how to date your images based on these clues.
Note that baby boys and girls dressed alike until about age 5. You can tell them apart by their hairstyles: Girls usually wore their hair parted in the middle, and boys parted on the side. After their toddler years, children generally dressed like mini adults
Clothing can convey more than a time period. For instance, folk costumes clue you in to your ancestors’ ethnicities, and fraternal-order regalia — such as medals, buttons, sashes and badges — provide evidence of membership.
8. Costume time frame
By comparing the clothing in your photograph with fashion depicted in a costume encyclopedia such as Dressed for the Photographer: Ordinary Americans and Fashion,1840-1900 by Joan Severa (Kent State University Press), you can establish a time frame for the image. To get started, use this 19th-century style timeline:
1840 to 1849: Dresses had long, tight bodices with fan-shaped gatherings that usually were pointed in the front. Women often wore fingerless gloves, gold watches on long chains, caps, bonnets and ribbon bracelets. Men’s outfits consisted of coats with extra-long, narrow sleeves; tailored white shirts with small, turned-up collars; and dark neckties worn in horizontal bowknots.
1850 to 1859: Broad-collared dresses had sleeves that were narrow at the shoulder and widened at the wrist, displaying white under-sleeves. Men wore generously cut suit coats with vests and wide-legged pants. Shirt collars turned over 2-inch-wide ties, worn in wide half-bows.
1860 to 1868: Women wore hoop-skirted dresses with military trim and sleeves gathered at the wrist or flared. Accessories included shawls, hairnets, wide belts, elaborate earrings and brooches. Men favored white shirts with narrow ties, oversized sack coats, wide-legged pants and suspenders
1869 to 1882: Ruffled bodices and necklines were all the rage. Skirts trimmed with apronlike overskirts had large bustles. Common accessories were hairpieces, black-velvet neck ribbons and large jewelry. Between 1875 and 1877, skirts had smaller bustles and long overskirts and trains. Into the early 1880s, bodices extended over the hips, and women posed with fans and parasols. Wide black or striped ties worn in a loose knot or overlapping ends accented men’s close-fitting jackets, which were buttoned only at the top to display the vest and watch chain underneath.
1883 to 1889: Form-fitting bodices extended below the waist and had low-standing collars and tight, three-quarter-length sleeves with trim at the cuff. Women accessorized with muffs and novelty jewelry. Men sported a variety of hats, from straw sailor hats to black homburgs (felt hats featuring dented crowns and shallow, rolled b
1890 to 1900: By mid-decade, women favored balloonlike “leg-o-mutton” sleeves worn tight at the wrist. After 1896, sleeves got smaller, with fullness at the shoulder and a slight flare over the hand. Feather boas, large fans and parasols show up in pictures from 1893 to 1896. Later in the decade, women wore small earrings, watches pinned to their bosoms, and small decorative combs placed high on the back of the head, but visible from the front. Throughout the 1890s, men wore narrow coats buttoned to the top, narrow black or patterned bow ties and slim trousers.
It’s easy to overlook background details, but they can be the most telling parts of a picture. Some people sat for portraits with tools of their trade: A milkmaid might have posed with her stool in one hand and bucket in the other. Perhaps you have a picture of an ancestor holding a foreign-language book — that’s a clue to his origins. Use antiques guides such as Treasures in Your Attic by Joe L. Rosson and Helaine Fendelman (HarperCollins) to research such props.
10. Owner’s name and contact information
Note the name of the image’s current owner and her contact info. Ask where she got the photo and if she knows who originally owned it. Tracing the picture’s provenance can lead to more photos held by the owner’s relatives.
11. Clues in genealogical records
Once you’ve narrowed the photo’s time frame, use genealogical records to identify the subjects. Vital records provide a person’s life dates, census records and city directories confirm a place of residence, and military papers supply evidence of service and sometimes a physical description. If your portrait was taken in Boston, for instance, scan your research for a relative who lived there — even for a short time. Record any details that look promising. This is a good place to jot down family stories associated with an image, as well.
12. Possible subjects and their life dates
After examining clues in the photo and rummaging through records, you should have an idea when the picture was taken. Now list each family member whose age, sex and location at the time make him a possible match for the photo’s subject(s). Further narrow the options by comparing the mystery image to identified pictures of people on your list.
Store your photo worksheets with your genealogical research forms so you’ll have all your data in one place. We guarantee this form will keep nagging you to fill in the blanks until you finally solve your picture puzzles.
Photo-Identification Worksheet
Solve your family photo mysteries one step at a time. Using the accompanying article as a guide, fill in the following information about your mystery photo, then attach a copy of the image to the form. (Feel free to photocopy this form for personal use.)

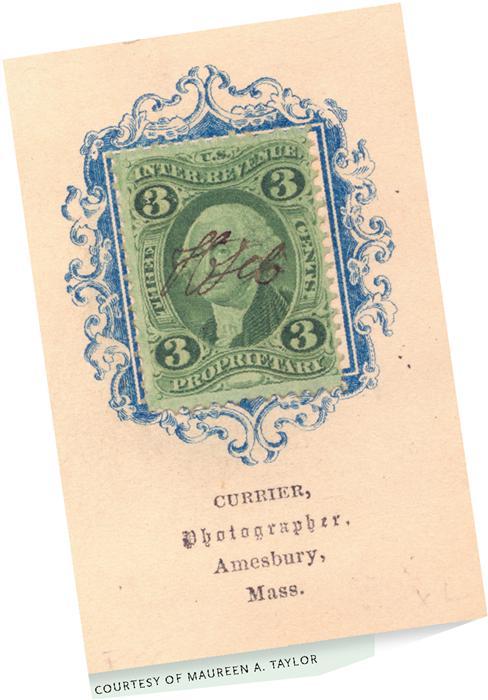 Certain clues can immediately date an image. Between Aug. 1, 1864, and Aug. 1, 1866, the US government levied a tax on photos. Photographers had to affix stamps to the backs of their images, and hand-cancel each one with their names or initials and the sale dates. If your mystery photo has one of these stamps, you’ll know exactly when it was taken.
Pay attention to postage stamps and cancellations on picture postcards and old envelopes that held photos, too. These clues can place a picture in a certain country at a particular time. Postal history books such as the Scott Standard Postage Stamp Catalogue series (Scott Publishing Co.), available in print and on CD-ROM at large libraries, will help you date international stamps.
ADVERTISEMENT