Sign up for the Family Tree Newsletter Plus, you’ll receive our 10 Essential Genealogy Research Forms PDF as a special thank you!
Get Your Free Genealogy Forms
"*" indicates required fields
My sister’s idea for a cousins reunion was great for our family, but rough on our family photos. We hadn’t all seen each other together in more than 25 years, so we agreed to bring the pictures taken of us when we were kids. Being a wonderful hostess, my sister plied us with potato chips and lots of other greasy snack foods. But can you imagine what happened to all those old photos being touched and handled by greasy fingers?
I was more fortunate than my cousins, because I’d protected my photographs before the reunion by encapsulating them — basically, sealing them in archival plastic. Encapsulation protects your photos from the elements, including rough handling. The oils and acids in our fingers can unwittingly cause physical deterioration when we touch old photos. Even just placing one photograph on top of another can cause surface scratching and abrasions. The easiest way to prevent this from happening is to encapsulate your photographs. The process works just as well to protect documents such as birth, death and marriage certificates, letters and so forth.
You have several choices for encapsulation. For example, you can purchase plastic sleeves with pockets and slide your photographs into the pockets. There are also other forms of protection you can make or purchase from any archival supply catalog, like clear, self-sealing envelopes. These forms of encapsulation do offer some protection, but they’re not ideal. The best encapsulation method is also one of the easiest: binding two pieces of Mylar together with double-sided archival tape, leaving a tiny “breathing space.” Another advantage to this approach is that it allows you to view both sides.
Although encapsulation looks like lamination, it’s a completely different process. You should never laminate a photograph or document under any circumstances. Lamination actually binds the document to the plastic — so it’s a destructive process, while encapsulation is a preservation process.
Encapsulation materials
Here’s a list of the materials you’ll need to encapsulate properly and with minimal trouble. Most can be purchased through any of the archival supply catalogs listed later in this article.
•Polyester film (Mylar)
•An X-Acto type knife. Olfa is another brand name that has snap-off blades.
•Lint-free cloth, to clean the Mylar and create static electricity
•Quarter-inch double-stick tape — I use 3M Scotch Brand tape No. 415
•Ruler
•Grid paper to help with measurements and to help cut straight lines
•A weight to hold down the work while you’re cutting, sizing and measuring
•Squeegee to remove the air between the sheets of plastic
•Brayer to ensure good adhesion and remove excess air
•Corner cutter (or you can use a sharp, new nail clipper)
•Cotton gloves
One last note before you begin: The acid content in most papers or documents will hasten the deterioration and also turn the paper yellow. This can be eliminated by a deacidification process, which neutralizes the acids in the papers. (It’s not necessary for photographs.) If you’re encapsulating documents and want to deacidify them, you can place a piece of acid-free buffered paper (available through most archival supply catalogs) under the document first. The only problem with the addition of the buffered paper is that it will keep you from being able to view both sides of a double-sided document.
When you’re ready to start encapsulating, the easiest way to organize your work area is to use a table that you can access from all four sides. If you have to keep turning your work, you may end up having to realign the Mylar pieces several times.
Here’s the process, step by step

1. Cut two polyester (Mylar) sheets of film at least 2 inches larger than the document or photograph in each direction — top, bottom, left and right. Do this on the grid paper to help you center the object and keep the borders even. (See picture A.)
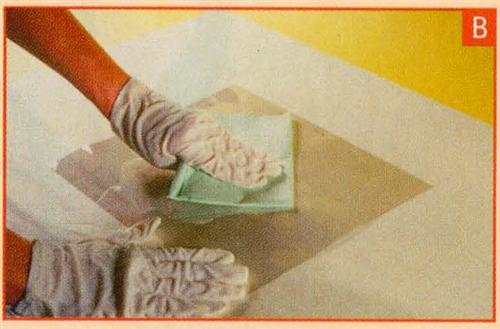
2. Place the first sheet of Mylar on a clean, flat work surface and wipe with a lint-free cloth to remove any dust and to add a static charge. (See picture B.)
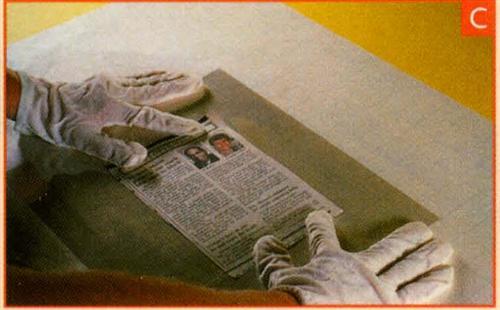
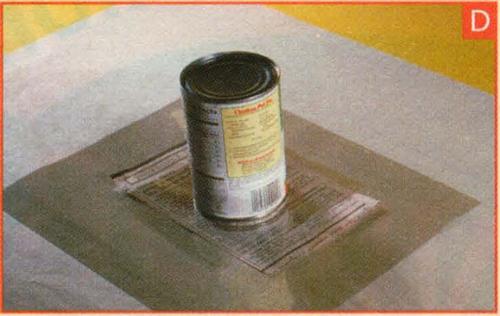
3. Center the document or photograph and place a weight on it to prevent the Mylar from shifting during the encapsulation process. (See pictures C and D.)
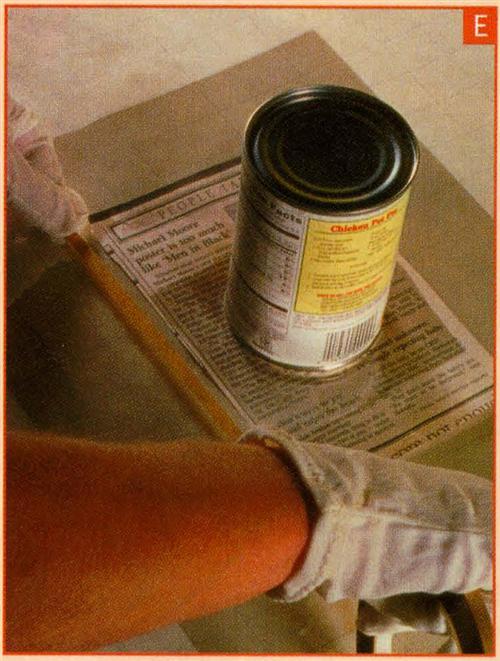
4. Apply the double-sided tape on the Mylar film just below the document. Leave a ?- to ¼-inch space between the edge of the document and the edge of the tape. Do not remove the brown protective paper on the tape yet. (See picture E.)
5. Wipe the second sheet of film with the lint-free cloth to remove any dust and to create a static charge again.
6. Remove the weight from the document and center the new sheet over the document, cleaned side down.
7. Place the weight back on the center of the top Mylar sheet.
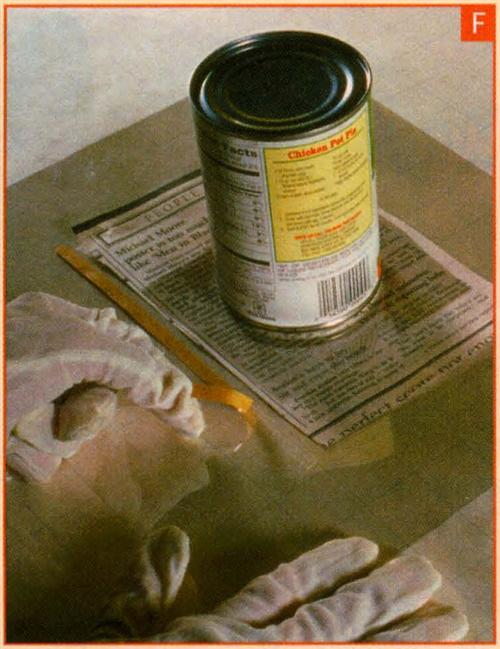
8. Lift one corner of the top sheet and carefully remove the brown protective paper along one edge of the document. Lower the corner and rub the film over the tape to adhere it. Then rub the two pieces of Mylar with the brayer where you just taped, to ensure a good seal. (See picture F.)
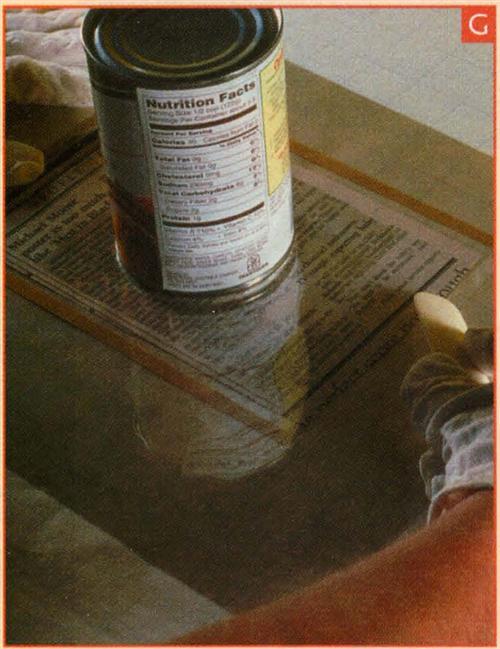
9. Repeat for the other three edges. (See picture G.)
10. Don’t overlap the tape from one side to the next. Place the tape to almost touch the adjoining side, but be sure not to overlap the tape. When you get to the final corner, leave about ?- to ¼-inch of space between the corners to provide a very slight “breathing” space.
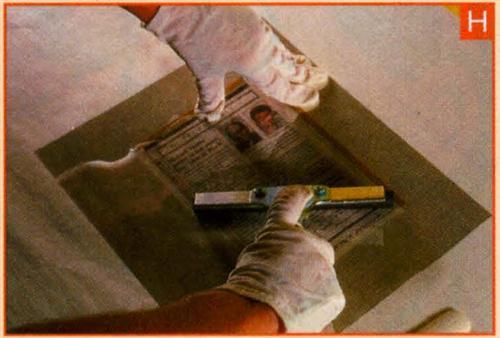
11. To remove trapped air from between the sheets of Mylar, slide the squeegee from the center of the film out to the edges. (See picture H.)
12. Roll the brayer over the tape to bond it firmly to the Mylar.
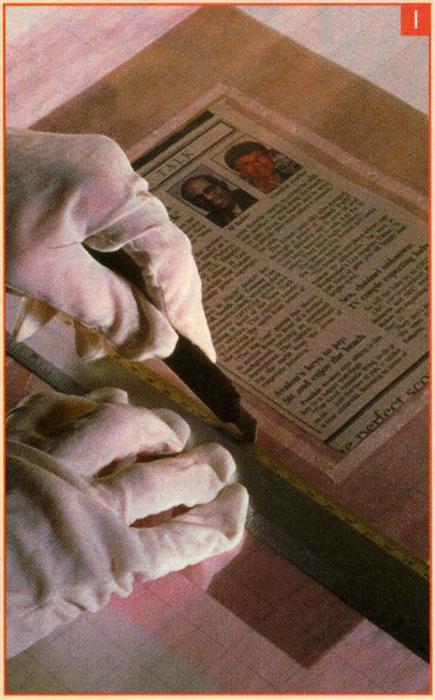
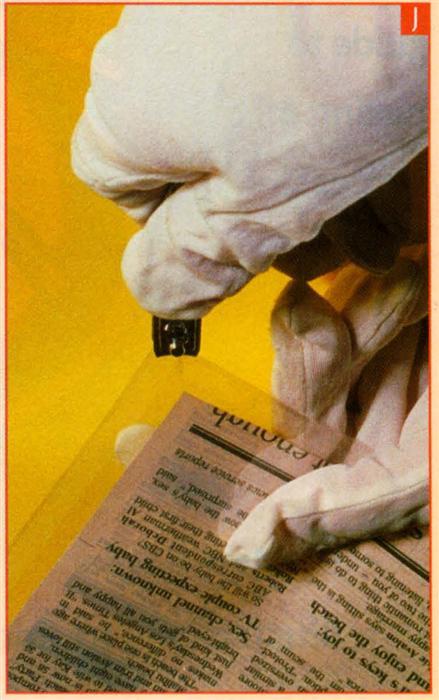
13. Carefully trim the package, leaving a ?- to ¼-inch margin of Mylar outside the tape and all around the document. Rounding the corners will help prevent scratching or cutting other materials during handling. (See pictures I and J.)
You’ll need to practice this procedure a few times to make sure you’re applying the tape correctly, of course. But once you’ve mastered this technique, you’ll have no problem encapsulating any document or photograph — and protecting your precious keepsakes and pictures from cousins who’ve grabbed too many greasy potato chips.
Archival Suppliers
•Gaylord Brothers
Box 4901 Syracuse, NY 13221 (800) 448-6160 <www.gaylord.com>
•Light Impressions Corp.
Box 22708 Rochester, NY 14692 (800)828-6216 <www.lightimpressionsdirect.com>
•University Products
517 Main St. Box 101 Holyoke, MA 01041 (800) 628-1912 <www.universityproducts.com>
ADVERTISEMENT
