Sign up for the Family Tree Newsletter Plus, you’ll receive our 10 Essential Genealogy Research Forms PDF as a special thank you!
Get Your Free Genealogy Forms
"*" indicates required fields
So you’ve busted down your genealogical brick walls and you’re ready to share your family history in a book, CD, Web page or scrapbook. Or maybe you’ve gathered dozens of documents, but you have a blank when trying to picture your ancestor’s world.
You probably have some photos of Great-grandma Mabel and other relatives you’ll incorporate into your finished family history product. But do you have a map showing their town when they lived there? Photographs of their neighborhood? Advertisements from the family business? Visuals like these give you a bigger, better-focused picture of your ancestor – where they lived, worked and went to school; what they wore, ate, read and used every day. That’s what makes genealogy exciting. By using secrets of professional picture – strategies we explain here – you too can find illustrations that illuminate your family history.
1. List most-wanted images
Your first step is to inventory images you already have for each family and list what you’re missing. Expand list search beyond photos, especially if you don’t have many pictures or you’re researching before the 1839 introduction of photography to the United States. Consider adding the following items to your list, and look for more ideas in my book Scrapbooking Your Family History (Family Tree Books):
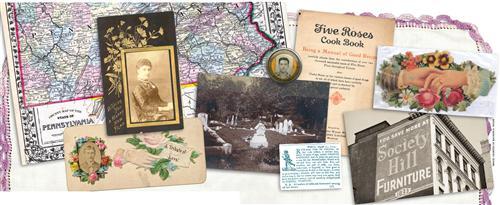
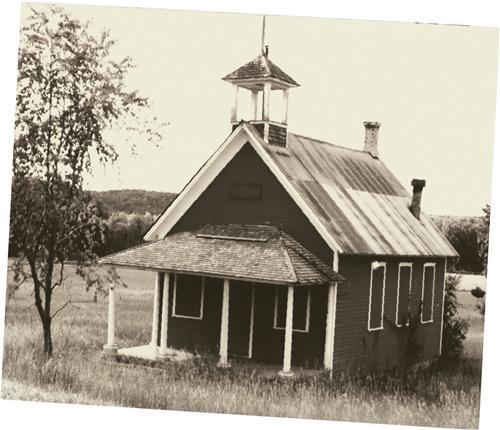
• More photos: Yes, you want portraits of ancestors, but mix in images of family events, relatives’ homes and towns, and ancestral tombstones. Use the techniques for filling gaps in your family photo collection in the Family Tree Yearbook 2003, a special issue of Family Tree Magazine.
• Documents: Census returns, land records, diaries and letters let your relatives feel the thrill of discovering their ancestors’ name of print.
• Ephemera: The valentine Great-grandma sent Great-grandpa may not tell you when they married, but it’ll give insight into their relationship and enhance their biographical details. Other examples of ephemera include graduation programs, award certificates, postcards, newspaper clippings, receipts, business stationery and advertisements. The Encyclopedia of Ephemera by Maurice Rickards (Ephemera Society of America) offers more suggestions.
• Artifacts: Suppose an 18th-century ancestor made furniture. If you have a piece he built, take a snapshot or have a professional photographer shoot it (find one in the phone book or get a referral from the Professional Photographers <www.ppa.com>). Also seek pictures of artifacts such as kitchen gadgets Grandma might’ve used or a Model T like Uncle Fred’s.
• Silhouettes, engravings and lithographs: You may not own a photo of your great-grandfather, but it’s possible he sat for a painting, pen-and-ink or one of those black profiles known as silhouettes. We the tips in the February 2003 Family Tree Magazine for help finding images of ancestors who lived before the age of photography.
• Maps: Show where ancestors lived using Sanborn fire-insurance maps (available from <www.sanborn.com/products/fire_insurance_maps.htm> and many major libraries) of their neighborhoods, period maps of their towns and plat maps of their properties. You also can plot ancestral homes and migrations on a Google map <maps.google.com>, or do the same thing digitally with a utility such as Map My Family History <familyatlas.com> or Map My Family History <www.progenygenealogy.com>.
2. Start searching.
Now it’s time to tackle your list. Every genealogist knows you start family research by examining home sources – documents and heirlooms stored in your closets, attic and basement. Begin your hunt for family history images there, too, and ask relatives to check their homes. You may plenty to work with this way, but check the following sources to pad your collection. First, a note of advice: As you research, you’ll come across illustrations, documents and ephemera related to your family. Scan or photocopy these items now and keep in a file with notes on where you found them. Don’t wait, or you’ll forget where you saw them.
• Repositories: Pay a visit to historical societies, museums, public libraries and other archives where your ancestors lived. These institutions often keep photographs, ephemera and newspapers – the collections may not be indexed, so be prepared to spend some time there.
• Estate sales and antiques shops: Photos and other images discarded by distant family often end up in estate sales and antiques shops. Scout for sales in your ancestral hometown’s newspaper or use Antique-Central <www.antique-central.com> to locate dealers.
• Books: Local histories and books about your ancestors’ hometown, pastimes and historic they witnessed all provide image leads. You can search 20,000-plus digitized family and local histories free through libraries that subscribe to HeritageQuest Online. Also try Google Book Search <books.google.com>, which lets you select Full-View (limits your search to books you can download) or All Books (searches all titles). For books that aren’t available digitally, purchase copies or them from the library. Check for a copyright statement showing the repository that owns the image – you can look there for additional pictures. A bonus: You’ll get social history information that juices up your family history prose.
• Digital collections: Be sure to try the Library of Congress’ American Memory <memory.loc.gov/ammem> collection of millions of photographs, maps and scanned documents.
• Photo-reunion Web sites: Users upload orphan photos – those lost or abandoned by their former owners – to sites such as Dead Fred <www.deadfred.com> and Ancient Faces <www.ancientfaces.com> in hopes of finding relatives to claim them. Find more such sites on Cyndi’s List <cyndislist.com/photos.htm#lost>; most let you search or browse photos by a name or place.
• Auction Web sites: Photos, post-cards, books and old brochures are just some of the items up for bid on <eBay.com>. Search on your ancestral surnames and places, then save time by clicking Save to Favorite Searches and opt for automatic notification when a matching item is for sale.
Bear in mind, it’s risky to buy an unidentified photograph that merely resembles a relative – you’ll need to connect it to your clan through genealogical research. An image that lacks any association with your town) isn’t likely to show a family member.
• Image search engines: Using Google and Alta Vista <altavista.com> to find facts is second nature to genealogists, but these and other search engines also offer image look-ups. Look for an advanced search, which may let you pick the format (JPG, GIF, BMP) and type (color, grayscale, line art), and filter X-rated images. Then just type your search terms. Results show thumbnails of matching pictures from various Web sites; click a thumbnail to see the page likely containing that image.
• Stock sites: If you still can’t find just the right picture – and you’re willing to spend $75 or more for one – try online stock database sites, which let you search for and download royalty-free photos and illustrations. Some agencies let you download a low-quality trial version before agreeing to a purchase. Fees vary depending on how you plan to use the image – in a book to sell, give a way or keep for yourself. You maybe able to call and request a search, but the company will charge you for the staff’s research time.
3. Know your rights
To stay legal, take care of copyright issues before you publish. In most cases, using an image in a scrapbook to keep and show family constitutes “fair use,” and you don’t have to get permission. Nor do you need to worry about copyright for public records, most family photos or items in the public domains. (Public domain images include those created before 1923 or produced by a government entity. See the December 2004 Family Tree Magazine or <www.unc.edu/~unclng/public-d.htm> for help determining whether an image is in the public domain) A repository that owns an image created before 1923 still can charge a licensing fee. And just because a photo is on a Web site doesn’t mean it’s OK for you to reuse it.
When permission is required, you’ll need to contact the creator or owner of the picture, and possibly pay a reprint fee. Provide information such as how many copies of your book you’ll print and whether you plan to sell them. For more-recent photos with close-ups of people and building addresses, ask the owner if he or she had model or property releases, which assures you won’t have to deal with legal matters in the future. Make sure you buy the rights you need – generally, one-time English language rights, meaning you can use the picture for one printing. If you reprint your book, you’ll probably have to pay a percentage of the original fee.
The owner likely will ask you to cite the image source, which you can do in a caption or in the back of your book. (This is a good idea even in a scrapbook for your own use.)
4. Place the pictures.
I know of a historical society that published a book of old photos depicting monuments around town. But instead of choosing good-quality pictures, the society made decisions based solely on subject. The result was unprofessional-looking, with lots of fuzzy images. Likewise, if your pictures lack clarity or don’t relate to your family history text, you’ll leave your readers at worst confused, and at best with a negative view of your research.
Any image you’ll print should be high-resolution. If you’re working with a publisher, ask for image specifications. “For print publication purposes, individuals should scan images at greater than 300 dpi [dots per inch] and at full size, then save those files in a TIFF format”, says Ann Hughes, president of self-publisher <www.gatewaypress.com>. (You’ll find scanning tips in Rhonda McClure’s Digitizing Your Family History, Family Tree Books.) When downloading photos from a library or stock Web site, look a high-resolution option. But if you plan to publish your family history online, make sure images are no more than 72 dpi or the page may take too long to load.
Ideally, use several illustrations per section of your book or Web site. Lots of images in one part and nothing elsewhere feels unbalanced. You may not a choice-maybe you couldn’t find pictures or the text doesn’t lend itself to illustration – so do your best. Remember for books, each illustration increases production costs.
To use the images you’ve so use a diligently collected to their utmost advantage, ask yourself these questions about each one:
• Is the photograph in focus? Never use a badly out-of-focus shot, even if it’s the only known picture of Aunt Sue — instead, include a photo of her house or her tombstone, or a page from her diary. If you must use her portrait, ask an artist to draw her using the fuzzy image as inspiration.
• Have you edited the image? Photo-editing software can improve your pictures by eliminating red eye, fixing tears and sharpening slightly blurry pictures. Follow the tips in the April 2004 Family Tree Magazine.
• Have you altered the format? Vary the size and shape of the pictures for eye-catching layouts. All horizontals or all verticals can be repetitive.
• Does your choice complement the text? Think about how the images relate to your words. An 1800s map doesn’t work in a section about 1710, and a photo of Aunt Penelope with a description of her parents is confusing.
• Is the caption helpful? Although you know who’s in a picture, it could be a mystery to everyone else. Add short captions with names and dates.
Once you have a draft of your text and images in their final placement, ask for others’ opinions. If you’ve done a good job supporting your family story with images, the final read will draw a big – even giant – picture of your ancestors’ world.
From the May 2007 issue of Family Tree Magazine.
ADVERTISEMENT