Sign up for the Family Tree Newsletter Plus, you’ll receive our 10 Essential Genealogy Research Forms PDF as a special thank you!
Get Your Free Genealogy Forms
"*" indicates required fields
Doing genealogy research sometimes feels more like pushing paper than pursuing ancestors. Binders, folders, journals, books, printouts and notes can create a roadblock more daunting than your most challenging brick wall.
Still, many genealogists cringe at the word paperless. They love the sound of freshly printed documents slipping out of the printer tray. They like marking up hard copies with highlighters and cross-referencing current research with old notes. Paper lasts, they say: Printed notes and vital records don’t disappear with the crash of a hard drive. You don’t need a special device to read a 100-year-old letter on paper—unlike a digital document, which requires a computer and compatible software.
That’s true, of course. But managing a mountain of genealogy-related paper costs you money, space and time. Printers, ink, paper and filing supplies get expensive. Space to keep it all is at a premium in many homes. Paper overflowing on your desk, in drawers and on shelves dilutes your focus, and organizing it takes away from valuable genealogy search time.
So what if you claim territory in the middle ground, where you thoughtfully select which family history documents you really need, dispose of the rest and develop habits that keep more paper from entering your home? Not paperless, but less paper. We’ll show you 12 ways to navigate a path to less paper and more genealogy productivity.
1. Have a goal in mind
The first step in planning a journey is knowing where you’re going—having a target destination that serves as your goal. The same is true when it comes to organization, so set a goal to reduce your paper load. Focusing on your destination will make it easier to eliminate the unnecessary paper in your genealogy life. As a result, your genealogy research will be more enjoyable and the paper documents that are most important to manage and preserve will receive the attention they deserve.
2. Sort out original family history documents
Family historians work with two different kinds of paper: original documents and photos on one hand, and working copies on the other. Each type calls for different handling and digitizing methods, so you’ll want to separate them as you go through your piles of paper.
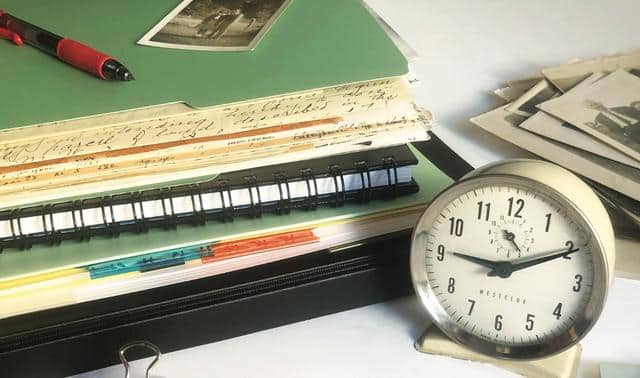
Heirloom originals include old documents (such as baptismal, birth and marriage certificates), old books (family Bibles and journals), original photographs, letters, newspaper clippings, funeral cards and other paper ephemera that holds genealogical information. You also might include photocopies of records made while doing on-site research, letterhead from Grandpa’s business and other one-of-a-kind paper documents. If it would be a financial or logistical burden to replace the item, consider it an original. These are the paper files you want to organize and preserve as your research archive.
For the purposes of reducing paper, most record images that you’ve viewed on websites such as Ancestry.com, FamilySearch and MyHeritage, then downloaded to your computer and printed out, aren’t original documents. Your relatives’ census, land, probate, estate and other public records may have been difficult to locate online, but original copies are still available on those same websites. File the digital copy, enter extracted information in your tree, and keep a record of the citation (which you can use if you ever need to find the document online again). Then recycle the printouts of the record.
3. Gather your working genealogy documents
Your everyday handwritten and computerized research notes belong with your working documents. It’s not necessary to print out a new family group sheet every time you add information to your genealogy software. If you regularly back up your computer (see more on this in step 10), that information is safe in its “born digital” format, so don’t waste the paper.
Other working documents include magazines and newsletters, receipts, research logs and plans, printed results from library catalog searches, pedigree charts and other reports, email messages, downloaded books and documents from genealogy websites, and anything created digitally. Organize these on your hard drive and print them only as needed (such as charts to take to a family reunion or catalog results to take to the library). You’ll digitize hard-copy heirloom and working documents in the next couple of steps.
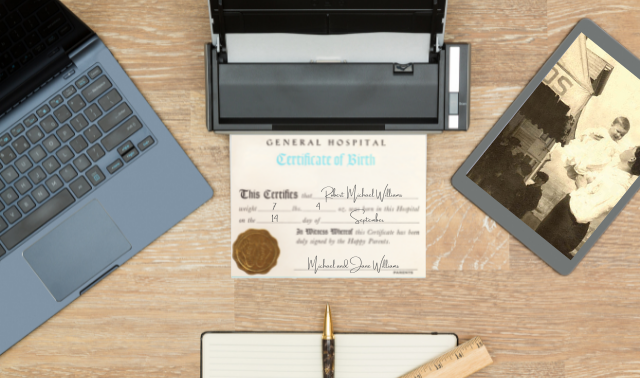
4. Scan heirloom documents
Heirloom originals and working documents call for different methods of digitization. You’d probably hand-wash a pricey new car with special towels and cleaners instead of a hose-end scrub brush, at least for a while. Your heirloom documents need that “white glove” treatment, too. In fact, it’s a good idea to wear white cotton gloves, or keep your hands scrupulously clean, when handling old photos and negatives.
Never digitize your heirloom originals with a standard sheet-fed office scanner. Old, brittle or damaged paper can easily become jammed or even shredded in the roller mechanism of such equipment. Play it safe by digitizing your priceless documents on a flatbed scanner, saving files in a TIFF or JPG format. For books, scan one page at a time by placing half the book on the scanner glass and letting the other side hang off the edge.
Another “scanning” option, especially for books and large documents, is to photograph them with your digital camera using a tripod for sharp, shake-free images. I like the Joby Gorillapod, which is flexible so you can stand it up or wrap it around a railing or chair back. Place the document flat on a table or the floor and position the camera directly over it. Using a remote shutter release will prevent the “shutter shake” that happens as you press the shutter.
If you travel frequently, it’s smart to digitize on the go rather than accumulating bits of paper to scan and organize when you return to your home office. If you use your camera to digitize while on a research trip, immediately upload the images to cloud storage (see step 11) so you have a backup.
5. Winnow and digitize working documents
Chances are, working documents make up the bulk of your paper mountain. These papers require efficient digitizing to help you conquer that mountain in good time. But first, if you no longer need the paper, don’t scan it. Notes about a research problem you’ve since resolved? Toss it. Travel itinerary for last year’s genealogy conference? Get rid of it. Brochures you picked up that you’ll never use? Put them in the recycling.

You probably already own some kind of scanner or digitizing device. Many home offices include an all-in-one printer-copier-scanner that can handle most office chores. These efficient models save space in small offices, and offer basic printing, scanning and copying functions best for digitizing letter- or legal-size papers or photos. They often include a sheet-fed mechanism that can speed up larger scanning jobs, but scan time per page is usually slower than with a dedicated sheet-fed scanner.
You also might find that the software included with an all-in-one scanner offers fewer options (such as for resolution or document type) than a dedicated flatbed or sheet-fed scanner. If you regularly scan a lot of paper or you need to scan film or slides, consider getting a specialized scanner. In that case, you’ll save considerable time by using a high-speed duplex sheet-fed scanner such as the Fujitsu ScanSnap or Neat Document Scanner. These devices offer several advantages:
- Duplex scanning digitizes both sides of the paper at the same time, effectively cutting your scan time in half.
- Batch processing allows you to set a file name for an entire batch of items further identified by a unique number
- Automatic sheet feed mechanism dispatches pages one at a time through the scanner
- Optical Character Recognition (OCR) software may offer the ability to turn printed text into searchable text
- Multiple file format options allow you to scan directly to PDF, JPG, TIFF or other format
Your smartphone is another option for mobile warriors, or anyone away from home. Adding an inexpensive app such as CamScanner, Genius Scan or Turbo Scan turns your cell phone into a scanner. Scanning apps offer several advantages over the standard camera app included with your smartphone, especially the ability to crop as you scan. Most apps allow you to rename the file and add numbering, dates or other information. Scan your travel receipts and toss the originals. These digital versions are now accepted by virtually all accountants for tax reporting purposes.
6. Adjust your organization workflow
Begin your move toward less paper clutter by creating only digital documents, keeping them in digital format until you need a printed copy. This may mean breaking old habits: If you usually find a record online, download it, and then automatically go for the Print button, you’ll have to stop yourself. Instead, download the record, name it (see step 7) and file it on your hard drive (step 8).
When you find text you want to save on a website, you have a few options besides printing it out. You could:
- use a note-taking program such as Evernote to “clip” the portion of the website you want to save and store the clipping with a link to the source site in an Evernote note. You’ll undoubtedly find Evernote useful in many ways, including keeping research notes you can access using your computer, tablet or mobile phone.
- take a screenshot or copy the part of the website you want and paste it into a Word document to save.
- bookmark the site to revisit later, although this has some drawbacks—the site could go offline or change URLs, or you might forget why you bookmarked the site
Don’t print email messages. Instead, extract any information you want to add as notes in your genealogy software or digitized research log, then file the message in a Correspondence folder in your in-box. If you haven’t already done so, make your email account easy to access from your smartphone or tablet by downloading the service’s mobile app.
Eliminate more clutter by converting paper publications you receive to digital editions. Get digitized books instead of the print version, request your conference syllabus as a PDF or on disc, opt for the digital version of your society’s newsletter, and order digital subscriptions to your favorite magazines. Save these documents in your digital filing system for quick access.
7. Consistently name digital files
Use a consistent file-naming scheme for genealogy records to help you easily locate the digital version on your computer, and know what’s in a file before you open it. Get in the habit of renaming the file as soon as you download it. I use a four-part scheme that includes last name, first name, date, location, and event in that order, for example, smith-john_1930_texas-dallas_census.
Some researchers prefer to begin the filename with a date; others prefer the surname. Think about the alphabetical sorting ability of your computer when deciding how to name your files. Files beginning with a year will sort chronologically, as shown below; files beginning with a surname will group by name. Whatever scheme you choose, make a cheat sheet to hang next to your computer as a reminder.
8. Use a simple folder structure
As you collect more digital files, you’ll need a way to organize them so you can find them again. Many genealogists use a simple folder arrangement with all genealogy-related files inside one big folder labeled Genealogy. This folder could contain subfolders for genealogical societies, genetic genealogy, places you’re searching, and surnames you’re researching. Inside the Surnames folder, you could set up a folder for each surname you’re tracing. Those folders would hold digitized records for people with that surname. You could go further to create folders for each nuclear family, for example, SMITH Alex and Rebecca. In this case, place Rebecca’s records in her parents’ folder until she marries, then put them in her folder with her husband.
In the Places folder, you could keep maps of towns where your ancestors lived, background information, and digitized county histories that apply to multiple families. Folders for genealogy societies could hold calendars, digitized newsletters and notes from meetings.
Being consistent with your folder structure will help you easily find the files you need and back up your work.
9. Take advantage of genealogy software
Many genealogists use their genealogy database software as tool to manage digital files. Genealogy programs are available as standalone desktop software (such as Family Tree Maker, RootsMagic or Family Tree Builder) or cloud-based family tree applications (such as MyHeritage or Ancestry). Many family tree sites combine these options with online trees that sync with desktop software, so you have copies in both places and can edit either one.
Whether desktop or online, genealogy programs let you create a family tree by adding people manually or uploading a GEDCOM file (the basic file format for genealogy software). Many programs also let you attach photos and digitized records, along with source information, to ancestor profiles, helping you connect your sources to family members.
Even when you attach record images to individuals in your software or online tree, keep a master copy of these research images filed on your hard drive, where you can regularly back them up. Don’t assume your software or a genealogy website will always be there. Like any other business, genealogy companies can cease operation or change policies and accessibility at any time. Family Tree Maker users panicked at the end of 2015, when Ancestry announced it would stop producing the software and end syncing with online trees. Although users got a reprieve when Software MacKiev acquired the program and promised to continue it, the situation serves as a reminder to keep a personal copy of your own content.
10. Back up your digitized files
If you’ve recently started trying to go paperless, you may have a nagging fear that a flood or electrical surge will fry your hard drive and pouf!—your digitized files will disappear. This could happen, which is why you should remember LOCKSS: Lots of Copies Keeps Stuff Safe. A single copy of your files isn’t a backup, especially if it’s on the same hard drive as the original data. A true backup includes three or more copies, each located on a different kind of storage media, such as a computer hard drive, external hard drive, DVD (provided you have a DVD drive), or online in cloud storage (see step 11).
If you’ve already organized your computer files with genealogy information in one big Genealogy folder, it’s a simple matter to back up that folder to multiple locations for safe-keeping or mobile access. Do this at least monthly or after a research session. You’ll also want a full computer backup to protect photos, videos and other information stored on your hard drive.
11. Brave the cloud
Cloud storage can seem like stormy weather: uncertain and a bit scary. We all use “the cloud” every time we access the internet; cloud storage means merely that you’re storing data on remote servers instead of on your home computer. Each time you access your bank or utility statements online, you’re using the cloud storage offered by your bank or phone company.
Cloud storage services such as Backblaze and Google Drive let you store almost any kind of digital file on a remote server, where it’s safe from disasters that could befall your computer. You’ll also be able to access stored documents from other devices, decreasing the need to carry around flash drives and printed copies.
Our cloud genealogy guide and podcast episode 91 offer tips for using the cloud. Ideally, you want a cloud storage service that automatically backs up your computer whenever you’re online, so you won’t even have to think about it.
12. Pack your toolbox
Reducing your genealogy paper clutter isn’t just getting rid of unnecessary papers. It’s also avoiding the addition of more paper to your home. Stocking your computer and mobile devices with the following types of apps and tools will help you digitize your papers and keep you from having to hit the Print button. Look for these tools in your device’s app store or on the websites listed:
- the app for your genealogy software so you can access your tree while on research trips
- an app, such as Camscanner, that turns smartphone photos into PDFs
- a note-taking app such as Evernote or Zotero, where you can keep a research log (tag the notes “To Do”), source citations, a list of online record collections to search, etc.
- Google Drive or Microsoft OneDrive to keep data in spreadsheets (another way to maintain a research log or source citations database) and store documents you want to access from anywhere
- Scrivener, software (with a companion mobile app for iOS coming soon) that helps you write your family history while viewing digitized resources side-by-side
- genealogy conference apps, when available, to get course schedules and exhibit hall information on your phone (search for the name of the conference in your device’s app store)
- a calendar app, such as Google’s (search your device’s app store), where you can store all the details about events on your schedule
- a travel app such as TripIt, which organizes your itineraries for easy access on your phone
- Google Maps or another app so you won’t have to print driving directions
- an app to organize all your e-books, such as Calibre
Navigating through your paper clutter doesn’t have to be an impossible digital dream. Set aside some time each week to devote to your paperless efforts, and commit to reducing the amount of paper you bring into your home. With planning and the proper tools, you can reduce your paper load to gain more time and better focus for your genealogy research.
Paper Shortcuts
These simple strategies will help you keep your finger off the Print button and cut your genealogy paper clutter:
- Save to PDF: Resist the temptation to print out newly updated files. Instead, use the Save to PDF or Print to PDF option, available in Microsoft Word and many other software programs. As a bonus, you can find full-text searchable PDF documents faster on your computer than by digging through file folders in a drawer.
- Subscribe to digital: As your magazine subscriptions and genealogical society memberships come up for renewal, select the option to receive publications digitally if available. You might save money, you’ll have less paper to manage and you can access your subscriptions on your tablet.
- Convert to digital: Are your shelves and drawers weighed down with journals, conference syllabi and notebooks? One you’ve culled your collection, remove the bindings from the “keepers” and run the pages through a sheet-fed scanner to create your own PDF reference library. Respect authors’ copyright by recycling the originals and limiting the digital versions to your own use.
Tip: If you have research papers relevant to someone else’s family—but not yours—consider donating them to your local genealogical or historical society library. Call first to ask about donation policies, and look for a facility related to your family history.
A version of this article appeared in the July/August 2016 issue of Family Tree Magazine.
Related Reads

ADVERTISEMENT