Sign up for the Family Tree Newsletter Plus, you’ll receive our 10 Essential Genealogy Research Forms PDF as a special thank you!
Get Your Free Genealogy Forms
"*" indicates required fields
If you’ve ever wanted to put your family on the map, Place My Past is for you. This Australia-based site combines family trees with maps and geocoding technology, enabling you to place even the most obscure family history events in geographic context. Here’s how to get up and running on the site.
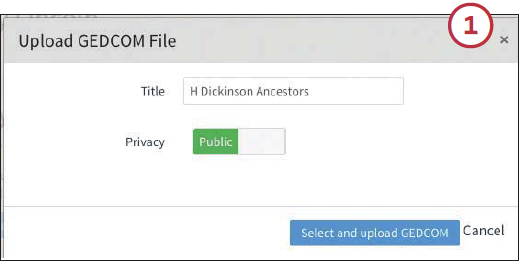
1. To get started, create a free basic account. (To upload historic maps, view family migrations and use other advanced features, you’ll need to subscribe at $48 a year.) The site walks you through importing your family tree in GEDCOM format, or you can click on About Me and My Trees to upload new trees. A simple “switch” lets you control whether a tree is public or private. Once you’ve uploaded a tree, Place My Past will process it and plot your ancestors’ life events on a contemporary map of the world.
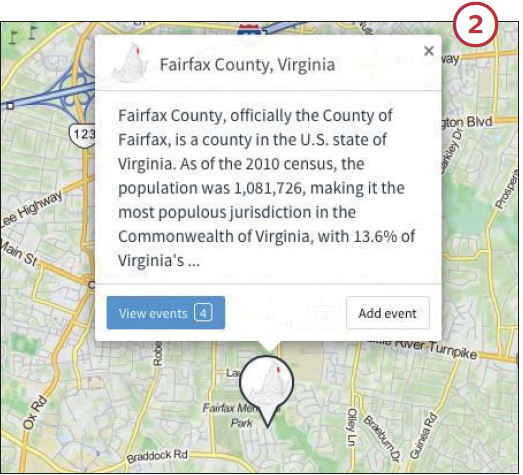
If you spot an error in mapping your ancestral events, you can use the Events Toolbox tab to fix where the site has mapped your uploaded place; this is also where you can deal with “unconfirmed events” that the site couldn’t place. Click “unconfirmed only” to review these events. For each, you can opt to view on the map, click a check mark to confi rm, edit with a pencil icon or delete with a trash icon.
When you confirm a matched location for an event, a dialog pops up asking if you want to also confi rm this location for all other events it’s linked to. If you click on the edit link instead, you can search for the correct location, selecting from a list of suggestions or dragging a marker to the right spot.
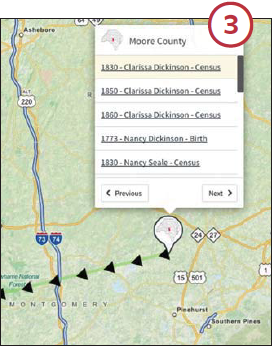
3. The My Family tab displays all events for your ancestors (though you can also choose which individuals to show or hide) on a map. Previous and Next links let you follow your ancestor’s life journey across the map, and a line of black triangles shows the path of their life events.
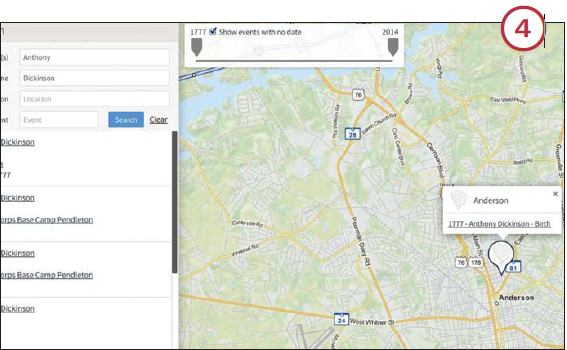
4. The Search tab lets you find any combination of people, places and events. Note the slider that appears on the resulting map—also a feature on the Map tab—that lets you narrow or expand the range of events shown.
5. Viewing your family on a modern map is useful, but what really brings your genealogical geography to life is the ability to put ancestors in historical context on old maps. Unless your family happened to live in one of the handful of places already represented by old maps on Place My Past, you’ll have to jump through a few hoops to add this dimension to your experience.
First, you’ll have to find a digitized historic map showing your ancestors’ location back when. Sources you might try include the National Archives and state archives’ sites, Wikipedia, and collections such as the David Rumsey maps collection , Perry-Castañeda Library or the Library of Congress’ American Memory . Once you have a map on your computer, go back to Place My Past and click About Me, then My Maps and the green Upload a New Map button. (You can add “datasets,” such as locations of cemeteries in an area, using the similar My Datasets link.)
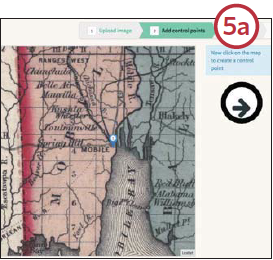
When you’ve uploaded a new map, the site will walk you through the process of linking its locations to those on a modern map, shown on the right side of the screen (a). It’s a good idea to use the search box on the modern map to navigate to the place you’re trying to match before clicking on the uploaded historic map. Once you have a place located on both the historic and modern maps, click on the historic map to drop a little blue “control point.” Then click to drop a matching control point on today’s map.
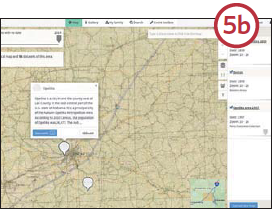
After you’ve matched three points, the site will ask you to name the map, attribute it to a source and add a date or date range. It takes awhile for Place My Past to process maps you upload (check the progress on your My Maps page), but once it’s finished you can view your maps as overlays on the modern map (b). Use the panel revealed by clicking the Layers icon (it looks like a little stack of paper) to turn these overlays on and off and control the transparency of each.
With a little trial and error, you can view a map of your ancestral hometown as it was in Great-grandpa’s day—while still seeing the modern interstate that now runs through. Place My Past encourages users to share family tree data as well as maps, so as the site becomes more popular, your uploads will help others put their families on the map. Plus, it will be ever easier to trace your ancestors, not only in time but also across the globe.
ADVERTISEMENT
