Sign up for the Family Tree Newsletter Plus, you’ll receive our 10 Essential Genealogy Research Forms PDF as a special thank you!
Get Your Free Genealogy Forms
"*" indicates required fields
Today’s smartphone is the Swiss Army knife of personal devices. It’s a camera. A scanner. An audio- and video-recorder. A cloud filing system. A day planner. A note-taker. A Rolodex. A television. Oh yes, and it lets you talk to and text your friends and family.
Your smartphone also can put cutting-edge genealogy tools right at your fingertips. Whether you carry an iPhone or Android model, it can replace your to-go research binder, calendar, scanner, and nearly every other genealogy tool in your pockets or purse. Read on to discover 25 ways you can take full advantage of this tiny genealogy powerhouse. But pull out your smartphone first, because you may suddenly feel a burning desire to download the recommended apps, adjust your settings and try these tricks.
1. Know Your Camera
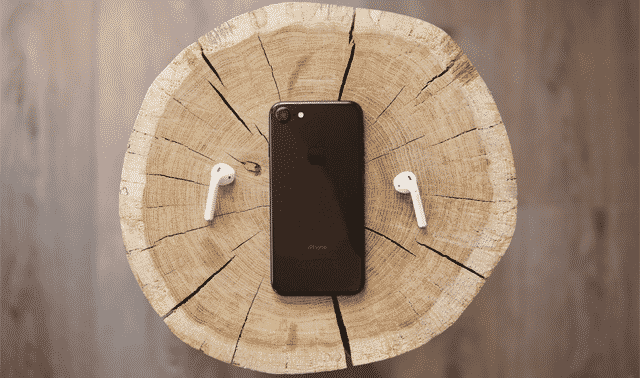
You probably know your smartphone has two cameras: The higher-megapixel (MP) lens is typically the rear-facing or primary camera, used to snap photos of family and friends. The lower-MP lens faces the front and is used for video calls, chats and selfies. You’ll get better results if you stick with the rear-facing camera for your photographs and digitizing projects.
2. Focus on Photo Essentials
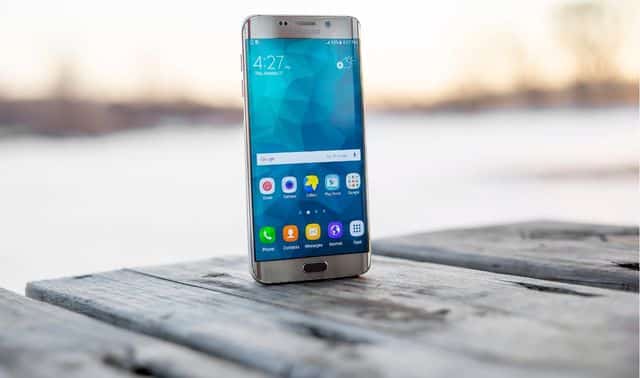
Great photos have three essentials: resolution, light and stability. The first of these is generally taken care of for you. Most smartphone cameras are equipped with at least a 4MP rear-facing lens. The iPhone 6s and the Samsung Galaxy S7 clock in at 12MP; and the LG G5, at 16MP. Smartphones with 3MP cameras can produce a 5×7-inch print at the recommended minimum of 300 dpi (dots per inch). If you want larger prints or you want to zoom way in on-screen without losing quality, shoot at a higher MP.
The other two essentials are up to you. Use natural light whenever possible. If you’re digitizing photos or keepsakes, position the item in front of a window where natural light can illuminate the subject. Move around to find the best angle so the light falls evenly across the object (rather than backlighting the object, which causes it to appear darker). Use a tripod and a remote shutter release to keep your smartphone on a firm footing and avoid camera shake.
3. Use a Scanning App
Sure, you can use a phone’s built-in camera to create digitized versions of family history documents. But scanning apps offer several advantages. CamScanner, Genius Scan and TurboScan will crop and straighten pages as you scan, and you can scan more than one page to a file (which is wonderful for multi-page documents like probate packets or letters). Scan apps are configured for capturing text on paper and photographs with enhanced lighting and cropping features. You can also name pages as you scan, add a date stamp, and in some apps, you can choose whether to create a PDF or JPEG file.
4. “Scan” Bound Books
Use your smartphone instead of a flatbed scanner for digitizing bound books, such as old photo albums or scrapbooks. That way, you don’t have to flip the books over and press them onto a scanning bed, which can damage the pages. Instead, open the book on a small pillow to support the book’s weight and prevent cracking the spine. Position your smartphone camera lens directly over the book, turn off the flash and snap the shot. To better steady your camera, you may want to experiment with a reverse-mount tripod. This type of tripod has a reversible center pole to position the camera directly over the subject.
5. Photograph Your Heirlooms
It’s tough to scan Great-grandma’s Royal Copenhagen teacup on a flatbed scanner, but it’s easier with a smartphone camera. Place your heirloom artifact on a sturdy shelf or table in an area with good natural lighting. Position the camera directly in front of the object at the same height and take several shots. For a sharper picture, move close enough to fill the frame with the object instead of using your camera’s digital zoom. (Activated when you use the “pinch and spread” gesture in your device’s camera app, digital zoom merely crops the image and then enlarges it, resulting in quality loss.)
6. Take Level, Composed Photos
Use the camera’s built-in grid to compose your photos and get a level horizon. This is especially helpful in cemeteries when rows of headstones can skew the perspective. Crouch or kneel if you must to be level with your subject.
Follow the photographer’s “rule of thirds:” divide your image into imaginary thirds, vertically and horizontally. Position the primary subject of the photo on those imaginary grid lines instead of at the dead center of the photo. The Camera Plus App for Android and iOS offers the traditional rule of thirds grid and a horizon level. The iPhone’s built-in camera app includes a grid that can be enabled in Settings > Photos & Camera > Camera > Grid.
7. Double-Check Image Quality
You’ve imaged a court document while you’re out researching. Before you return the document, open your image and use your fingers to pinch and zoom out. Can you read it clearly? Did you accidentally crop anything out? Is it blurry or dark?
You can get more detail out of your images by turning on magnification or zoom. On the iPhone, go to Settings >
General > Accessibility > Zoom. Tap with three fingers to magnify a window or full screen for greater readability. On Android, look for Settings > Systems > Accessibility > Magnification Gestures. Tap with two fingers to magnify.
8. Fix Bad Exposure
Sometimes the perfect shot isn’t so perfect. Improve contrast and lighting with images in your camera roll with the Relight app (iOS), or use the live HDR mode to preview adjustments before taking the photo. Select a mode, choose a button for enhanced effect, and adjust the slider to fine-tune the results. A split screen shows before and after images.
9. Make Handwriting and Headstones Readable
Enhance faded handwriting on old documents and make worn headstones easier to read with photo editing apps like Snapseed. Use the enhancement tools to experiment with contrast, clarity, highlights and shadows. When you’ve finished editing your image, choose Save to Camera Roll or Export to Photos to have a copy of the enhanced image with your other digital photos.
10. Automate Cloud Storage
One long day of scanning old documents and photos at a relative’s house can quickly consume your smartphone storage space. “Cloud storage” is simply a term for storing files on remote servers. Reputable companies offer convenient, encrypted storage space at affordable prices. Sign up for cloud storage at Dropbox, Google Drive or iCloud. Configure your scanning app and camera to upload photos to your cloud storage automatically. The small monthly storage fee is well worth the added backup security and access from other mobile devices and your home computer.
11. Back It Up
Your smartphone is a mini-computer that needs a routine backup program, just as your desktop does. This is in addition to tip No. 10, because you also want to save what’s on your phone at any given moment—contacts, text messages, app data, files in your device storage, etc.—in case you drop it into a puddle or lose it. You can manually backup your phone to your computer, but the simplest backup is automated so you don’t have to think about it. Apple iPhone users can subscribe to the Apple iCloud to keep photos and documents backed up and synchronized between iOS devices and computers. Android devices running Marshmallow can back up app data to the user’s Google account with Google’s Auto Backup for Apps feature. You also can use a backup app such as Titanium Backup (Android), available in the Google Play store.
12. Create a Photo Archive
Transferring photos from your smartphone to your computer at least once a month, or after a big research session, is an easy way to create an image archive that serves as your offsite backup copy. (Remember Backup 3-2-1: three copies on two different media, with one copy offsite.) File transfer via USB cable is faster than a wifi connection, and gives you an opportunity to direct your files to the new storage location. Once images have been downloaded from your device to your computer, back up the files to your external hard drive and/or cloud backup system such as Backblaze and Carbonite.
13. Identify Your Images
Captioning old photos and saving source citations is easy to do with your smartphone. Consider one or more of these options:
Use the Aviary app to add overlay text to a photo or document, change the font and color, and email directly from the app. Click the Gear icon in the upper left corner to access the Aviary settings menu and step-by-step tutorials for each feature.
Add text captions or source citations to images with Moldiv (iOS, Android), a full feature photo-editing and collage making app. Open the Collage option and select the two-photo template. In the top space, tap to select an image from your camera roll or take a new photo; tap Frame Adjust and adjust the image size to fit your photo. Tap the blank space and select Text to add your caption. Tools for justification, font, style, color and size let you customize the effect.
When viewing records on microfilm or paper, snap a picture of source citation information (the microfilm title image or the book title page) just before snapping a series of document images.
Photograph a closeup shot of your research log with identifying source details, to use as a reference when naming smartphone files. If you number research items in your log, you can use this same number as the custom filename in your scanning app. For example, source No. 23 on my research log corresponds with files named 23-1, 23-2, 23-3 and so on for the pages snapped with my scanning app.
14. Keep Passwords Straight
Are you continually confounded by all the passwords you need to remember? It’s crucial to use different passwords for websites where you’re registered, and to change these passwords regularly. Save your sanity and stay secure by using an encrypted password manager to access information on your phone, tablet, and computer. LastPass and 1Password support iOS, Android, and Windows devices to help you recall passwords and other important security information, such as software registration codes, online account numbers and personal identification.
15. Plan a Research Date
Busy schedules, daily routines and forgetfulness can keep you from accomplishing your genealogy goals. Use your smartphone calendar to schedule personal research sessions. Plan ahead as you would for an important business meeting by adding a reminder the day before and an alert 15 to 30 minutes before your scheduled appointment. Be prepared with a goal in mind and your workspace cleared for action.
16. Stay on Task
It’s easy to get distracted while researching online. Before you realize it, you’ve lost precious research time to chasing rabbits around the internet. Use a focus app on your smartphone to help you concentrate on your research goal and avoid the temptation to check email and Facebook posts.
The Forest app uses the visual image of a seedling growing into a tree and a countdown clock. If you leave the app, you’re reminded, “Go back to Forest immediately to prevent the tree from dying.” Forest tracks your daily sessions so you can see your progress in keeping on task, or “off smartphone.” You’ll find similar tools in the many 25-minute “Pomodoro Timers” (named for a popular time management technique) available in your smartphone app store.
17. Travel Smart
Genealogy travel often involves more than booking airline tickets and hotel reservations. You may need to know library hours and addresses, cemetery locations and directions to your relative’s house. A dedicated travel and itinerary app will link to your air, car rental and hotel reservations and keep you posted of any flight delays or weather advisories.
One such app is TripIt. Register online and forward confirmation emails to your personal TripIt inbox. Your plans are organized into a complete, shareable itinerary that you can access from your desktop or any mobile device. Custom input lets you add your research locations, maps and other info.
18. Use Conference Apps
Genealogy conference apps aren’t just for registered on-site attendees. Many conferences now offer virtual live-streaming sessions, handouts and other materials to anyone. If you’re going, the official event app will help you review the program and highlight sessions and events you want to attend and conference hall vendors you want to visit. Download the app when it becomes available and add your profile information to connect with colleagues and exhibitors as you plan your schedule. If you’re not going, use it to find video and audio recordings you want to order.
19. Find Your Way Back
Use your smartphone’s mapping app to return from a library or conference center to your parked car, metro station or hotel room. This tip is especially helpful when traveling in unfamiliar cities: bus stops and routes look different when viewed from the reverse direction. When you’re standing at the spot to which you want to return, open your map app and drop a pin (in Google Maps, simply tap and hold the spot where you want a pin). Continue to your destination. When ready to return, return to the map app and press Start to follow the route to your pin.
20. Send Map Searches to Your Phone
If you like to look up directions to the courthouse and plan trips on your computer before leaving home, Google Maps can send directions directly to your smartphone with no need to print or email your searches. Download the free Google Maps App from Google Play, the Chrome web store or iTunes. Sign in to your Google Account in the app. Give your phone permission to receive the maps from your desktop by enabling this option in the app Settings > Notifications > Sent from desktop maps. When you use Google maps for location searches, you should now see a “Send to Your Phone” option.
21. Mark Headstones with GPS
You have several options for using a smartphone’s GPS technology to capture exact locations of cemeteries or graves. Remember that the detail and accuracy of location data may depend on satellite signal strength.
The easiest way is to take a photo with location services enabled. Images can be viewed and sorted on a computer by location. You can also drop a pin with the Maps app and retrieve location data later or use the mobile device built-in Compass App to record latitude and longitude coordinates by capturing a screenshot. To share the headstone image and location, consider photographing it with the free BillionGraves app (Google Play, iTunes, Windows store), which captures GPS data. Once the headstone image posts to the site, share the link with loved ones.
22. Snap Screenshots
Capture an old map, information from a web page, a FaceTime video calling image, or anything else you see on your smartphone screen with a quick screenshot. On the iPhone, press and hold briefly the Sleep/Wake Button on the side of the phone and the Home button. On most Android phones, press and hold the power button and volume down. You’ll hear a long click like a camera shutter-release as the screenshot is captured. Find the image in your camera roll.
23. Order Prints and Books
Your smartphone can be a personal family history publishing house with apps for ordering prints and photo gifts, creating photo books and digital scrapbooking. Order high-quality prints from your smartphone through Persnickety Prints. Create a digital scrapbook or print 12×12 pages for your album with the Project Life App (iOS, Android). Before uploading your photos, select and edit images on your device and save the edited versions as copies to protect the original versions.
24. Record the Stories
Don’t let your family stories disappear. Record audio and video interviews with the award-winning StoryCorps (iOS, Android) and StoryCatcher (iOS) apps. Both help capture memories and stories with suggestions for interview questions. Audio interviews with StoryCorps can be kept private or uploaded to the website, where they’ll be archived at the Library of Congress. StoryCatcher is a similar app with video capability.
For the best success, give the app a test run before you set up your interview with Uncle Harry. Think about interview questions and bring photos or memorabilia that can act as memory-triggers. For better audio quality, use an external microphone such as a lapel mike or a smartphone earphone with attached microphone.
25. Consult and Update Your Family Tree
Not even the most diligent genealogists have their entire family trees memorized. Consult your software-based or online tree on the go via that platform’s companion app, such as RootsMagic, Ancestry.com, FamilySearch and MyHeritage (all for iOS or Android). Specific features vary, but generally you can pull up your tree, access individual profiles, see images, search for historical records and add new data.
In fact, your smartphone makes it especially easy to drop copies of photos you’ve taken right into your tree (think images of headstones, old family pictures and documents). Before uploading, take time to add a caption and your contact information using a photo editing app (see No. 13) and you may discover new cousins who find your photos online.
A version of this article originally appeared in the September 2016 issue of Family Tree Magazine.
Related Reads
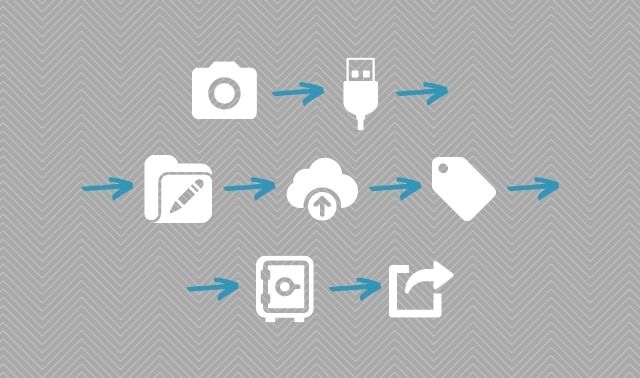
Find out how a digital asset management workflow makes it easy to organize and back up your family photos.


ADVERTISEMENT