Sign up for the Family Tree Newsletter Plus, you’ll receive our 10 Essential Genealogy Research Forms PDF as a special thank you!
Get Your Free Genealogy Forms
"*" indicates required fields
Who says you can’t go home again? I’ve lived in the same house for more than 30 years. But my mom’s family moved more than 25 times before she was married. When my sister and I decided to take our mom and aunt to see some of those houses, we had no idea of the genealogical adventure that would unfold.
During the lean years of the Great Depression and into the beginning of World War II, Grandfather Brown would barter his work as a house painter and wallpaper hanger in exchange for rent for the family of four. Sometimes they lived in a house for a few months; sometimes, a few years. Mom could remember living in 13 houses and her sister recalled a few more; snapshots and old letters gave evidence to more than 20 residences.
We couldn’t find all the houses they’d lived in, but we had a great day visiting many homes with stops along the way to see their schools, churches and teenage hangouts. The best part was listening to Mom and her sister reminisce about the people and events from their past.
Whether you have one ancestral home or 25—or more—you can conduct a similar tour of family homes. It’s a wonderful, memory-filled activity for a family reunion, parent’s birthday or empty Sunday afternoon. Follow these steps to plan your own trip down memory lane.
1. Focus your tour
You can avoid detours and bumps in the road by creating a road map for a successful day. Your tour will be shaped by the available time plus factors such as weather, driving distance and your passengers’ energy.
First, decide what kind of home tour you want. A family tour of Grandma’s and Grandpa’s childhood homes and haunts can be a good activity for mixed generations, and a chance for older relatives to share memories. Visiting homes, farms or towns of more-distant ancestors might be most meaningful for genealogy-minded relatives, but may require more research and planning time.
If you have the passenger space (or you want to caravan), start gathering participants. Invite family elders and consider enticing teens with the opportunity to drive. Conducting your tour as part of a family reunion? You may need to enlist more drivers and tour guides (or hire a charter coach). Remember to prepare duplicate address lists, maps and notes, and try to mix family generations in each vehicle. Granddad’s memories and Junior’s questions will spark some of the best conversations.
Assign roles to your passengers (especially youngsters, who may need more than history to engage them): You’ll want a navigator acquainted with maps and the locality, and a photographer. It also helps to have someone armed with paper, pencil and an audio recorder to capture the memories.
2. Allow enough time
Set a time limit in advance. It’s best to focus on one family, town or area, rather than try to see the homes of everyone in your tree. Even if you’re only visiting one place, though, list nearby family churches, schools and other favorite spots you can take in if you end up with spare time.
Allow extra time for latecomers, unexpected traffic, road construction and bad weather. Take into consideration the driving time for folks to get to your rendezvous point. Mom and I had an hour’s drive before we met my sister and aunt and started on our tour.
Allow time at stops for your passengers to get out of the car and take photos of a house or walk around the neighborhood. Plan stops to stretch your legs, too: Young children can become restless, and older relatives may be accustomed to a calmer routine.
We knew that a two-hour tour would be long enough for Mom and Auntie, and then we’d want lunch before heading home. This time limit helped us narrow our stops from 24 addresses spread out among four towns, to five or six houses in one general neighborhood. That worked perfectly: After two hours, we were all ready for a break. It’s better to end your tour day with the family calling for an encore than for folks to be exhausted and irritable from an outing that went too long.
3. Verify addresses
Once you decide what your tour will cover, be sure you have the correct addresses. An exact address can be hard to remember. Mom and Auntie recalled different house numbers and the area had changed so much that it was difficult to know which house they really lived in.
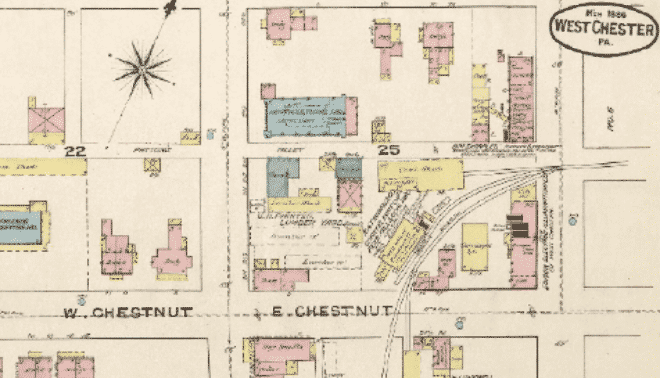
Photos and envelopes from old letters provide hard evidence of the addresses. Family sources such as these are a good starting point for researching the address of your ancestral home. If you don’t have them, look in census records, city directories, phone books, vital records, and tax and deed records. (Learn more about researching family homes in the September 2008 Family Tree Magazine.)
If the community has an online property records search (check the county government or auditor’s website), you can type in the address and perhaps get a look at the home today, along with its value and the owner’s name. Or go to Google Maps to generate a map of the home’s location, and drag Mr. Pegman (the little yellow man icon) onto the map for a Street View of the house. This is a good way to avoid the disappointment of driving up to your ancestral address only to discover it’s now a vacant lot.
Finally, if you’re unfamiliar with the area, make sure it’s safe to visit. Ask friends who’ve been there, check with the police, post to a local genealogical society message board or use a website such as Neighborhood Scout.
4. Map your route
While you’re using maps, go ahead and plot out the route for your home tour. Locate potential pit stops for snacks or bathroom breaks, too. We found it worked well to visit houses in clusters, beginning with the ones farthest away from our final destination, which was lunch at a favorite local restaurant located in a historic building.
Be sure to check state and county transportation department websites for information about construction projects to avoid (the Federal Highway Administration provides links to traffic sites across the country on it’s website).
If you have a GPS device, take it with you, but for planning purposes, use the estimated driving times on Google Maps to help you figure out the best route between locations and estimate your overall driving time. You can even add destinations to your Google map and get directions from one stop to the next. If you have a Google account, you can save the map to retrieve later (from a smartphone, if you have the Google Maps mobile app).
5. Gather background information
Your trip will be more meaningful if you have some family history to share. Relatives with former homes on the tour might contribute lively personal recollections. But you’ll need to do some research if you plan to visit homes from beyond a passenger’s living memory.
Learn as much as you can about the families who lived in the homes you visit. What were their names and when did they live there? Where did they work, go to school and attend church? Were they financially well off or did they struggle? Examine your genealogy research for relevant records and newspaper articles. Bring along copies of their photos. It may help to make a timeline of family events or addresses to help visualize who lived where, and when.
My sister and I quickly learned that although our grandparents moved a lot, they tended to stay in the same general neighborhood. Our aunt remembered going to the same school year after year, although it was clear her home address had changed. The family also attended the same church and used the same local businesses for many years.
6. Plan activities
What should you do when you stop outside a house, besides share your knowledge and ask Grandma for stories? Some simple activities like these can generate memories and bring out the history buff in anyone:
- Then-and-Now Memories: Read from letters, local histories or other sources that mention family houses or life at the time. Let older passengers comment on what life was really like—they may tell a different story.
My sister and I had a great time hearing Mom and Auntie try to outdo each other with memories about certain homes. Mom remembered the house according to parties she attended and her boyfriend at the time; Auntie recalled her school, grade and teachers. They got into a bit of a verbal tussle over who had the better memory. We were trying so hard not to laugh that we nearly forgot to turn on the digital recorder. Their conversation truly brings the day back to life and provides a great audio track for a photo slideshow.
- Then-and-Now Photographs: Do you have a photo of a family home you plan to visit, maybe even with a few family members in the picture? If so, plan to recreate the photo with the same people or their descendants. Position your subjects as closely as possible to resemble the original photograph. (If you can tell someone’s home, it might be polite to knock and explain why you’re taking pictures of the house.) Use the two snapshots side by side in an album or as part of a slide show to share with the family. You can see the photographs we took on our home tour at The Family Curator>.
- Dear Photograph: Use an old snapshot of the house to blend past and present in one picture, as popularized by the Dear Photograph website <www.dearphotograph.com>. Stand back from the house and hold up the photo as though you were comparing it with the modern-day building. Ask someone to view the scene on a digital camera, including your hand holding the photo. Try to position the photo so the picture of the building becomes a seamless part of the present-day scene (check out Dear Photograph Tips at The Family Curator). Then snap the photo.
- Documentary: Does your family include an aspiring Ken Burns? This is the perfect chance to show off filmmaking talent by documenting your ancestral home tour. Try to enlist your camera crew before the event and give him a heads-up on your plan. Even if you don’t have a filmmaking enthusiast or even a video camera, you can use the movie mode on your digital camera or phone. It’s an easy way to capture relatives reminiscing about the past and the video can be incorporated with projects at another time.
7. Follow up
Your memory-making day doesn’t have to end when you drop off your last passenger. My mom and aunt “discussed” houses and addresses for days. We finally pulled out a stack of old letters to establish an address timeline, and the conversation settled into memories of past people and events.
Now it’s time to pause and consider the photographs, stories and information you’ve gathered. Did you learn new details about your ancestors or the family members on the tour? My sister and I weren’t surprised that Auntie remembered all the schools she attended—after all, she grew up to be a third grade teacher. And Mom, who recalled parties and boyfriends, was always among the most popular girls in her class.
Consider sharing what you learned on your tour. A family history website or blog is a perfect place to share photos and stories, or propose an article to a local newspaper or historical society newsletter (they often welcome features about early residents and buildings). You also could consider these ideas:
- Photo album: Not all family members are computer-savvy and many older relatives, especially, cherish printed photos they can share with friends. Fortunately, online photo sharing services such as Shutterfly, MixBook and Snapfish make it easy to design and print albums.
Use the photos and documents you gathered in step 5, along with photos from your tour. Include a photo of the participants, as well as each stop on your tour. Place old photos next to new for easy comparison. Be sure to label them with addresses and the family who lived there, as well as memories your tour participants shared.
- Slide show or video: Photos enhanced with video and audio clips of your home tour can become part of a movie or digital slide presentation for your next family gathering. This is a great opportunity to include any relatives who were unable to join you. You can record narration after your tour, if desired, to minimize distracting background noise. Include the same items that make a good photo album. It’s a good idea to include text along with audio for hard-of-hearing viewers.
Your family may have been fortunate enough to live their entire lives in one house and one community, or they might’ve moved a few times. Either way, a family home tour is a unique opportunity to connect relatives with the places their ancestors called home.
- local map with marked route or GPS device
- list of addresses, former residents and historical notes
- photos of homes and buildings
- camera with extra batteries
- notebook and pen
- audio or video recorder
- bottled water and snacks
- first-aid kit (including medication for any passengers who take it)
- amusements for young passengers
- umbrella
Expand your ancestral home tour with local spots that your family frequented. Put these stops on your itinerary:
- church where mom was baptized
- schools
- places of employment
- homes of friends and relatives
- city hall
- post office
- library or museum
- police and fire stations
- movie theater where Mom and Dad had their first date
- shopping district
- gas station
- club hall
- ballpark
- hunting or fishing spots
- local ‘lovers lane’
- train or bus station where Grandpa arrived home from the war
From the September 2012 Family Tree Magazine
ADVERTISEMENT