Sign up for the Family Tree Newsletter Plus, you’ll receive our 10 Essential Genealogy Research Forms PDF as a special thank you!
Get Your Free Genealogy Forms
"*" indicates required fields
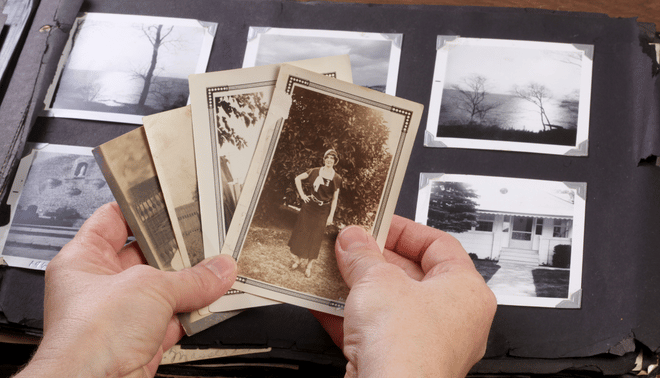
You’ve been doing the genealogy happy dance for days, since you found your great-grandmother’s marriage certificate tucked inside an aunt’s family Bible. It’s just what you need to document the date and place of the marriage. You’ve dutifully transcribed the information into your genealogy database, scanned the document and backed up your digital file. Now what do you do with the precious paper record?
Genealogy organizing gurus recommend filing originals in archival storage containers separate from your research files. But how will you ever find them again? How can you preserve and protect your family’s aging documents, yet keep them accessible and in order?
I faced just that challenge after inheriting five decaying cardboard boxes bulging with old letters, photos, receipts and more. Today, the contents fill several archival-quality file and flat storage boxes, yet they take up less space than the original grocery store cartons did and are preserved for decades to come. How did I do it? Follow my four-step C-A-R-E plan to set up and manage your own family archive.
1. C – Collect and categorize.
Museum curators and library archivists know that they can’t do anything with a historical collection until it’s gathered in one place and categorized according to how it will be used. You need to do the same with your family treasures.
First, you’ll gather everything in your archival collection in one place. A clean flat surface where everything will fit, such as a dining table, is ideal. Cover the table with an old cloth if you’re worried about dirt and scratches (some papers may have staples or paper clips).
As you bring together your items, preserve the original order whenever possible. For example, if your grandmother had two shoeboxes stuffed with pictures and old letters, maybe shoebox 1 contains items from her deceased sister and shoebox 2 contains items from their mother’s family. If you combine the contents now, you’ll lose that clue to determining who’s pictured in unidentified photos or which woman signed her name “M” on letters. So keep the two boxes separate for now, until you can determine any sorting system Grandma might’ve used.
If the original order already has been lost, as with my inherited cardboard boxes, you may wish to categorize similar items into logical groups, such as letters, documents, photographs and heirloom objects. For example:
- Letters: personal correspondence, business correspondence, postcards
- Documents: vital records, deeds, wills, insurance papers, financial documents
- Photographs: cartes de visite, cabinet cards, portraits, snapshots (or by family, if you can tell which photo goes with which family)
- Objects: diaries, political campaign buttons, jewelry (or by owner, if you know who the objects belonged to)
In deciding how to group items, you might consider your end goal for the materials. Will your archive be used mainly for genealogical research of relatives and family events? In that case, you might want to separate items by family or surname. Do you plan to write an ancestor’s biography? It could be helpful to organize letters chronologically by author. Have you already scanned the items and referenced them in your genealogy software? You may want to organize them by item type, then by whatever record number you’ve given the items in your software.
As you sort, remove staples, paper clips and anything metal from the documents. Separate out things that are obvious trash or may damage other items, such as old perfume bottles (which could leak) or rusty hardware. If you want to keep items for sentimental reasons, place them in their own pile to be stored separately from photographs and documents.

2. A – Assess and archive.
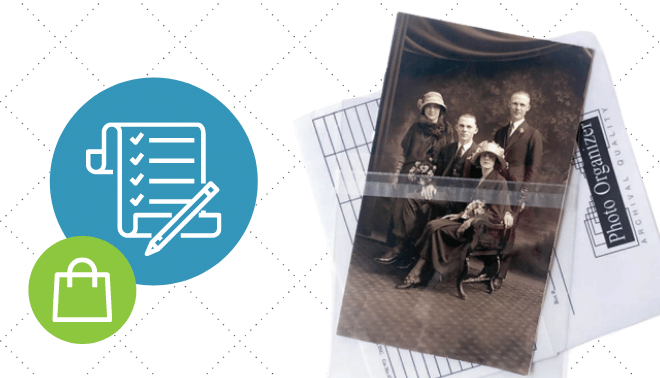
Now it’s time to make a shopping list of the archival storage boxes, folders and other supplies you’ll need. Archival boxes not only organize your collection, they also cushion treasures against extreme temperatures, block light and dust, and deter pests. Stand back and look at the material on your dining table. Family heirlooms typically fall into three categories: paper, photos and objects. Each is best stored in a particular way:
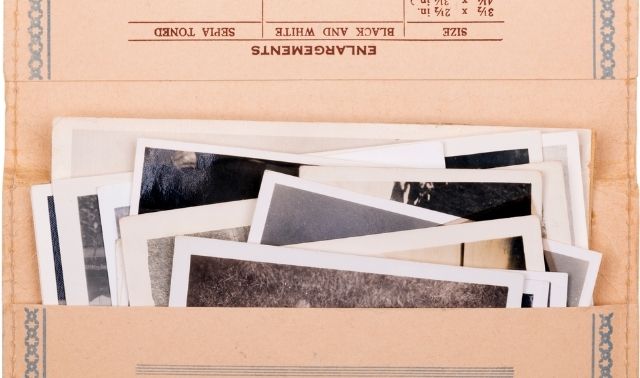
Paper should be stored flat, either in a flat box or in vertical file folders. Remove letters from envelopes and unfold them, but keep each one with its envelope. Be prepared to invest in archival quality storage folders and boxes.
You can economize by placing documents inside archival paper folders and grouping several of these paper folders inside a heavier archival file folder. But don’t be tempted to save money by using file folders from your local office supply store. When it comes to preserving heirlooms, there’s no substitute for acid-free, lignin-free, buffered products.
Store photographs flat or vertically in a photo storage box. Be aware that even items labeled “archival” or “acid-free” may not pass the requirements of the Photographic Activity Test (PAT), which preservation experts use to determine how photos react with various storage materials. Most of us have seen photos stained from those old “magnetic” photo albums with the sticky pages and plastic overlays; such pages would never pass the PAT. Always purchase your supplies from a reputable archival supplier.
You can slip fragile or special photos into clear archival sleeves before placing them in an archival box. Don’t crowd photos into the box, or let them slant or slump in a half-full box. If you want to put photos in an album, use archival photo corners on archival-quality paper. Better yet, put copies in your album and keep originals in archival boxes.
Store objects individually (if possible) in a container that matches the item in size and offers cushioning if needed. Avoid creating boxes of random “stuff.” Metal can stain textiles, so coins, jewelry and tools should be stored separately from fabric or paper.
Place two photo albums of the same size in an archival box, wrapping each album in a sheet of acid-free tissue paper or a clean cotton pillowcase before placing in the box. Store political campaign buttons or jewelry in plastic photo pages with four pockets to a page.
Archival bags and boxes come in a variety of sizes. Study archival product catalogs and websites to determine the size and style you need. You can limit costs by watching for specials and buying in bulk.
Once your photos, documents and heirlooms are safely stashed in archival containers, you’ll need to find a place to house your new family archive. You can’t expect to replicate museum conditions at home, says Peter D. Verheyen, head of preservation and conservation at Syracuse University Library. The key is to avoid spikes and extremes in temperature and humidity levels. It’s also important to keep documents and photographs away from light and protected from dust, dampness and pests.
3. R – Retrieve for research.
The purpose of a family archive is twofold: preservation and research. Your need for access to items in the archive will depend on whether you have digital copies available for regular research use, and whether you plan to share the actual items with family members. Older relatives, especially, may cherish the opportunity to touch and view old letters or photos.
Verheyen notes that improper handling often inflicts more damage than storage. So does everyone need to wear white gloves to use the archive? Actually, no, he says. Gloves can make it difficult to handle items, often resulting in torn paper or broken photo corners. Instead, he suggests that users wash their hands frequently (and skip the lotion) and handle items gently. It may help to view materials at a table where they can be supported on a clean, flat surface.
Retrieving material from your archive will be difficult if you haven’t created an index or catalog of the contents of each box. This can be as simple as a list printed on acid-free paper with a copy placed inside the box or folder for reference, and another master index copy in another folder or binder. Head each page with the name of your family archive, the name of the box, and then titles and descriptions of the items, for example:
Levenick Family Archive
File Box 1, Folder 1
Item 1: May-Levenick Marriage Certificate
Item 2: Levenick, Denise Baptismal Certificate
Item 3: Levenick, Denise High School Diploma
For a large collection, you might want to catalog items in a spreadsheet or database for easier searching and retrieval – similar to the way a library catalog tells you where in the library to find a book. If you keep track of your research in genealogy software, assign each item a reference number in your printed index or database. Then you can use the number as a source code in your software.
4. E – Expand your archive.
Even archival materials can’t protect heirlooms forever. Acid-free, lignin-free, buffered products absorb toxins from the air around them and will eventually become less effective. Continually educate yourself on new products and periodically test items in your archive.
“Disasters can always happen and one can’t protect against all of them,” Verheyen says. “Storing items in waterproof bins would not have helped during Katrina if the items were flooded, or in a tornado that scatters everything, or in a fire. Plastic bins can help protect items, but if water gets in, it will not drain out and will create a very wet environment that will be conducive to mold growth.”
That underscores he importance of backing up your archive with multiple copies. “What I would recommend is making basic or color photocopies and storing them elsewhere,” Verheyen advises. “Lots of copies keep stuff safe.” You also can scan documents and photos or digitally photograph objects and store the images on an external hard drive or online – perhaps even both. With CARE, you’ll be the archivist of your family collection and know that you’re acting as a good steward of the legacy entrusted to you.
Tip: The ideal preservation climate is no more than 70 degrees Fahrenheit with 30 to 50 percent humidity. You can monitor the temperature and humidity in the container holding your home archive with a digital thermohygrometer. (These can vary quite a bit in price; you can find them for as cheap as $10 on Amazon, but be aware that you may get what you pay for in terms of quality!)
Best & Worst Storage Spots
Where should you stash your cherished heirlooms? Take a cue from this ranking of home storage locations.
Poor: The attic, basement and garage are prone to heat and cold extremes, moisture, mold and pests. Basements also can be prone to flooding. Most people wouldn’t sleep in these areas of their homes — why banish family memories there?
Better: A better option is a closet, cabinet or chest within the living areas of your home (such as the living room, den or bedroom). These spots usually receive suitable heating and cooling, have limited light, and are clean and pest-free.
Ideal: A closet, cabinet or chest on an inside wall that doesn’t contain plumbing is the best storage spot. This type of location poses the least risk of exposing your treasures to temperature extremes and water damage from burst pipes.
Archival Suppliers and Resources
Websites
- American Institute for the Preservation of Historic and Artistic Works
- How to Preserve Family Archives
- Caring for Private and Family Collections
Archival Suppliers
From the July 2011 issue of Family Tree Magazine. Last updated: Oct. 2022
ADVERTISEMENT