Sign up for the Family Tree Newsletter Plus, you’ll receive our 10 Essential Genealogy Research Forms PDF as a special thank you!
Get Your Free Genealogy Forms
"*" indicates required fields

As one of the giant genealogy research websites, MyHeritage offers historical record searching, DNA testing and online family trees. But long before it offered DNA and records, MyHeritage specialized in hosting family trees from around the world. Its platform had facial recognition technology for family photos way back in 2006, about the time it started acquiring all kinds of family tree sites.
The MyHeritage family tree platform still has a ton of tech-forward features today. For example, each user (including those who don’t have subscriptions) receives a free, shareable family website that displays their family tree. At no additional cost, you can use that family tree website as a group calendar and genealogy hub with extended family members.
Given that added functionality, a MyHeritage family tree is easy to create, and you can get started for free. Here’s a step-by-step tutorial for how to create (or import) your MyHeritage family tree.
Step One: Set Up Your Account
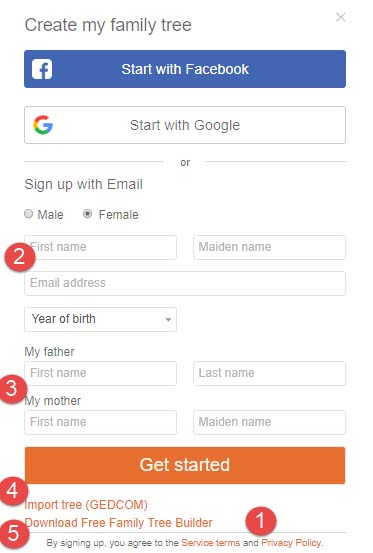
Begin by creating a MyHeritage account. Go to MyHeritage.com and click Sign up > Start Your Family Tree. In small print at the bottom of the dialog box, you can read the site’s terms of service and privacy policy (#1). Once you’ve done so, answer the required questions about yourself (#2) to create your account.
Next, choose whether you’ll enter your parents’ names (#3) to start a new family tree or (if you’d prefer) import an existing family tree (#4). If you have a tree in software (or, in most cases, another site), you can download or export your tree as a .GED (or GEDCOM) file. We have a guide on handling GEDCOM files that will get you started.
If you decide to upload a GEDCOM file, choose a file from your computer, then click Get Started to have the site import it. From this same Get Started box, you can also choose to download MyHeritage’s free Family Tree Builder software (#5), which you can use to keep your family tree in the privacy and security of your own home computer. (For those thinking ahead: Yes, you can sync your MyHeritage family tree with your desktop software.)
Step Two: Build Out Your MyHeritage Family Tree
After creating your account and starting your tree with one of those options, click Go To My Family Tree to work on your tree. You’ll see a screen like this:
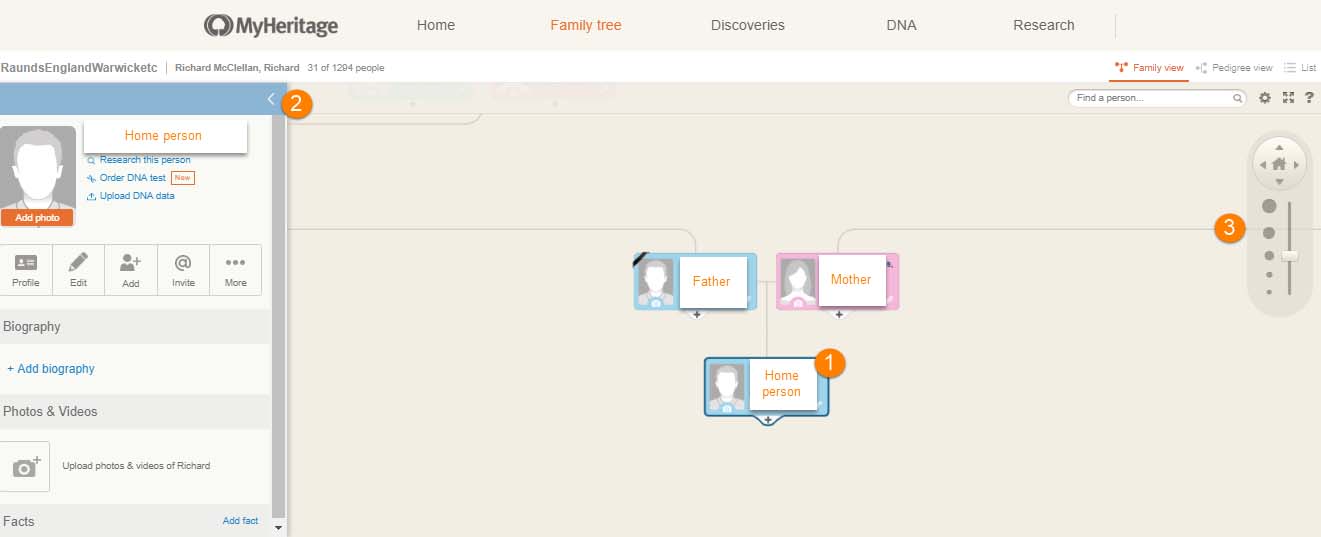
By default, the Family Tree view displays the “home” person in your tree (#1), who is often you. (I’ve blurred this home person’s identity for privacy’s sake.) You’ll also see a pop-up window on the left (#2) showing a summary of whomever’s profile you’re currently viewing. Click on the various icons and fields to add information to that person’s profile, such as photos, a biography, or raw DNA data. You can close this summary view by clicking the arrow.
Use the navigation tools (#3) to move around your tree and to zoom in (for a closer look) and out (to see more of your tree at once). These, along with the “Find a person” search bar, make it easy to find people on your tree and add information about them—or to add new people to your tree.
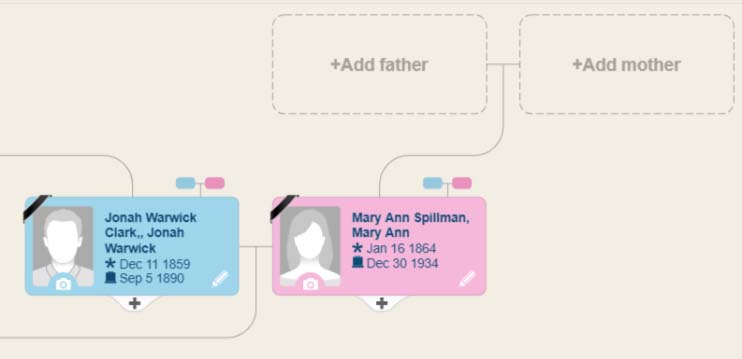
As shown in this close-up view of your tree, it’s easy to click on an empty place for a parent and “Add father” or “Add mother.” You can also click on the plus sign at the bottom center of any ancestral profile to add another close relative: brother, sister, partner, son or daughter.
For additional questions about how to use the online tree, click Help > Help Center, then choose Family Site. Here, you can also learn how to upload photos, invite other relatives to view your tree (or help build it!) and create your family calendar.
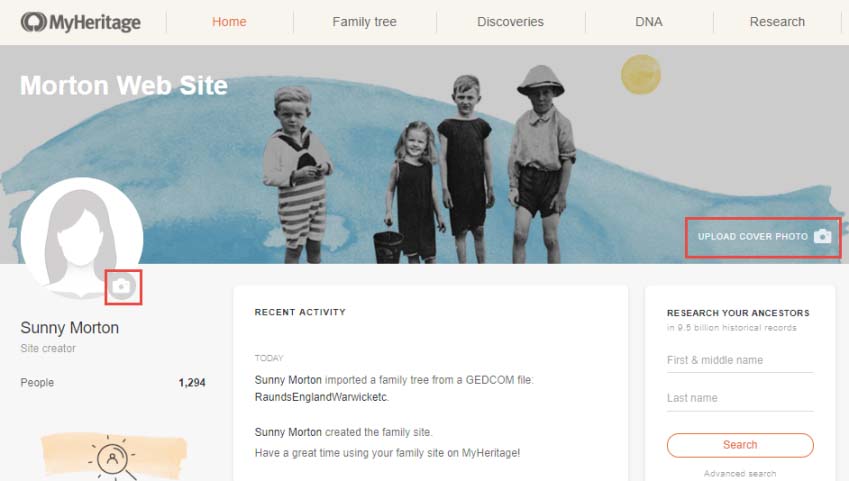
As mentioned earlier, you can also customize a family website experience for your family. Choose Home from the top menu and follow the prompts to add elements to the page, as shown here.
Step Three: Upgrade Your MyHeritage Family Tree
MyHeritage offers each guest user a free tree with up to 250 people on it. But the free version of the MyHeritage family tree doesn’t have all features or DNA tools, nor can free users access most historical records. To get those, you’ll need to upgrade your tree experience by choosing a Premium or Premium Plus subscription plan. You can give yourself full access to historical records with the Data plan, or both with the Complete plan. Compare the MyHeritage pricing plans for yourself.
Step Four: Start Searching for Records!
Now that you’ve got a family tree and a Data or Complete subscription, it’s time to search. This video will help you get started:


ADVERTISEMENT