Sign up for the Family Tree Newsletter Plus, you’ll receive our 10 Essential Genealogy Research Forms PDF as a special thank you!
Get Your Free Genealogy Forms
"*" indicates required fields
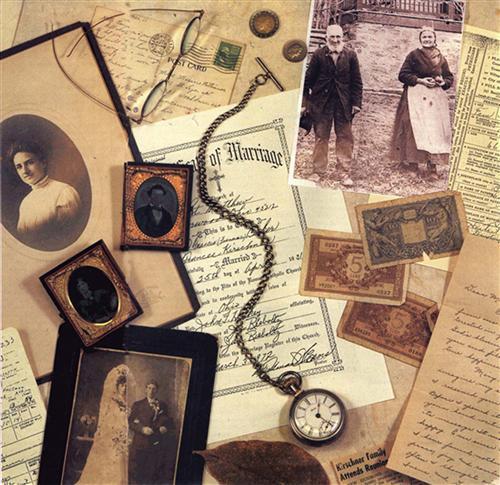
Here’s the scrapbook every family historian dreams of finding: Page after page of mementos, photos and documents, preserved alongside stories that capture ancestors’ personalities and family traditions. It’s not just a gold mine of genealogical facts. It provides a sense of your ancestors’ lives that you can’t get from an old record or pedigree chart.
Even if your forebears didn’t oblige, you can still have the ancestral scrapbook you wish they’d left behind — create your own heritage album. With today’s archival-quality preservation products, your album will last far longer than anything your ancestors could’ve created. Your descendants can enjoy it for generations to come.
You’ll use many scrapbooking techniques and supplies in your album. But there are some key differences between a heritage album and a regular scrapbook or memory album. Scrapbooks display your family photographs in a more friendly and fun way than just placing them in an album. Memory albums usually commemorate one special person or event, such as a wedding, birth, special vacation or major milestone. With both scrapbooks and memory alliums, you can use just about any acid-free paper or embellishment to make your pages vibrant and fun. You start with bright papers, stickers and die cuts, and then add some journaling.
A heritage album, however, is an excellent way of documenting and preserving your family history. Its primary purpose is to tell your ancestors ‘ life histories. It should include photographs, genealogical documents and well-researched facts about your family. A heritage album tells stories about family traditions, anecdotes, special memories, everyday occurrences and historical events as they relate to ancestors’ lives. It will provide a lasting bond between the past and the future. Memories, traditions and little-known facts about family and friends are recorded in the album so they’re not lost to future generations.
You don’t have to be an avid scrapbooker or amateur designer to create this chronicle of your family’s past. All it takes is a few supplies, some archival know-how and, of course, a little creativity. Follow these four steps to turn your research into an heirloom you’ll be proud of.
1. Put your materials in order.
The first step in creating your heritage album is to gather contents. You probably have a box of pictures, documents and memorabilia that need to be sorted. These are the three simplest ways to organize your collection:
• Chronologically: Depending on how much historical information and how many pictures you have, you can sort by decades, half-centuries or centuries. Once you get things sorted, you can always go back and split them into smaller stacks.
• By family: If you’re working on both lines of your family as well as your spouse’s, you can begin with four major stacks or packets of information — one each for your mother and father, and one each for your spouse’s parents.
• By individual: If you have a really big collection, one of the easiest ways to get started is to sort all the photographs, documents and memorabilia relating to one person inside a large envelope. Write the person’s name on the outside and place everything you find pertaining to that person in that envelope. If you have any written or taped oral histories, be sure to keep them with the rest of the person’s history so you can use them when you get ready to do your journaling (see step 4).
Memorabilia musts
Examples of items you should try to include in your heritage album:
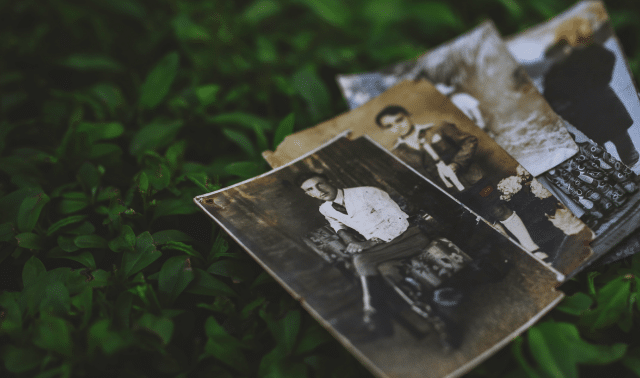
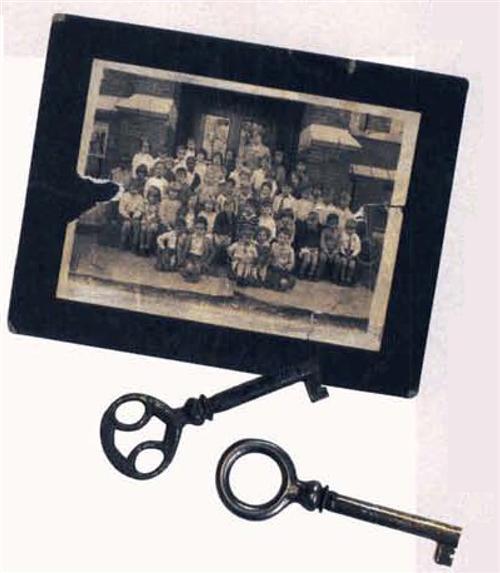
- pictures of family members with names and relationships to you
- copies of official documents: birth, death, baptismal and marriage certificates; naturalization papers, land deeds
- timelines of major facts about the family; employment history, residences, births, deaths, marriages
- personal histories provided by interviews, other relatives, family traditions, anecdotes and historical documents
- mementos to be shared with future generations, such as war medals and military dog tags, hospital birth bracelets and locks of hair
- significant historical, social and political events that affected the lives of the family you’re documenting
- information about family hobbies or special talents
2. Select your album and supplies.
You’re creating a priceless heirloom for future generations, so you don’t want to have to worry about its longevity. To ensure your heritage album doesn’t start deteriorating in 20 to 30 years, use only 100 percent archival-safe materials. The box on the next page outlines basic supplies you’ll need.
• Albums: Decide how you’ll store and display your album — this will help determine whether you need one that lies flat when it’s open or stands upright on a bookcase shelf. Make sure you have room to add more pages as you collect more information. The album should have a sturdy cover if it will be handled a lot.
The least expensive album choice is a three-ring binder, where you store your pages in acid-free page protectors. You can also buy hole-punched paper pages to insert. In a binder, a two-page spread will have rings between the pages when the album’s open for display. Strap-bound expandable albums have plastic-strap binding that allows your album to grow. Facing pages lie flat when the album is open without any binding showing. Post-bound albums are hole-punched pages with metal posts. You can expand them by adding post extensions. Pages don’t lie totally flat when the album is open. Page protectors are available for both these types.
Avoid spiral-bound and magnetic albums — they’re bad choices for a heritage album. Page protectors aren’t available for spiral-bound albums, and you can’t move the pages. Your photographs and documents will deteriorate faster in magnetic albums. Most damage occurs in the first five years. If you have pictures in magnetic albums, take them out! Store them in a photo-safe storage box or sleeves until you’re ready to put them in an archival album. And don’t be fooled: magnetic albums found in most stores today shouldn’t be used — even if they say “photo-safe,” they may not be.
• Page protectors: These sleeves enclose your album pages and keep photographs from rubbing together. You can also use them in a separate binder to store documents and larger photos. Top-loading protectors are used most frequently. Side-loaders open on the left and can keep your pages from falling out if the album is dropped or turned upside-down. Page protectors come in standard and heavyweight strengths.
• Paper: You’ll find a wide variety of plain and acid-free papers to choose from, in 8½x11-inch and 12×12-inch sizes. Papers also come in different weights, from stationery to cardstock. Heavier stocks are usually best for your background papers. If you choose to mat photographs and documents, you can use lighter weight paper and adhere them to the background paper.
3. Assemble the album.
A consistent style or design throughout your album will add to its overall beauty. It will also tie all the elements together — photographs, mementos and journaling. You have endless possibilities to create unity: For example, use the same colors of paper throughout, the same basic layout on each page or the same border. Or use the same die cut, verse or rubber-stamp design in the corner of each page.
• Choosing colors: Color enhances the elegance and timelessness of your album. Heritage-album papers are generally soft, classic colors rather than bold and bright. For instance, moss and hunter green, peach, rose, mauve, burgundy, black, gray, I cream, dark purple and lilac are good choices. Narrowing the variety of paper colors to four or six can create continuity and make your layout choices faster and easier. Note that different background colors bring out different tones and highlights in a photograph, document or memento. As you create pages, try several colors until you find the one that complements the item best.
• Arranging content: You can organize your album by family lines, by nuclear families, in chronological order or by major events. Whatever you decide, allow for modifications and flexibility. You may want to move things around later. Use the first page of your album as a title page — this will introduce the contents and reinforce the album’s theme. Make an outline of the album’s content before you complete the pages, so you can see how the book will go together.
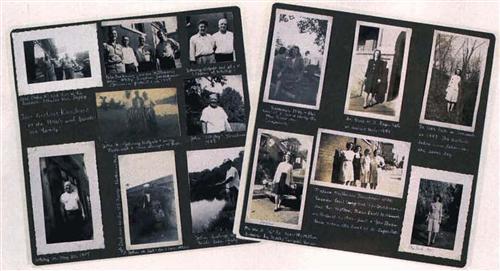
• Picking and attaching pictures: You can’t include every photograph you’ve taken or collected. Look over your pictures carefully and select those with the best clarity and sharpness. Don’t use one-of-a-kind photos or original documents in your album. Make color copies (on acid-free paper) and safely store the originals. Then you don’t have to worry about damaging irreplaceable images, and you’re free to crop and paste the pictures however you want. Attach color copies with acid-free glue, double-sided tape or photo sticker squares. If you do use any actual photographs (duplicates, for example), mount them with photo corners so you can easily remove them without damage.
• Adding finishing touches: Some “extra” elements can really enhance your page designs — without a lot of effort. Borders are fast and easy to create and rake up little space. You can create a nice border by cutting paper with decorative scissors, tracing from a template or using stickers. Die cuts are pre-cut shapes that you can paste directly onto your page and even journal on top of. Craft punches create tiny die cuts you can use to enhance your page’s theme. You can also add images, letters and borders with rubber stamps and stickers.
4. Tell your family’s story.
Journaling is one of the most important elements of your heritage album. It brings the pictures and documents to life. Allow plenty of room for journaling as you design your pages, even if you don’t know the story behind a picture — when family members look through your book, they may recall details to go with the pictures.
Journaling tools such as rubber stamps and templates can help you add words with flair. For example, Journaling Genie templates from Chatterbox <www.chatterboxinc.com> provide lines to guide your writing in different shapes and styles. If you don’t have journaling aids, use a ruler and a pencil to draw a light line where you’re going to write.
Computers are useful for journaling, too. (But check with your printer manufacturer to find out if your printer ink is archival-quality.) You can type drafts of your stories, rewrite and polish them, and experiment with font and layout. And don’t be afraid to use your own handwriting. Just think how thrilled you’d be if you had a history of your mother’s early days in her own hand.
So what do you write? Try to answer questions someone might have when she looks at the page:
- Who is this?
- To whom is he related?
- What was he doing?
- Where and when was the picture taken?
- Why does he look so happy or sad?
Always include names, ages, dates, places and the events if you know them. Add as much detail as you can about family members’ lives, such as when and where they were bom, married and died, what they did for a living, what property they owned and who their neighbors and friends were. These tidbits will help family and friends piece together the family relationships.
Even if you don’t have pictures to go with them, remember to include stories about family traditions and everyday events that, if not recorded, would be lost to future generations. In fact, you can create entire pages without pictures. Official documents and mementos can expand on the basic information you have about birth and death dates. Always remember to include the source of your document or fact in your journaling, even if it’s as simple as “Conversation with Aunt Maggie, March 15, 1999.” And don’t be afraid to use a whole page in your album to write about family tradition. Your journaling will help fill the gaps that would otherwise leave your heritage album incomplete.
Heritage-album toolbox
Don’t buy too many scrapbooking supplies when you first get started. You’ll be overwhelmed and find it more difficult to stay organized. Once you develop your style, you can add to your inventory. Here’s a list of tools you need to get started:
- photo-safe adhesives, such as photo corners and photo sticker squares
- black medium-tip permanent pen
- sharp, straight scissors
- decorative scissors
- corner-rounder punch, decorative corner punch, maybe a photo-slit punch
- archival-safe album or three-ring binder
- polypropylene page protectors (8 ½x11 inches or 12×12)
- 12-inch personal paper trimmers
- pH testing pen (to test paper for acid content)
- photographic marker
- ruler
ADVERTISEMENT