Sign up for the Family Tree Newsletter Plus, you’ll receive our 10 Essential Genealogy Research Forms PDF as a special thank you!
Get Your Free Genealogy Forms
"*" indicates required fields
Part 3: Making a Page Plan for Your Photo Book
A book page plan is similar to the storyboards used by filmmakers. Storyboards show the filmmaker’s plan for different shots as they progress through a scene. That helps everyone involve visualize what is coming, whether it’s a camera crew, group of animators, actors or voice talents, etc.
Your page plan provides you with a visual map of your photo book. The standard photo book length is 20 pages, including a right-side-only opening page and a left-side-only closing page. You can choose to create more pages than that, but you’ll pay extra for the privilege. For that reason, and for the sake of having a logical and pleasing flow throughout the book (without running out of content or room), it’s best to create a page plan.
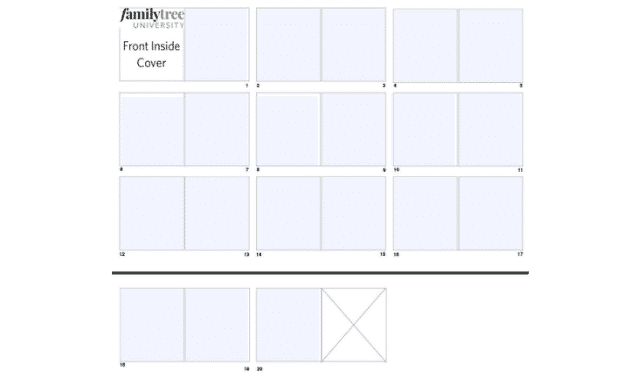
How thoroughly you fill out your page plan is up to you. Perhaps you don’t need to put many details on individual pages to know what you’re going to do. But at least for your first book, I strongly suggest you note on which page you plan to insert each image and story or other significant text.
My final page plan looked like this:
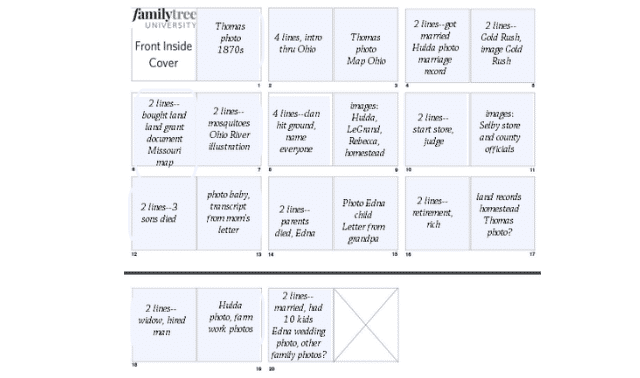
In the example below, I’ve laid out the life story of Thomas Selby. A few years ago, I wrote verses about Thomas’ life, to be sung to the tune of “Gilligan’s Island.” That became the basic text for a photo book about him.
Most people don’t put their ancestors’ stories into verse, but this example still illustrates the process of divvying up your content onto book pages. I had already gathered up all the images I wanted to illustrate the song lyrics, along with a couple of document transcripts. These I organized in a computer file in rough order according to the song lyrics and the chronology of Thomas’ life.
Next, I typed up the lyrics in a text document. That way I could easily see them all at once.
I decided to use the inside cover as a title page of sorts, without any lyrics on them. That meant I needed to fit the lyrics and all the accompanying images onto 9 two-page “spreads” (of two pages each), plus a single closing page. With about 26 lines of lyrics, that would average about 3 lines per page. But the lyrics were mostly written in two-line phrases, so I wanted to place either 2 or 4 lines on each page. I figured out how to divvy them up by assigning images to each line of lyrics. I ended up with more images for some lyrics and less for others. Those that required more room became 2-line pages.


It’s your turn to create a page plan! Your project may be quite different than mine, but the process of creating a page plan will likely be similar. Gather together the words and images you want to use. Put them in order. Divide them into content clusters for 20 individual pages, or into nine content clusters that will spread across two facing pages (plus an opening and closing page). Based on your own preferences and how much content you have, determine whether your opening page will serve more as a cover or summary page, or whether it will launch right into your story. Similarly, decide what the closing page will contain.
Now you’re ready to create your own unique family history photo book!
Next: Part 4: The Ultimate Family History Photo Book Example
ADVERTISEMENT