Sign up for the Family Tree Newsletter Plus, you’ll receive our 10 Essential Genealogy Research Forms PDF as a special thank you!
Get Your Free Genealogy Forms
"*" indicates required fields

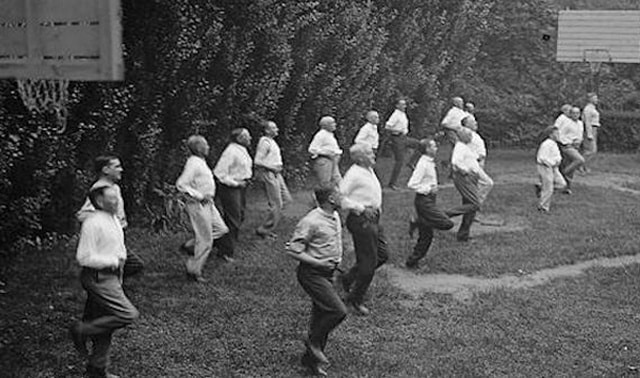
Simplifying and organizing are all the rage. Look no further than the popularity of Marie Kondo’s The Life-Changing Magic of Tidying Up (Ten Speed Press), or the pages upon pages of “life hacks” on Pinterest. But getting organized takes more than just figuring out if items “spark joy” and straightening out computer wires using paper clips. You also need to set realistic goals and develop a plan to achieve them.
After consulting with our team of genealogy “meteorologists,” I’ve created this “forecast”: a week’s worth of daily research tasks. This seven-day program will have you build a comprehensive foundation for your ancestor’s life story. (And, hopefully, uncover clues you can use to research other ancestors, too.) With this dedicated genealogy research plan, you may just find that when it rains records—it pours records.
Day One: Find birth and death dates
Birth and death dates mark the major moments in your ancestor’s life, setting the boundaries for your research. By focusing on this information first, you’ll hopefully save valuable research time. After all, there’s no sense in looking for your ancestor in a census taken when he wasn’t alive! And since many records mention age or birth year, you can use this data to identify your ancestor in other kinds of records.
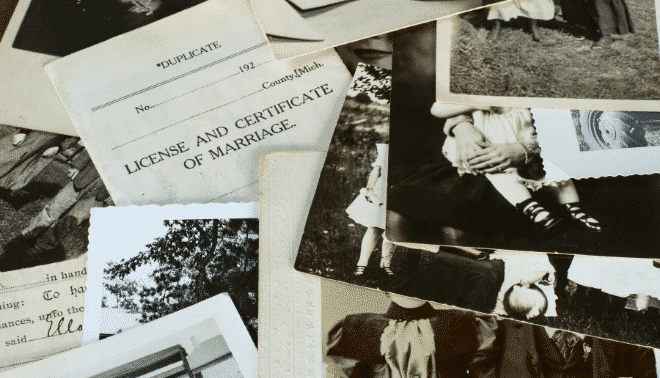
Birth and death certificates are the most obvious sources for these details, so consider when and where you believe your ancestor was born and died.
In the United States, vital records were kept at the state level. Determine when your ancestor’s state started keeping vital records, and how you can request them today. David A. Fryxell’s guide to accessing vital records from each of the 50 states can help.
But vital records aren’t the only way to determine birth and death dates. Study censuses and obituaries to see how old your ancestor was in a given year. Likewise, tombstones and Social Security records can provide both birth and death information, though (since they were created decades after a person’s birth) their accuracy can be spotty.
Day Two: Document where your ancestor lived.
Now that you know where your ancestor’s life began and ended, it’s time to fill in the gaps. Instead of just looking for a country, state and town, turn your attention to the addresses your ancestor had throughout his lifetime:
- What street did he grow up on?
- Where did he go to school?
- Where did he work?
- Where did he raise a family?
Your ancestor’s address will lead you to a host of records: deeds, probate records, wills and more.
We’ve already mentioned censuses, but they’re worth revisiting on Day Two. As some of the most consistently kept (and most widely indexed) records, they’re invaluable. They can lead to all sorts of information, so use censuses as a springboard for the rest of the week: immigration and naturalization data (Day Three), occupation and/or military service details (Day Four), and hints about financial status (Day Six).
Sunny Jane Morton shares excellent tips for discovering clues in censuses in “Cracking the Census Code.”
One major downside to federal censuses is that they were only taken once every 10 years. To help fill in the gap, consult city directories. These dense documents were created intermittently (not just every 10 years), meaning they’ll give you information about your ancestor and his family, neighbors and coworkers in the years between federal censuses. Plus, they can provide information about your ancestor’s occupation (see Day Four).
Your ancestor’s address—used together with documents like censuses and city directories—will help flesh out his life and times like few other details can. What trends did your ancestor experience, and what was his everyday life like?
Day Three: Uncover immigration dates
No image more captures the genealogist’s imagination than that of a family stepping off the boat to begin a new life. Discovering your immigrant ancestors can provide a new layer of meaning to your research. And with DNA tests and ethnicity estimates becoming ever more popular, studying immigrant ancestors can help you learn more about your own ethnic heritage.
Like birth and death information, immigration dates set boundaries for your research: Everything before that date was in the old country, and everything after was in the new. Immigration records can also give you clues about your ancestor’s family and community, since immigrants often came over to the United States in groups and settled near each other.
Whether your ancestor stepped off the boat at Ellis Island, Baltimore or New Orleans, passenger lists provide great details about the immigrants in your family tree. Mandatory beginning in 1820, passenger lists indicate each immigrant’s name, age, occupation and nationality, plus the name of the ship, the dates the ship arrived and departed, and where the ship embarked. After 1891, you’ll find even more details, such as: marital status, ability to read and write, last place of residence, final destination, and the names and addresses of relatives in both the United States and the country of origin.
Many immigrants applied for naturalization, giving you access to another set of useful documents. Naturalization records varied by state until 1906, when the federal government created a standardized set of forms. Look for your ancestor’s declaration of intention (“first papers”), then for his petition for naturalization (“second/final papers”). Censuses in 1870 and 1900 to 1950 include a question about whether a person was naturalized, so check your ancestor’s entry before diving into these records.
But what if the ancestor you’re studying wasn’t an immigrant? Look for records that document other major moves throughout his lifetime. Was your ancestor part of a larger movement of people, such as the Great Migration or the Mormon Trail?
Day Four: Research occupations and military service
Like your ancestor’s address (Day Two), details about your ancestor’s occupation and military service give you insight into the kind of life your ancestor lived. For example, did your ancestor’s job involve a lot of training, or was it relatively unskilled? Was it able to provide a financially secure life for your ancestor and his family?
Fortunately, you have already come across occupational information this week. Census records, city directories, Social Security applications and death certificates can all contain information about your ancestor’s job. Look, too, in marriage certificates, obituaries, and children’s birth certificates, which may also have the details you’re looking for.
Next, turn to local archives, museums and historical societies. Perhaps your ancestor belonged to a guild or another professional group. Or maybe he joined a fraternal organization devoted to helping members of a trade, such as the Modern Woodmen of America.
If your research suggests your ancestor served in the military, investigate that group of records as well. Those who served before 1902 can look for compiled military service records (CMSRs), kept by the federal government and housed at the National Archives. Each CMSR is made up of an envelope with cards that contain details of a soldier’s service, extracted from original records and copied by War Department and Pension Office personnel.
Even if your ancestor didn’t end up serving, draft cards (like censuses) place your ancestor in a specific location at a specific time. They include valuable details such as address, name of a contact (often, a parent or spouse) and occupation. Draft records for the Civil War, World War I and World War II survive, so look for draft cards for some combination of those wars if your male ancestor was born between 1816 and 1920.
Day Five: Discover newsworthy ancestors
Most researchers assume newspapers are good just for obituaries. While obituaries provide important genealogical information, they’re certainly not the only sections of a newspaper worth studying.
Newspapers contain a host of interesting facts if you know where to look: ads, classifieds, personal announcements, gossip columns, estate sales, editorials and more. Though more time-intensive to study than other kinds of records, they can add wonderful color to your research, giving you insight into your ancestor’s personality.
Your ancestor didn’t have to be rich or famous to be covered in the paper. In fact, newspapers in small- or medium-sized towns might grant space to what we would consider the most mundane of events. For example, your otherwise non-newsworthy ancestor may have appeared in print by:
- Celebrating a milestone birthday or anniversary
- Getting married (or divorced)
- Graduating high school or a university program
- Volunteering for a local charity
- Being a prominent member of a church or social group
- Receiving an award
- Owning a business (especially one that sponsored a public event or underwent some kind of tragedy)
- Retiring or going on vacation
- Developing a sudden illness or being a victim of a crime or accident
- Committing a crime or otherwise being involved in a court proceeding
Newspapers are easier to search now than they ever have been, with databases like Newspapers.com, Chronicling America and GenealogyBank. These services index and make searchable publications from around the world using optical character recognition (OCR) programs. Use your ancestor’s address from Day Two to identify papers in his town (and in neighboring towns), then see if databases have those publications archived during your ancestor’s lifetime.
Day Six: Retrieve tax records
The old cliché states that the only certainties in life are death and taxes. We covered death on Day One, so why not examine taxes on Day Six? Your tax records are (unsurprisingly) not available to the public. But your ancestors’ very well may be.
At their most basic, tax records include the name of your ancestor and a description of the land or property he paid taxes on. You can use tax records to gauge your ancestor’s wealth, as well as to track how your ancestor’s financial status changed. Was he rich or poor for his time and place? How did his circumstances change over his lifetime?
Tax records are particularly useful in “burned counties”—areas affected by record loss. They can serve as replacements for destroyed or otherwise missing census records, since they place your ancestor in a specific place at a specific time.
Historically, taxes were taken at the local, county and/or state level. (Federal taxes were only levied with any regularity beginning in the 20th century, and most of them remain under privacy restrictions.) As a result, there’s no one standard source for tax records—you’ll have to find collections for individual places. Use the birth, death and address information you found in Days One and Two to search for tax records for your ancestor’s locale.
Day Seven: Put it all together
Congrats! You’ve now researched several different aspects of your ancestor’s life. Now it’s time to look at all your information together, and determine next steps. Here are some possibilities:
Analyze your data
Look for patterns or holes in your research. Based on what you know about your ancestor’s life, are you missing anything? What other kinds of records might he have created?
- Consider if and how any of your research contradicts itself. If two records give different information about the same event, determine which is more likely to be reliable.
- Revisit your documents for clues about other individuals key to your ancestor’s story: family members, friends, neighbors and co-workers.
- Think about how you might take your ancestry back another generation. Did your ancestor’s birth certificate give his parents’ names?
- Take note of any loose ends you need to tie up, or potential research leads you want to follow up on.
Document your research
- Record your findings in an organized fashion, using worksheets, a genealogy software program or an online family tree.
- Make sure you’ve created complete, accurate citations for each of your sources. Then, link each fact to one of your sources.
Share your findings
- Show off your hard work! Print out a family tree or a summary of your ancestor’s life to share with relatives at the next reunion or holiday party.
- Put together a research report that summarizes your key findings. Store it with your genealogy files and worksheets.
- Take to the Internet to share your ancestor’s story in a blog or social media post. Connect with other researchers, who can maybe add details to your story.
Related Reads


A version of this article appeared in the October/November 2019 issue of Family Tree Magazine.
ADVERTISEMENT