Sign up for the Family Tree Newsletter Plus, you’ll receive our 10 Essential Genealogy Research Forms PDF as a special thank you!
Get Your Free Genealogy Forms
"*" indicates required fields
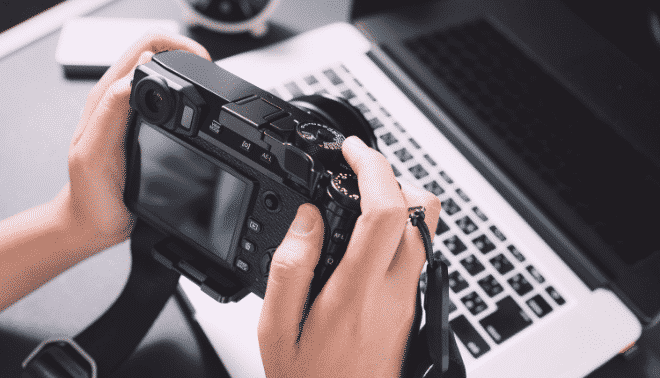
In the beginning of amateur photography, you pushed the button and the company did the rest. But in the digital photography age, you do it all: print, edit and store your photos. You can take an endless number of pictures, preview them as you go, discard bad ones, and then upload and edit.
Cameras’ bells and whistles let you take great pictures of the grandkids and your favorite vacation spots—but they’re also handy for shooting genealogical subject matter such as relatives’ gravestones, ancestral homes, family heirlooms and historical documents you find at the library. Start thinking of your camera as a genealogy tool. It can be an integral part of your roots research, and our family historian’s guide to digital photography will show you how, with tips for capturing five key family history items.
In this article:

Gravestones and Cemeteries
Photography offers a way to capture images of gravestones and their inscriptions without damaging the stone, as using shaving cream to bring out the inscription can. With the right equipment, good lighting and a little patience, you can add headstones images to your family photo archive and share them on sites such as Find A Grave. If your camera has a built-in GPS, you can even record exactly where you took the picture and upload it to Google Maps.
It’s a good idea to get permission to photograph gravestones. While you won’t necessarily be able to contact the caretakers of some cemeteries, call large cemetery offices ahead of time to ask about any policies regarding gravestone photography. The town or city hall should be able to supply contacts for municipal facilities as well as some privately owned ones. If a cemetery is located in the middle of private property, you’ll need permission from the property owner before accessing the site.
Next, make sure you have the right stuff. Midge Frazel, instructor of Family Tree University’s Cemetery Research 101 class, carries a gravestone photography kit. Among the items are an oblong mirror (a foil-covered piece of cardboard also would work) and a photographer’s reflecting disk (available at photo stores) to direct light, a soft brush, garden shears, a spray bottle full of water, and pen and paper.
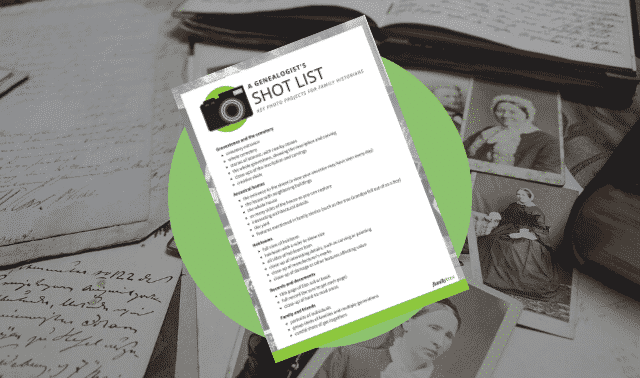
Create a “shot list” of the photos you want, or download our pre-made shot list. Make sure you include pictures of the cemetery as a whole, in addition to relatives’ headstones. Now you’re ready to get started. If the stone is in good condition, lightly clean it—otherwise, don’t touch. Use a soft brush and spritzes of water to remove surface soil and bird droppings. Never use hard objects, stiff brushes or household cleaners. Trim tall grass around the base—you may discover hidden epitaphs.
You’ll need bright sunlight to highlight the stone’s features. Ideally, sun that hits the stone at a 30-degree angle is best. The stone’s location influences optimal lighting times. For instance, New England gravestones often face west and are best photographed at mid-day, while stones that face north should be photographed in late afternoon. South-facing stones are well-lit all day in summer, but not the rest of the year.
Turn off your flash to eliminate glare. Instead, if necessary, illuminate the stone by reflecting light onto it with a mirror (bring an assistant, or a tripod to lean a mirror against). If the stone is shaded, try using two mirrors to bounce light. Sunlight too strong? Create shade by standing where you’ll block the sun, or use a large dark cloth or cardboard as a shield. Remember, if your photo doesn’t turn out perfectly, you can enhance the inscription using Lisa Louise Cooke’s tips in the September 2009 Family Tree Magazine.
Try to eliminate distracting background elements such as fences, trees and other monuments. You can use a cloth or cardboard as a backdrop, but make sure it’s free of imperfections or they’ll be even more distracting.
Even though you have a visual record of a stone, write down the inscription in case something happens to your digital file. It would be a shame to return home from a cemetery adventure to discover that none of the images are fully legible.
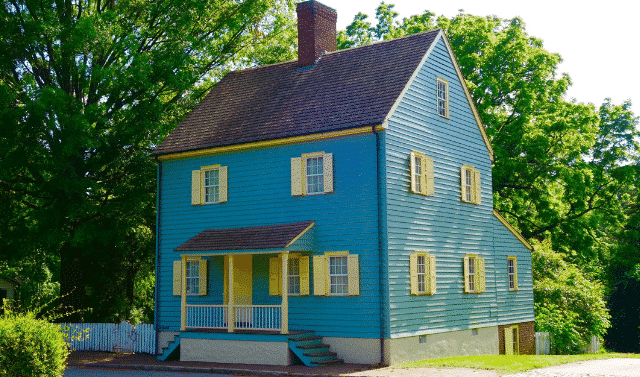
Ancestral Homes
If your ancestors’ homes are still standing, consider photographing them as part of your family’s story. I recommend knocking on the door and getting permission from the homeowner before you take a picture—it’s polite, you’ll avoid arousing suspicion, and you might learn some house history. If no one’s home, you still can photograph the house, but make sure you don’t trespass on the property. Planning to use the photographs in a family history book you’ll sell or another commercial product? Consult a lawyer to learn about any legal obligations.
Try to photograph the house on an overcast day. Bright sunlight can make the image look flat, create dark shadows and fool your camera into underexposing or overexposing the scene. If you must take the image when bright sunshine is forecast, go in the morning or evening, when the sun is at an angle and the light is warmer.
Look around for viewpoints where you can get the whole building in a shot. Also shoot from several angles to capture all sides of the house. Try to minimize foreground distractions such as cars and telephone poles—but do include such objects in a few photos to help viewers see how big the house is. Zoom in to shoot interesting details such as a bay window or Victorian trimwork. If your camera has a panorama mode, you can capture a whole streetscape including the house. If not, take a series of images and “stitch” them together later using a photo editing program.
Heirlooms
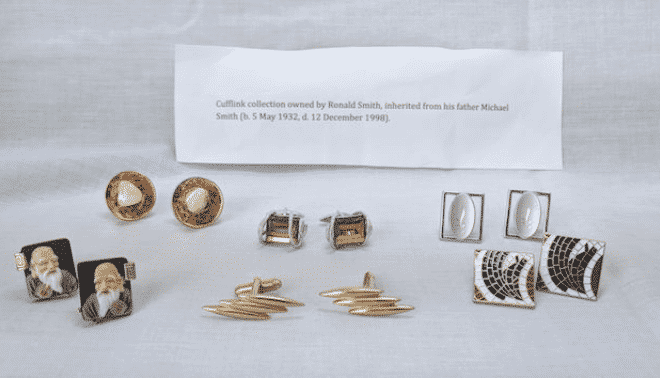
Documenting your family treasures—such as jewelry, dishes, furniture and cased photographs—is a great idea not just for insurance coverage, but to preserve them for future generations. Combine the photo with a story about the original owner and why the item is important, and you’ve created a family history memento. Put the photographs in the box at right on your heirloom shot list.
To photograph artifacts, professional photographers use what’s called a copy stand—basically, lights, a platform for the object and a pole on which a camera can be mounted to point down at the object. You can create a homemade version using two desk lamps, a flat surface (such as a table or, for a book or photograph, a music stand) and a camera on a tripod. Space the lamps evenly from the object to be photographed, ideally at a 45-degree angle, to create balanced light and avoid glare from shiny surfaces. Both lights should be the same type and of the same wattage. If possible, use tungsten lights. Adjust the tripod so the camera tilts down toward the object to be photographed.
A great solution for small objects is a portable photo studio, which you can find for less than $100 at photo stores. Kits come with two tungsten lamps and a nylon mesh box “studio” with a backdrop.
If you want to keep it simpler, that’s fine. Just find a well-lit area of your home, or go outdoors on a bright but overcast day. Set up a contrasting sheet as a backdrop and place the item on it. For small items, such as jewelry and cased photographs, place the piece on a sheet- or paper-covered table and use white cardboard to create a three-sided backdrop around it.
Try shining a light from different angles to see what creates the most-visible detail. Use a tripod if possible for a steady shot, or brace the camera against a stack of books. Again, turn off the flash. Turn the item as necessary to capture all sides, and get close-ups of any interesting details, manufacturer’s markings and other features that might affect the monetary value of the piece. Shoot daguerreotype photos at an angle so that the image is visible. For tiny details on small items, use your zoom lens or your camera’s macro setting, if it has one (often indicated by a flower).
Records and Documents
You can use your camera to copy documents and photographs—even those on microfilm—at the library, or at home if you don’t have a scanner. But first, ask the librarian whether this type of copying is allowed. Some facilities don’t permit photography; other places may have you sign a copy of their policies and let you carry in a camera without a case. And if it’s your first few times copying records this way, make backup photocopies, just in case. Start your shot list with the photos in the box above.
A portable photo studio is handy for photographing documents and photographs at home. You also can use a homemade copy stand with a music stand. If you don’t have one, use a white sheet as a backdrop in a well-lit room or outside on an overcast day, similar to the set-up for an artifact. A tripod will help the text and details remain in sharp focus. If your flash comes on and causes glare, turn it off and add a light.
Archives often prohibit flash photography because the light can damage items over time. Instead, find a table in the best-lit area possible and use the low-light settings on your camera if necessary. A tabletop tripod will be essential for focus. Take extra care with the materials: Don’t force bound documents or books to lie flat—instead, ask the archivist for a book cradle or prop up the covers with beanbags. Lay photos or historical documents flat.
To photograph microfilmed records, you’ll need a camera, a clamp that attaches the camera to the microfilm reader, and a cable release to press the shutter, preventing any camera movement. If you can’t find a clamp, try hand holding your camera with your elbows firmly on the table, and make sure the image stabilization feature, if your camera has it, is on. Since most microfilm machines project the record image onto a slightly shiny surface, bring a piece of white paper or cardboard to set on the projection surface and cut the glare. Once you find a record you need, attach the clamp to the microfilm reader, fill the camera’s frame with the record, focus and take your shot. Write citation information on post-it notes in the picture.
Keep track of your photographed records with a spreadsheet of basic information such as photo number, surname, given name or head of household, record description and date. Also note the call number and repository, or the Family History Library film number. This also serves as a research log, citation sheet and a checklist of your pictures.
Family and Friends
Don’t forget to include your relatives in your family photo collection. If you get the chance to take a portrait, ask the person to wear a solid color or simple pattern—avoid distracting colors and busy patterns. Have the person pose in soft light, such as outdoors on an overcast day. Check the background to make sure trees or signposts aren’t coming out of your subject’s head. To add interest and encourage a natural expression, photograph the person with a prop, such as a hobby-related object or a family photo.
At family events, such as holidays, it’s harder to stop people for posed portraits. Instead, snap photos when subjects are involved in an activity (such as opening presents) and zoom in to eliminate background distractions.
After the fun, promptly download the photos to your computer and use a photo-organizing system to label them with names, the date and the occasion. Share them via e-mail, CDs or a site such as Flickr. Consider printing the keepers or making a photo book with a service such as Snapfish or Shutterfly. Finally, charge the camera batteries so your genealogy tool will be ready for its next outing.
Genealogy Shot List
Cemeteries shot list
- cemetery entrance
- whole cemetery
- stones of interest, with nearby stones
- the whole gravestone, showing the inscription and carving
- close-ups of the inscription and carvings
- creative shots. For tips, see the Field Guide to Photographing Gravestones by Daniel and Jessie Farber (Association For Gravestone Studies). You can see their images here.
Ancestral homes shot list
- the entrance to the street (a view your ancestor may have seen every day)
- the house with neighboring buildings
- the whole house
- as many sides of the house as you can capture
- interesting architectural details
- the yard
- features mentioned in family stories (such as the tree Grandpa fell out of as a boy)
Heirlooms shot list
- full view of heirloom
- heirloom with a ruler to show size
- all sides of heirloom item
- close-up of interesting details, such as carving or painting
- close-up of manufacturer’s marks
- close-up of damage or other features affecting value
Records and documents shot list
- title page of film roll or book
- full record (be sure to get each page)
- close-up of hard-to-read areas
Family and friends shot list
- portraits of individuals
- group shots of families and multiple generations
- candid shots of get-togethers
Tip: If you plan to photograph a lot of gravestones, consider investing in a piece of Formica mounted on ¼-inch plywood with a handhold cutout to use as a backdrop. A kitchen counter store should be able to provide one. To contrast with the gravestones, opt for a neutral shade other than gray.
Photography Tips
These photo-taking tips will help you get good shots no matter the subject:
- Never walk and shoot at the same time. When you want to take a picture, stop, get set up and snap away.
- To prevent damage to your camera, always keep the neck strap around your neck or wrist strap around your wrist. Place it in a padded camera bag each time you pause in taking pictures.
- Take several different shots of the same view at a variety of camera settings, holding the camera vertically and horizontally, and with and without flash. The more pictures you take, the greater the chances one will be perfect.
- A tripod is best for slow shutter speeds, such as on a low-light or macro setting. If you don’t have one, try placing the camera on a nearby flat surface, composing the shot and setting the timer.
- Avoid taking pictures with the sun behind your subject, or it will be silhouetted. If you must shoot in these circumstances, try using the flash to illuminate your subject. If the subject is within five feet, use the fill-flash mode if your camera has it; beyond five feet, use the full-flash mode.
- Remember that a digital image looks sharper on your camera’s tiny LCD screen than it will full-size on your computer back home.
- You can edit imperfect shots using photo-editing software (see the January 2011 Family Tree Magazine for how-tos). Just make sure you save the unedited original in case you make a mistake.
From the March 2011 Family Tree Magazine.
ADVERTISEMENT