Sign up for the Family Tree Newsletter Plus, you’ll receive our 10 Essential Genealogy Research Forms PDF as a special thank you!
Get Your Free Genealogy Forms
"*" indicates required fields
A STITCH IN TIME
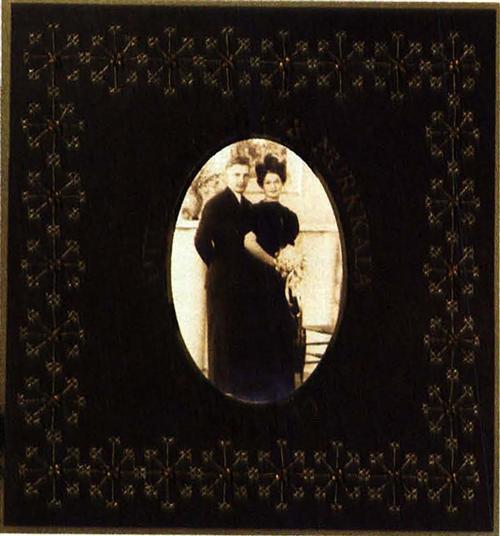
Many of us remember Grandma sitting with her embroidery hoop, working diligently on a beautiful piece of needlework. You can evoke the same homespun feel by adding a cross-stitch look to your heritage album. It’s easy
to adapt sewing techniques to paper — use a pattern book, perforated cross-stitch paper and pens to create a faux cross-stitch, or color in the squares of mesh plastic canvas (available at craft stores) for a mock needlepoint look. You can even sew right on the page: To create an authentic cross-stitched page like the one above, use a pencil to lightly draw a ?-inch grid on the page and pencil in the design you’re using. Then punch holes around the design on the page using a push pin. Erase the pencil lines and stitch through the holes.
– Amy G. Partain
VINTAGE views
Déjà Views Time & Again kits come in several heritage motifs, including Wedding, The Early Years (at right), Military and Career and Through the Years. Each $15.95 kit contains a template, precut frames, printed paper, solid cardstock, border stickers, self-adhesive photo corners, titles and more. C-Thru Ruler also sells coordinating vintage-fabric papers and yesteryear letter stickers. (800) 243-8419, <www.cthruruler.com>
PAGES OF HISTORY 1900s & 1910s
For our turn-of-the-century ancestors, life was a moving experience — from the changing modes of transportation to the millions of immigrants pouring into America. The 1900s and 1910s brought the Wright brothers’ first flight, ragtime and the “Great War.” Bring those decades into your scrapbooks with these elements:
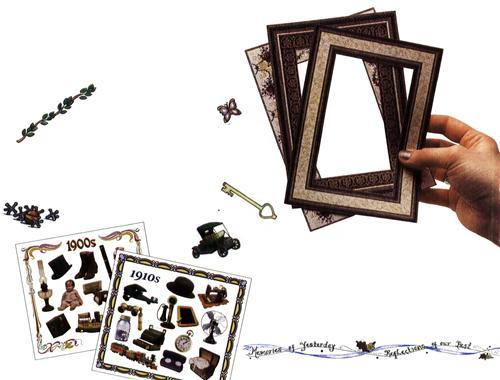
STICKERS Look for stickers from Frances Meyer <www.francesmeyer.com>, Inspire Me <www.inspiremescrapbooks.com> and Karen Foster Design <www.karenfosterdesign.com>.
FRAMES Decorate delicate heritage photos with frames from Minigraphics <www.minigraphics.com>.
DIE CUTS Add more character with Accu-Cut’s shoe, hat, glove and umbrella die cuts <www.accucut.com>.
COLOR Numerous, diverse color palettes exist for the first 20 years of the 20th century. The muted hues used by artists such as Pablo Picasso in the Cubist movement blend well with heritage photos and old documents.
STAMPS
Choose from products such as Rubber Stampede’s old-fashioned bicycle and ocean liner <www.rubberstampede.com>.
PAPER Beautiful papers characteristic of the patterns and colors used in the 1900s are available from Minigraphics <www.minigraphics.com>, K&Company <www.kandcompany.com> and Anna Griffin <www.annagriffin.com>.
Find more scrapbooking advice in Memory Makers magazine. For product news, tips and giveaways, subscribe to Memory Makers’ free e-mail newsletter at <www.memorymakersmagazine.com>.
BRIGHT IDEA
Preservation Technologies has shed light on a pesky paper-preservation problem: how to keep letters, documents, newspaper clippings and other keepsakes from yellowing as they age. Its new Paper Bright spray acts as a “sunblock” for paper. A few squirts will stave off fading and discoloration by soaking up ultraviolet light. The company designed Paper Bright to work in tandem with its popular Archival Mist spray, which halts acid damage to paper by applying an alkaline buffer. Both products come in 1.5- and 5.3-ounce pump-and-spray bottles. (800) 416-2665, <www.ptlp.com>
– Allison Stacy
SCRAPBOOKING Q&A: STAYING POWER
Q. I’ve had problems with my pocket pages falling apart over time. What adhesives do you recommend for keeping them intact?
A. Seasoned scrappers recommend double-sided tape, such as Creative Memories’ Two-Sided Tape Runner <www.creativememories.com>, for best results. Simply apply tape to the sides and bottom of a piece of cardstock that you’re using for your pocket and press firmly to your page. Mary Suits, manager of About Memories in Denver, says double-sided foam tape works well: It holds firmly and the foam allows more room in the pocket for memorabilia.
Making a pocket without any adhesive is another trick. Give grommets a practical use by hammering them in place around the edges of a pocket. Or punch small circles around the edges of your pocket and background paper, then weave in ribbon, raffia or twine to hold the pocket together. Suits says this idea can solve the problem of adhesives showing through vellum pockets.
Glue is another option. Kathy Montgomery, owner of A Moment In Time in Louisville, Colo., prefers Zig 2Way Glue <www.eksuccess.com>. When using glue, it’s important to work fast. The glue must be completely wet to ensure a secure hold.
No matter how you choose to construct pocket pages, don’t go overboard when placing memorabilia inside. The heavier the memorabilia, the greater chance your pocket may rip or come apart after years of use.
ADVERTISEMENT
