Sign up for the Family Tree Newsletter Plus, you’ll receive our 10 Essential Genealogy Research Forms PDF as a special thank you!
Get Your Free Genealogy Forms
"*" indicates required fields
The web offers tons of genealogical information. But capturing it by printing pages can add up to a mountain of paper. Nor is saving web addresses a long-term solution, as web pages can be changed and deleted. Family historians need a reliable, paperless way to capture the information they need from a website and organize that pile of notes. That’s where Evernote comes in. This free, cloud-based note-taking service off ers precise screen clipping—whether it’s an entire web page or just a paragraph—on a PC or Mac.
This ability to clip, store, organize, backup, share and retrieve notes with lightning speed makes Evernote a genealogist’s best friend. Start by signing up for a free account on the Evernote website. Next, download the desktop client to your computer. Evernote will detect if you’re on a PC or Mac and offer the right software. Download the free app (available for iOS, Android, Windows, Blackberry and WebOS) to your mobile devices, and you can access your clippings and notes on the go. Then follow these steps for Evernote’s Desktop or Web Clipper.

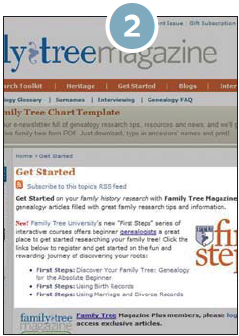
1. Open the Evernote desktop client, (make sure you’re signed in to your account) and minimize the program. Next, display the content to be clipped on your screen. Right-click on the Evernote icon in your computer’s task bar, and select Clip Screenshot.
2. Your cursor becomes crosshairs. Click and drag your mouse to draw a box around the desired area, and release the mouse button. The screen fl ashes, indicating a successful clip.
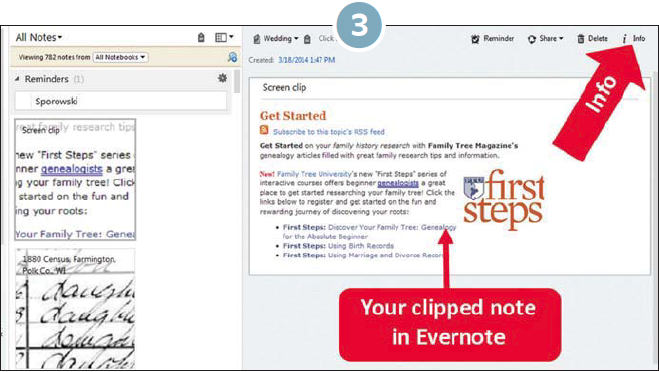
3. The clipping will automatically be saved as an image note in Evernote. Here you can add a note title and keyword tags. Click the Info (I) button to add source citation information, such as the original web address.
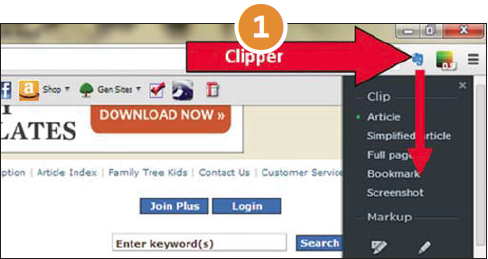
1. Go to evernote.com/webclipper, where Evernote will detect the browser you’re using and off er the right clipper. (For these examples, we used Chrome with Clipper 6.0.) Click the green download button and follow the instructions. Once installed, the small, grey elephant icon appears in your browser bar.
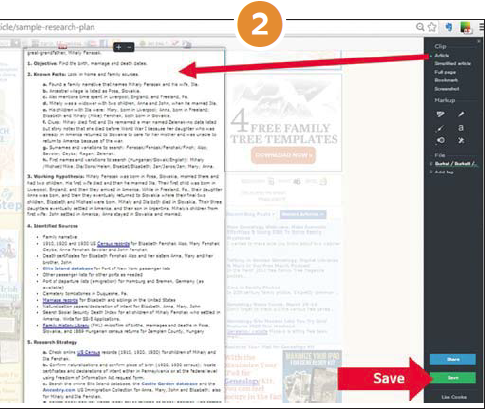
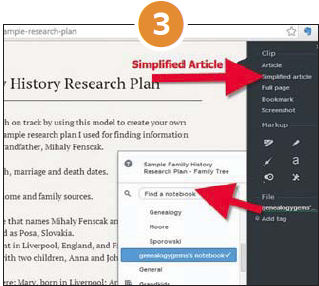
2. Navigate to a page or article you want to clip and click the Evernote web clipper icon in your browser bar. Select the desired type of clipping from the clipper’s sidebar menu. For example, select Article to highlight and clip a single article from the page.
3. Select Simplified Article and extraneous information on the page disappears, leaving only the article itself to be clipped. At this point you can assign your note to a specific notebook and tag it with keywords to make it easier to locate. You also can use the “markup” tools to annotate your clipping with highlighting, text comments, arrows and stamps, or blur out unwanted areas.
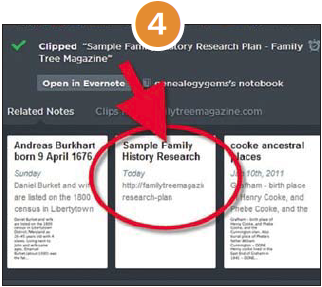
4. When you’re finished, click Save to save your note to your Evernote account. In the pop-up completion window, click the Open in Evernote button to view and work with your note in Evernote on your computer. Your clippings and notes are saved to your computer and, with an internet connection, to Evernote’s cloud storage.
ADVERTISEMENT
