Sign up for the Family Tree Newsletter Plus, you’ll receive our 10 Essential Genealogy Research Forms PDF as a special thank you!
Get Your Free Genealogy Forms
"*" indicates required fields
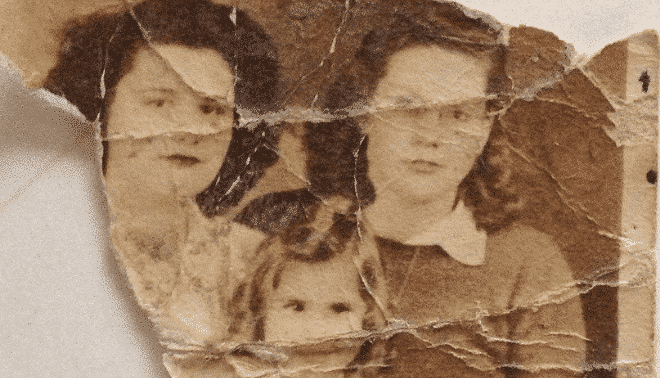
From rips and tears to water damage, there are many ways our precious family photos can degrade over time. Here are a few helpful tips for how to fix a damaged photo and prevent further harm.
- Photograph or scan it immediately. This type of deterioration will continue to progress if it isn’t moved to a stable environment.
- Try to convince your relative of the image’s importance if they’re trying to dispose of it.
- Separate moldy photos from other items. Mold spreads quite easily, and you don’t want to end up with more than one problem.
- Place the item in an acid- and lignin-free folder and a reinforced-corner box.
- Find a good storage spot. Not all storage spaces are created equal—or appropriate for storing archival materials long term. A windowless interior closet in a living area of the home is ideal (not an attic, garage or basement).
- Obtain an estimate from a photo-conservation expert for stabilizing the picture. You can find a conservator in your area on the American Institute for Conservation of Historic and Artistic Works website.
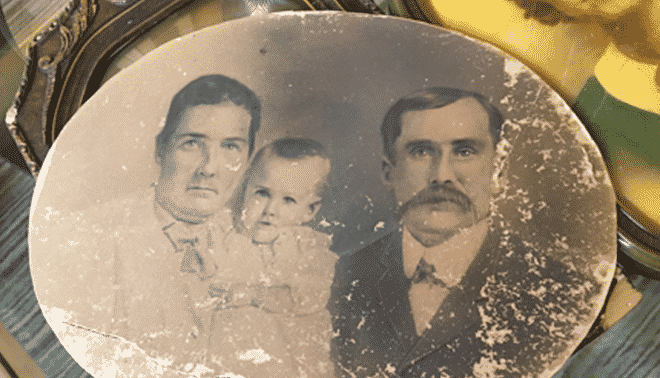
Let’s look at one example: In 2005, Lois O’Malley visited an elderly cousin in South Carolina to talk about family history. On the visit, she discovered he owned a large photo. The thin paper was worn away in places, and there’s evidence of mold and insect damage.

As soon as she saw its condition, she took photos of it to make sure she had a copy. Lois did the right thing. Her camera documented the exact day she took the image. (And it’s a good thing that Lois photographed the picture—When she went back to visit her cousin a few years later, he couldn’t find it.)

Solutions for Common Photo Problems
I Have a Blurry and Faded Photograph. Is There a Fix?
Blurry, faded and color shifted images used to be beyond hope unless you learned how to use an expensive photo-editing program—and even that often didn’t work. Blurry images were destined for the garbage can. But now that’s changed, with a variety of programs now at your disposal.
Our partner Vivid-Pix has the RESTORE software, which can provide several different kinds of photo enhancement within seconds of an image being uploaded. You can adjust color and contrast, zoom in to select sections, and even keep track of metadata. If the colors in your picture have faded or shifted, Vivid-Pix RESTORE helps with that, too.
Megawebsite MyHeritage now also offers enhancements and colorization as part of its Complete Subscription. Add an image to your account, then select colorization or enhancement (or both) and watch the magic happen. A partnership with Mixtiles, makes it possible for you to order them suitable for framing too.
What Can I Do About Rolled Photographs?
Because photographs have a tendency to break, you’ll need to be very careful. Start by placing the photographs into a home-humidification chamber, which will relax them and make them easier to lay flat. Denise Levenick, the Family Curator, has a seven-step tutorial on her website on how to safely work with rolled images.
How Do I Remove a Photo That’s Stuck to Glass?
Framed photos stored in humid climates will often become stuck to their glass. Color photographs on resin-coated paper are particularly susceptible to sticking to glass (and each other) in humid situations. If you try to un-stick the image, the emulsion will likely remain or tear. The services of a professional conservator are required. Another option is to photograph/scan the picture as it is in the glass, then use photo-editing software to sharpen as necessary.
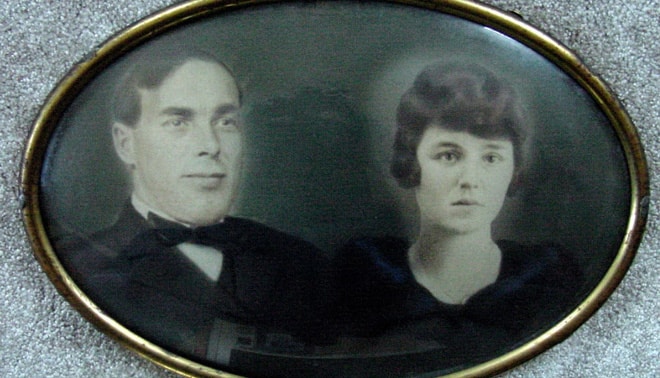
You’ll want to distinguish between pictures trapped in glass from pictures that were meant to adhere to glass. In the early 20th century, studios offered images on curved glass. Those photographs aren’t meant to be removed from the glass, and trying to do so will actually damage or destroy them. In these cases, the best solution is to photograph the entire photo and frame.
What Should I Use to Scan a Relative’s Photos?
You’ll want to invest in a flatbed scanner that fits in a small suitcase so you can cart it around. Use the scanning tips mentioned earlier in this article and keep track of each image on a simple chart.
Alternatively, some apps can bring the power of a scanner to your smartphone. Google PhotoScan is one useful (and free!) option.
As you’re collecting photos from relatives, try to also preserve any memories or stories they might associate with them. A mobile app called Storyglory is one tool, allowing you to attach voice recordings to photos.
How Do I Remove a Photo from an Album?
Our photo albums tell a story. Turning each page reveals another part of your family history, and someone organized the album with intent and purpose. So, unless the album is a toxic mess of poor-quality paper, glue, and plastic overlays, you should probably leave it and its photos alone. Future family historians will thank you!
Disassembling an album will almost certainly do more harm than good. For example, card photograph albums often have broken covers, but the covers are likely still providing some protection for the images within them. And, though you might be tempted to remove photos from a black paper album so you can view any information on their backs, there’s rarely details written there. Your ancestors likely used white ink to write beneath the pictures instead.
Instead of taking the album apart, photograph each of its pages. Make sure you scan and number/name the photos in such a way that you’ll always know where images sit in the actual albums, such as “upper left page 30.” Then use your digital photo organizer to recreate the album in digital form making it easily shareable.
Storing photo albums is easier than you’d think. All it takes is some unbleached muslin fabric and a box with reinforced corners.
Should I Remove Photos from Magnetic Albums?
Having said that, magnetic photo albums should be taken apart. Over time, the acidic pages (which are actually glue strips or dots, not “magnets” of some kind) will deteriorate the images they hold and stain them. And the longer you wait, the more your photos might stick to the page.
First, document the order of the photographs by taking pictures or scanning each page. Then purchase a new album with acid- and lignin-free pages and a non-PVC polyester overlay. Carefully remove all your images from that nasty magnetic one, and re-create the order of the images on new pages.
Getting the pictures off the pages won’t be easy. With any luck, the aging glue will release the images without trouble. If not, you can gently slide a piece of dental floss between the image and the page. Just be careful—it’s possible to tear a photo even with floss.
And, of course, don’t keep buying magnetic photo albums. (No matter how cheap they are on sale!) Stick with the good stuff: acid- and lignin-free models with polyester overlays. They will last and do minimal damage to your photos.
Should I Use Kitchen Bags for Storing Images?
It’s right to question the use of ordinary plastic bags on archival materials. Whether or not they’re safe for photos depends on the type of plastic. Polypropylene is a stable polyester and suitable for images. But if the bag has a scent of strong plastic, then they are usually not fit for long-term storage of pictures.
Can I Store Different Types of Materials Together?
Family collections usually come to us as photographs, newspapers and paper memorabilia all jumbled together. You likely want to keep it all together, but it’s actually best to store them separately.
If you have news clippings about a wedding as well as a picture of the smiling couple, place each item in a separate acid- and lignin-free folder. This way, the acid from the newspaper won’t stain the picture. If you don’t want to lose how they are linked together, a digital photo organizer can help. Create a digital album/folder for the couple and add the items.
4 Tips for Preserving Family Photos
Time is of the essence, so make no mistake: Now is the time to work with your family photographs. Whether they’re pictures you took yourself or treasures you inherited from a family member, the photos that add so much personality to your research are in danger. Light, fading ink, pests and natural disasters all pose serious threats, so it’s imperative to preserve your family photos—particularly those already fragile or damaged.
Contrary to popular misconceptions, preserving your photographs doesn’t have to be expensive. Supplies aren’t nearly as costly or hard to locate as they once were. In fact, you can find them at a variety of locations, including library/museum suppliers and art stores.
You can’t stop time from decaying your family photos and documents—but you can slow it down, and prepare for even the worst scenarios. With the right tools and know-how, it’s easy to begin caring for your pictures. Start by following these basic preservation rules to keep your family archives safe. Here’s how you can save your photos from disaster in the first place.
1. Avoid Temperature and Humidity Extremes
Photos are susceptible to extremes of temperature and humidity. While you can’t do anything about the weather outside your house, you can somewhat control the interior environment.
First, avoid all the “problem” storage areas: basements, attics and garages. Not only are those zones subject to temperature and humidity fluctuations, they’re also usually home to critters that love to eat or nest in paper—including your family photos.
Then, take proactive steps to manage the climate of your other interior spaces as best as you can. You can’t turn your house into a museum, but a few techniques and tools can get it under control.
For example, try to manage temperature fluctuations by storing your photos in a spot away from drafts—winter cold can harm as much as summer’s heat—as well as heating systems. In addition, use either a de-humidifier to remove excess moisture in a space, or (if your house is too dry, particularly in the winter) a humidifier to moisten the air.
If you’re looking for a cheaper way to manage humidity, try a reusable desiccant container. It’s a small box with an inert substance that attracts and holds water vapor. When the material is saturated (usually indicated by a dot turning green), bake the container in a ventilated oven to dry it out. While I wouldn’t advise putting one in direct contact with photos, you could use it in the same closet(s) you’re storing photos in. They’re available from museum suppliers such as Gaylord Archival.
2. Buy the Right Materials
There are more archival-supply outlets than ever before—just check labels on their products for the right terminology. When purchasing storage materials, look for industry-appropriate phrases such as acid- and lignin-free paper or cardboard and non-PVC plastic (preferably polyester or polypropylene). And for photos, you just need good-quality boxes and sleeves that fit those criteria. You can buy them in art-supply stores, museum storage companies, storage stores, and online vendors like Gaylord.
3. Scan Once and Store
Scanning your images should become a reflex. Digital files can be easily shared online, backed up on cloud-storage services, or sorted using a program that embeds important metadata like date created.
The Library of Congress suggests scanning, when possible, using the following specifications:
- a minimum of 1200 DPI: This resolution gives you the most detail and flexibility. Downsize copies of files as necessary for online sharing.
- TIFF files: These store the most data.
- 100-percent scale (i.e., the same dimensions as the original photo, instead of reducing the size)
Developing a system that you can follow each time (e.g., scan, then label, then file) is important. In addition, image files will be large, so you’ll need a backup hard drive and/or an online cloud service such as Forever Storage or Dropbox.
4. Identify and Label
An unidentified photo is one that later family members may consider disposable. If you have a lot of images without names and are intimidated by the idea of working through them, take it slow—one picture at a time.
Write anything you know about a photo or its subject on its back—name, date, occasion—even if you don’t know much. Add your own name and the current date so your descendants will always know who labeled the photos. Safe labeling tools include a soft lead pencil for paper-based prints or an approved waterproof, fade-proof, quick-drying pen (not a Sharpie) for resin-coated pictures. One option for the latter is Zig Photo Signature Pens, which are widely available in scrapbook-, art- and office-supply stores.
You can even embed all this data into a digital file using programs like MemoryWeb and Vivid-Pix.
A version of this article appeared in the March/April 2021 issue of Family Tree Magazine.
Pin this article for later!

ADVERTISEMENT