Sign up for the Family Tree Newsletter Plus, you’ll receive our 10 Essential Genealogy Research Forms PDF as a special thank you!
Get Your Free Genealogy Forms
"*" indicates required fields
Family photo mysteries usually start with one simple — and easily preventable — problem: lack of identification. Think about the unknown faces peering out from your family’s old photographs. At some point, someone knew exactly who the people in those pictures were. Unfortunately, you can’t go back and ask Great-aunt Gertrude to caption all the images in her album, and you can’t make labels that have faded or smudged away reappear (though you might try!).
But you can avert photo confusion for future generations — by labeling the old images you’ve managed to identify, as well as the present-day pix you plan to pass on. Putting names and dates on your pictures increases the probability that your descendants will keep them. And it’s simple to label your photos safely: Just use the right tools and follow a few basic rules.
Instrumental tips
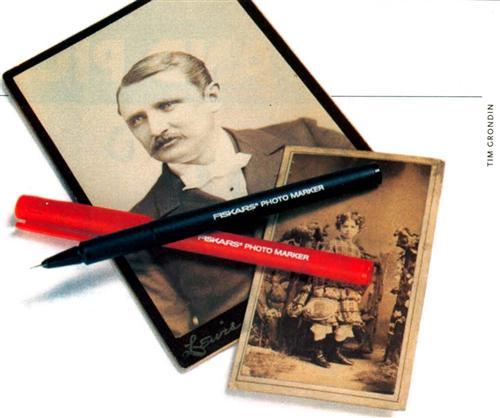
Let’s start with the tools you don’t want to use. Never use a ballpoint pen or a felt-tip marker. Ballpoint pens smudge and make indentations in images, and felt-tip markers’ water-soluble ink can bleed into pictures.
You can use two types of writing implements for identification purposes. A soft lead, such as a graphite sketching pencil, is best for labeling paper photos. Contemporary photos are printed on resin-coated paper, which makes them difficult to write on without a special pen. Look for ink that’s waterproof, fade-resistant, permanent, odorless (when dry) and quick-drying. Black ink is preferable, since colored inks tend to fade over time. You can find these pens and pencils in art-supply and scrapbooking stores.
Label lessons
In each label, include the full name and life dates of everyone pictured. Don’t worry if you don’t have all the facts, such as maiden name and death date, or if you don’t know who everyone is. Just write what you do know; partial information is better than none at all. If you know when or where a picture was taken or what the occasion was, include those details, too.
Just your type
Now it’s time to learn how to label the different types of pictures in your family photo collection. One rule applies to all images: Don’t write on the front — you don’t want to mar the surface of your picture.
• Cased images: You can’t write directly on daguerreotypes, ambrotypes and tintypes, but certain storage and labeling methods will work. Some people include in the cases small slips of acid- and lignin-free paper, but those tend to get misplaced. The best way to label your cased images is to purchase envelopes or boxes that are acid- and lignin-free and write the ID on the storage container.
Tintypes are sometimes found in paper mounts or without any enclosure. Rather than affix a label to the back — you shouldn’t affix anything to an original image — place the tintype in a polypropylene or Mylar sleeve large enough to hold a piece of acid- and lignin-free paper behind the image. Then, you can write on the paper without causing damage to your heritage photograph. Polypropylene and Mylar products, as well as acid- and lignin-free enclosures, are available from archival suppliers such as Hollinger Corp. (800-634-0491, <www.hollingercorp.com>) and University Products (800-628-1912, <www.universityproducts.com>).
• Paper images: Paper prints and modern, resin-coated pictures are the easiest images to label because you can write on the backs or use the method suggested for tintypes. Be sure to use the appropriate pen or pencil for the type of photograph.
• Slides: Identifying slides requires a fine-point marker with the same specifications as those used on resin-coated prints — waterproof, odorless (when dry), fade-proof and quick-drying. Use this type of pen for both paper and plastic mounted slides.
• Digital images: With the new photo software on the market, you can organize and caption your digital pix — those taken with a digital camera, downloaded or scanned — at the click of a mouse. Try Lifescape Solutions’ Picasa <www.lifescapeinc.com/picasa> or Adobe’s Photoshop Album <www.adobe.com/products/photoshopalbum>. See the June 2003 Family Tree Magazine for more on these programs.
• Negatives: Polypropylene pages designed for negative storage make finding your negatives a snap. Across the top of the page, include a brief description of what’s on the roll and when the pictures were taken. The pages come pre-punched, so try storing all your negatives in notebooks for easy retrieval.
You probably can’t identify all your photographs, but it’s time to take care of the images you know something about. If you leave the identification to someone else, either it won’t get done, the caption information will be incorrect or the pictures will get discarded. After all, isn’t that how we all end up with boxes of unidentified photographs?
From the October 2003 issue of Family Tree Magazine.
ADVERTISEMENT
