Sign up for the Family Tree Newsletter Plus, you’ll receive our 10 Essential Genealogy Research Forms PDF as a special thank you!
Get Your Free Genealogy Forms
"*" indicates required fields
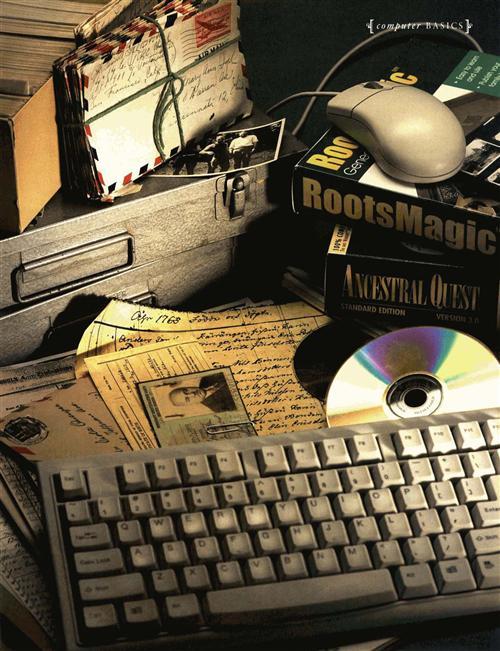
Your family tree findings are spilling out of their shoebox, and the manila folder marked “Genealogy” is splitting at the seams. Your hand-drawn pedigree charts look as if they were sketched by angry chickens. It’s time to upgrade from old-fashioned paper to high-tech genealogy software, and turn your family history into bits, bytes and pixels.
But how to begin? If you think GEDCOM sounds more like a cellphone company or Pentagon command than a family tree file type, or if you’d guess that PDF stands for Pretty Darn Fine instead of Portable Document Format, you may not feel ready to leap into the brave new world of digital family history. Never fear: Just as you mastered genealogy Web sites and found your way from Cyndi’s List <www.cyndislist.com> to GenForum <genforum.genealogy.com>, you can figure out what you need to know to buy the right genealogy software and start inputting your research results.
First, the good news is that you may not have to buy anything, Some programs, such as Personal Ancestral File, are free — just download them from the Internet. Others are “shareware,” letting you try before you buy. See the box on page 64 for a complete rundown of both free and commercial software choices.
If you use a Macintosh, the bad news is that your options are a lot more limited than those of computer owners running some version of Windows. You still can do everything you need to computerize your family tree, with all the bells and whistles — you just won’t have as many choices to wade through as your Windows brethren.
Electrifying the index card
Whatever kind of computer you use and whichever program you pick, the basics are pretty much the same. Once you’ve installed the soft-ware and launched it for the first time, you’ll see a screen that looks like some variation of a genealogy chart — typically, a simple family group sheet. You type in your own name and date and place of birth, then start working backward with your parents’ info. The software stores the facts you enter in a database — much like the electronic catalogs your library uses to index its collection, or the powerful data- i crunching programs your credit-card company relies on to keep track of who you are, where you live and how much you owe. Essentially, it’s not much more complicated than a batch of index cards, one card per person with spaces (fields in computerspeak) for each type of fact, such as name, birth date, birthplace and so on.
So who needs a computer program? Why not just write everything on index cards, which will never “crash” on you? For one, genealogy software not only remembers the facts you enter, but also the relationships between those facts. When you fill in your grandmother’s name in the space for your father’s mother, the program makes a link between those individuals — and every other person already linked to them. So when you look at the facts you’ve entered from a different perspective, these relationships all follow along Click on your grandmother to show all her descendants, for example, and there’s your dad and you and your uncle Harry and cousin Mabel. The program even knows that you and Mabel are cousins, without your having to explicitly tell it so; it can figure out the relationship from what you’ve entered about the rest of the family. (Not sure whether you and Mabel are first or second cousins, maybe once or twice removed? The software can calculate that for you, too.)
This ability to look at the same information many different ways is part of what gives genealogy programs their power. Most programs, for instance, let you view a list of all the individuals in your family tree at once. Depending on the software, you may be able to sort this list by first name or surname, by date or even by place. Need a list of everyone you might want to look up at the courthouse in the old ancestral stomping grounds of Pumpkin Center, Iowa? Your software can churn out a report of everyone who has Pumpkin Center in a place field. Let’s see your old index cards do that.
Most programs also can speed up your data entry and even catch errors as you type. However you type in dates, the program will turn them all into the same format — which you can pick (8 March 1856? 3/8/1856?). Smart software can “learn” as you use it, so that once you’ve entered Pumpkin Center, Corncob County, Iowa, a few times, the program will suggest that whole long place name as soon as you type Pump. Just hit Enter or Tab to accept the suggestion (or keep typing if you’ve also got a Pumpernickel, Ga.). Not only does this save keystrokes, but it also keeps your data consistent, so later you’ll be able to find all the Pumpkin Center entries without missing the one where you omitted the county or misspelled it Centre.
Or suppose you slip up and enter your grandfather’s marriage date as 1827 instead of 1927. Your software will point out that you have him getting married before he was born. Most programs also include date calculators to help you figure out Great-grandma’s age when she died, or even to work backward to her birth based on her death date and age.
Adding sources and pictures
Once you start entering your research findings, you’ll also want to note where you found each fact. Think of these source citations as electronic footnotes, only without the aggravation footnotes caused you in American Lit class. Genealogy software can keep track of each source you type, so the next time you cite the same source, you simply select it from a list.
Most programs will help you enter new sources by offering a list of source types (census, birth certificate, obituary) and blanks to fill in key elements, such as title, author and repository where you found it. If none of those options fit, you can type in “freeform” text to describe your source.
A few programs go a step further and let you add an actual image of your source. This isn’t as tricky as it sounds: Just slap that death certificate on your scanner, take a picture with a digital camera or save the image you found on the Web (in Windows, right-click to Save Picture As…). Then the genealogy software walks you through the process of finding the image file on your computer and importing it.
Pictures of sources aren’t exciting to look at, but many genealogy programs also let you add family photos to your files. The process works pretty much the same way: Once you’ve got Grandpa’s graduation picture on your computer, you click on Grandpa in your family tree file and select Add Picture (or a similar command). Pick the appropriate picture file in the resulting dialog box, hit OK and there he is. Several programs store images in “scrapbooks” that are linked to each individual and/or family, while others treat them more like facts that just happen to be pictures.
Some programs don’t stop there. Your genealogy file can incorporate sound clips and even short home movies. Pretty much anything you can digitize and get into your computer can become part of your electronic family tree, from the song played at your grandparenrs’ wedding to home movies of their trip to the Grand Canyon. And you thought your kids were the only ones with a use for video clips or music downloads!
Plotting your pedigree
There’s no point in getting all your genealogy findings into the computer, of course, if you can’t get them out again, and family tree programs offer a wealth of “output” options. The one you’ll probably use the most — and a big part of these programs’ appeal in the first place — is the family tree chart. Far more flexible and attractive than preprinted, fill-in pedigree forms, these computerized charts take the data you’ve entered and display it in a variety of “trees.” You can customize everything from the facts they show to the colors, line widths and fonts. You even can create family trees that include the photos you’ve added.
Turning your data into trees is usually as simple as selecting a tree style from a menu. But the forest of family tree styles can be a bit confusing, and the differences are more than cosmetic: Different tree designs display different views of your family facts. Here are some of the most common styles:
• Ancestor tree: This basic format displays all the ancestors of a given individual.
• Descendant tree: This tree shows just the opposite: an individual’s descendants.
• Hourglass tree: A combination ancestor and descendant tree, it puts the selected individual in the middle, with ancestors above and descendants below.
• All-in-one tree: It’s similar to an hourglass tree, but includes everyone who’s related to the individual: cousins, in-laws and so forth.
• Outline descendant tree: Really a text document rather than a graphic “tree,” this style lists a person’s descendants and is indented to show generations.
• Pedigree tree or chart: Also more text than graphic, a pedigree tree shows three to five generations of one family.
The graphic tree styles also may come in both standard (the familiar basketball-bracket look) and fan (which spreads and squeezes the boxes like the folds of a fan) shapes. A waterfall tree shows descendants cascading down from upper left to lower right. Some programs also let you choose between a horizontal or vertical arrangement for some or all types of trees.
Besides these visual family trees, genealogy software offers a range of all-text reports, including these popular options:
• Family group sheet: This report puts all the basic facts about a nuclear family — parents and children — on a single sheet.
• Descendant report: It’s similar to the outline descendant tree, but usually with more detail on dates and places.
• Ancestor report: It’s like a descendant report, but goes backward in time.
• Genealogy report: Here, the software fleshes out the facts you’ve entered, creating a narrative of an individual’s ancestors or descendants. If you’ve entered Martha Williams and a birth date of April 12, 1778, in Nash County, NC, for instance, the genealogy report turns that information into a sentence: “Martha Williams was born April 12, 1778, in Nash County, NC”
Programs use various schemes to number and label individuals in these reports, in keeping with the conventions genealogists have used over the years (especially in research journals, such as the New England Historical and Genealogical Register and National Genealogical Society Quarterly), A Register report marks the parent with an Arabic number (1), and numbers children with small Roman numerals (i, ii, iii, iv…); every child later listed as a parent also gets an Arabic number (2, 3, 4 …) for matching that individual later in the report. The Modified Register or NGS Quarterly system assigns each child both a Roman and an Arabic numeral, with a plus sign for those who repeat as parents in the next generation. The Ahnentafel system — from the German for “ancestor table” — looks confusing at first, but can he quire handy: It assigns every individual in the report a unique number. You double the person’s number to get his or her father’s number, and add one to the father’s number to get the mother’s number. (This is the standard numbering system for pedigree charts.)
Besides these general reports, programs can create specialized reports of surnames, relationships and timelines. You can combine the narrative-style reports with family trees and images to automatically generate whole “books” that tell your family history. You also can publish reports and family trees on the Internet, using the HTML code that makes the World Wide Web work. Don’t worry — you don’t have to become a code geek: The programs do it all for you, and even turn your pictures into Web-ready images.
Most genealogy software can save reports in a format (usually RTF, short for Rich Text Format) that your word processing program can open. Some also can generate files that are compatible with spreadsheet programs such as Excel. A few family tree programs recently have added the capability to convert your reports, trees and family history books into Adobe’s PDF format. The resulting PDF files can be saved on CD, e-mailed or posted on the Web. Anyone who has the free Adobe Reader software (downloadable from <www.adobe.com/products/acrobat/readstep2.html>) can view them — no need for cousin Mabel to have the same genealogy program you do.
Getting into GEDCOM
If you want to share your family tree in a format that others actually can use — not just look at — you’ll need to get your software to export a GEDCOM file. A convoluted acronym for Genealogical Data COMmunications, GEDCOM is the universal format for pedigree files — a lingua franca that lets different genealogy software exchange information. You also can import GEDCOM files into your family tree, adding whole branches of somebody else’s work with a single click (but for heaven’s sake, check that other researcher’s work before you do!).
GEDCOM is really just a database format. Genealogists and computer programmers have gotten together and agreed on certain standard types of information (birth dates, for example) and ways to tag and store that information in a computer file. So when Family Tree Maker, say, sees a GEDCOM file that’s created by RootsMagic, it knows to put Grandpa’s birth date in the correct slot and not in his Occupation field instead. GEDCOM can handle only the generic facts common to most programs, however — not the extras such as family photos, movies or scanned source pages. Although GEDCOM can easily translate regular source citations, computer programs deal with sources differently enough that you may lose odd bits here and there.
Creating a GEDCOM file typically is as easy as picking Export GEDCOM from a menu and clicking through a few dialog boxes. Then you can share the file with other researchers by e-mail or on a disk, upload it to your own Web site, or add it to an online collection of GEDCOMs such as RootsWeb’s WorldConnect<worldconnect.rootsweb.com>.
Importing a GEDCOM file into your own family tree is almost as straightforward. Most programs offer some sort of merge-management feature that walks you through combining the new data with your existing file: Is the imported Harry Smith your good old Uncle Harry, for example, or some new fellow with the same name?
GEDCOM also is the key to switching genealogy programs without losing all your hard work. Although a few programs can read the file formats of their competitors, usually the process requires these steps:
1. Export a GEDCOM file from your old program to your hard drive.
2. Launch your new genealogy software.
3. Import the GEDCOM into an empty family tree file in the new program.
Simple, right? You may have to go back and clean up a few details or copy and paste special bits that got lost in translation, but your basic family tree facts will pop up in the new program like magic. (Once you know all of the information is safely stored in your new program, you can uninstall the old one.) So you shouldn’t sweat too much the decision of which genealogy software to start with. If you don’t like it, simply switch to something else.
Now, if only that shoebox you’ve been using had an “export” feature …
ADVERTISEMENT
