Sign up for the Family Tree Newsletter Plus, you’ll receive our 10 Essential Genealogy Research Forms PDF as a special thank you!
Get Your Free Genealogy Forms
"*" indicates required fields
Old maps are invaluable in deciphering your ancestor’s past, but sometimes you need to put yesterday’s geography into today’s context. The New York Public Library (NYPL) has just the tool for that task, Map Warper. It’s free, though you’ll need to register or login with your GitHub, Twitter, Google or Facebook account to rectify maps, or overlay them with modern maps and align coordinates. But you also can search the library’s 20,000-plus digitized maps and view those others have already rectified. Either way, it’s a handy tool to locate the sites of ancestral places despite development, address renumberings and street reroutings.
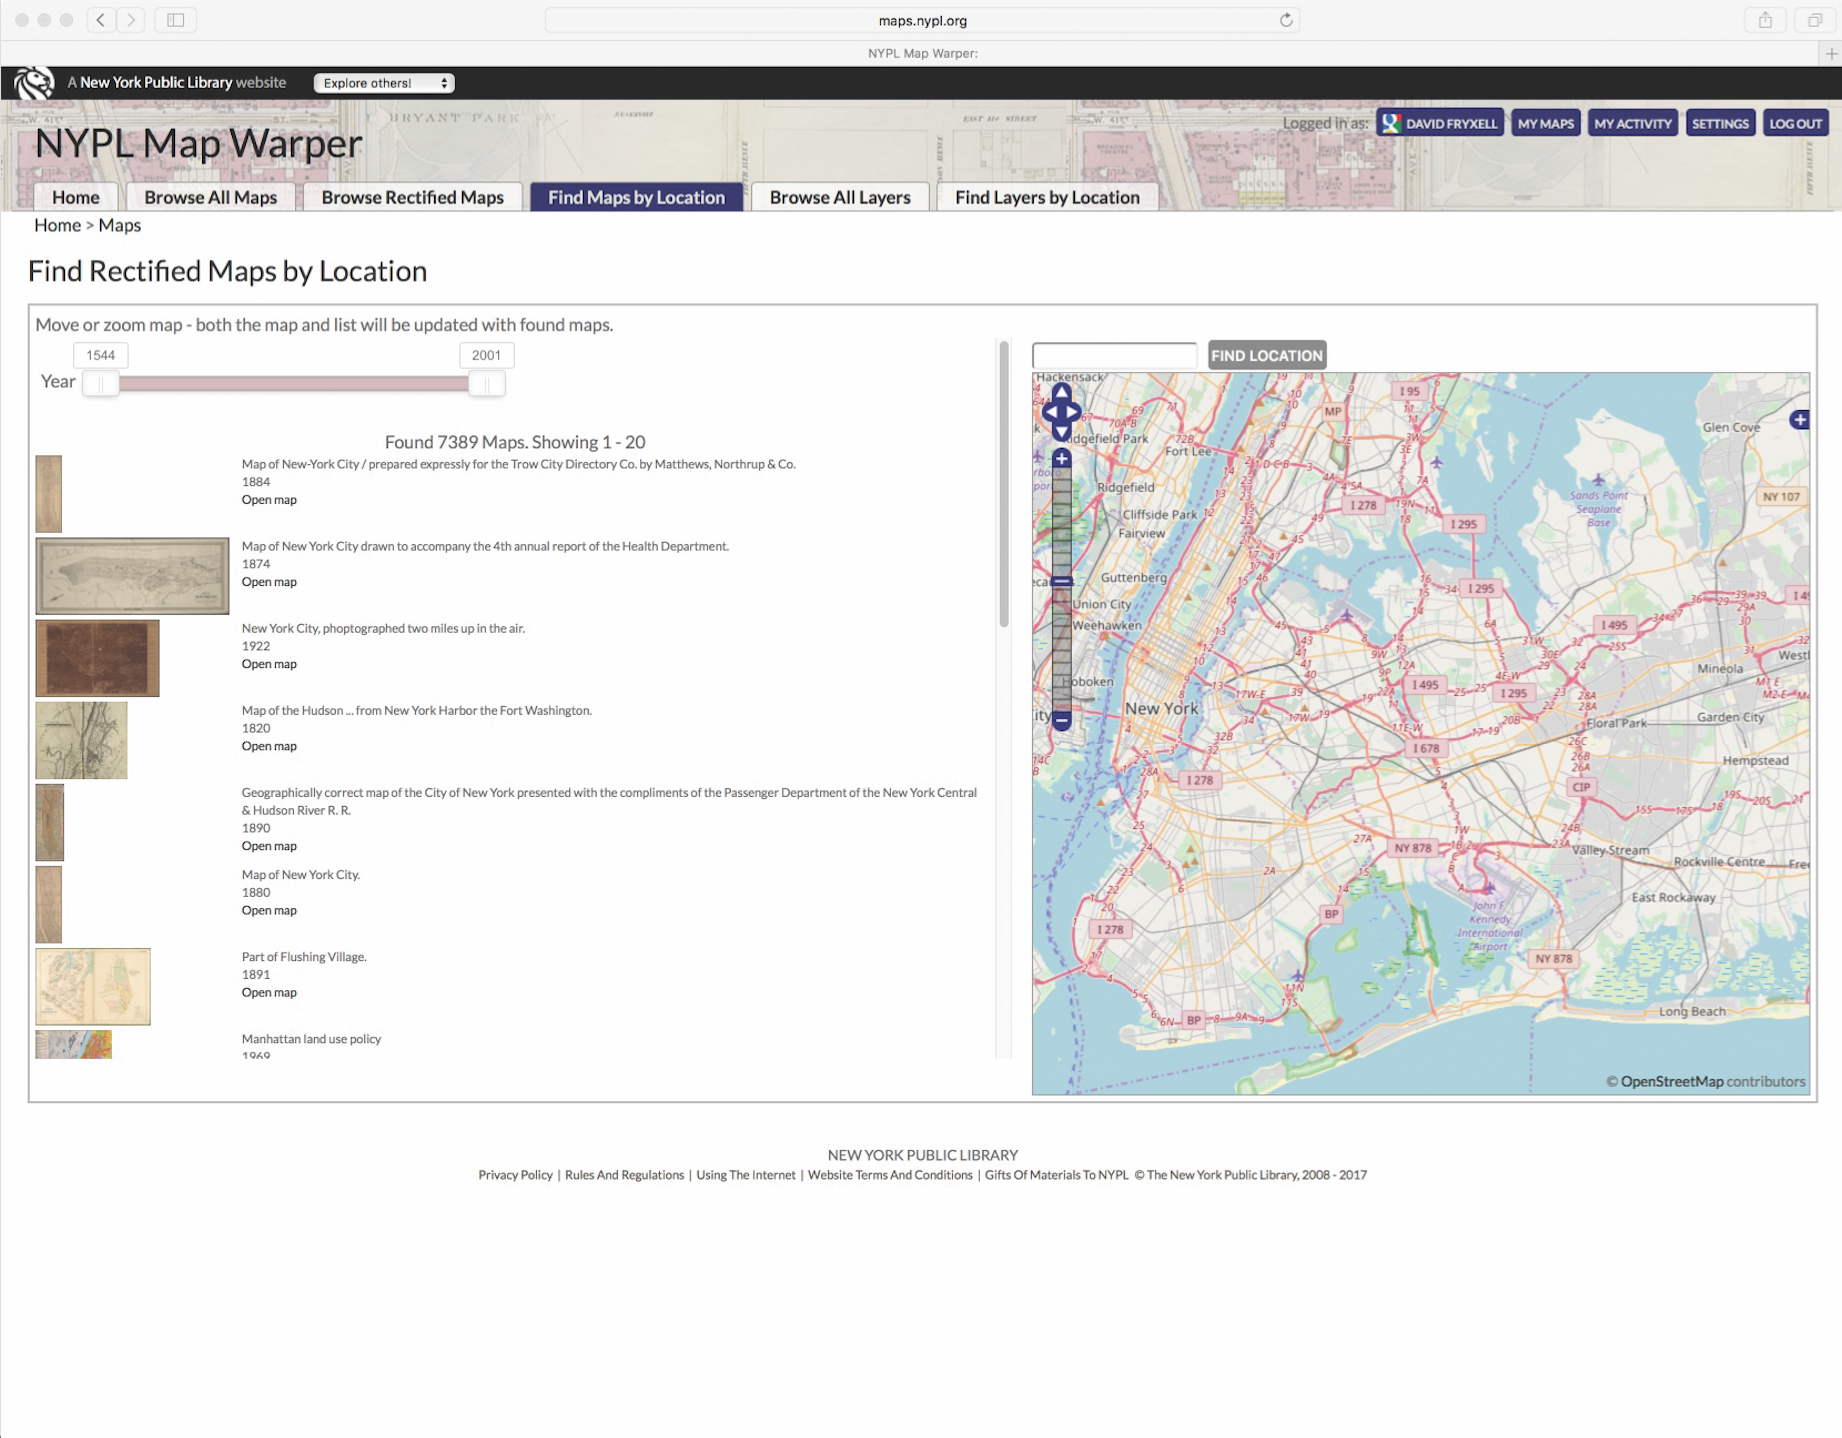
1. Just enter a place in the search box at the top of the home page, or click Browse All Maps to find old maps of your family’s hometown. Date sliders let you narrow the time frame. You can click a radio button or choose Browse Rectified Maps to find only maps that others have already rectified. The slickest way to find a map, however, is to click the Find Maps by Location tab. This brings up a list on the left and a modern map on the right. As you pan and zoom the map, the list updates to put the closest matches on top. Playing around with this view, you’ll see that the map collection is strongest for the NYPL’s own northeastern backyard.
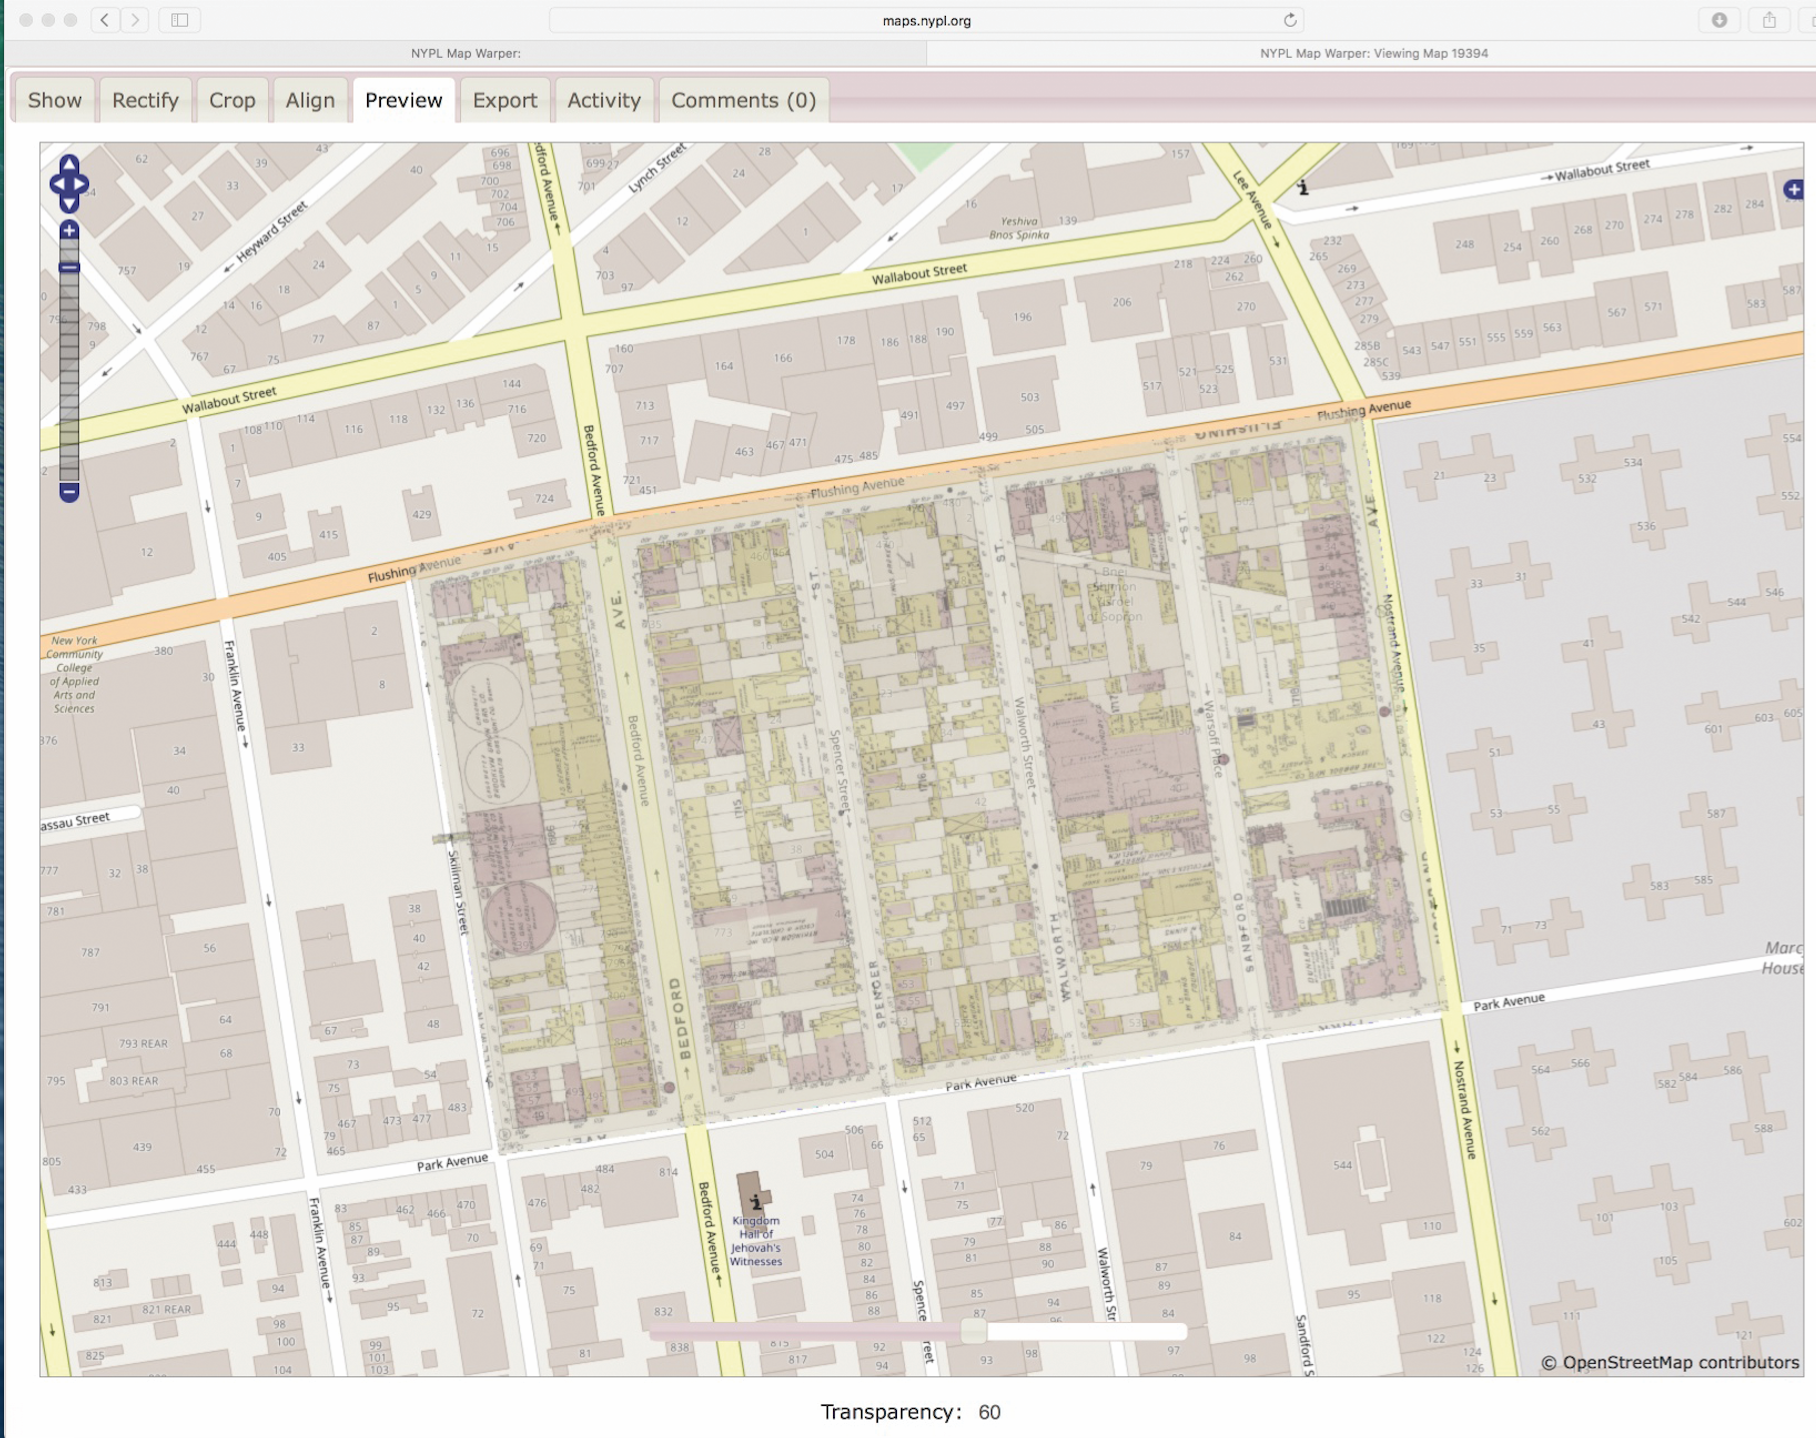
2. Once you’ve found an old map, you can save it to your account, open it in NYPL’s regular digital collections for a higher-resolution view, or download a file (KML) to import into Google Earth. Click the “Export” link for still more options. To see a rectified map overlaid on a modern view, click “Preview.” Use the transparency slider that pops up at the bottom to adjust the transparency of the old map.
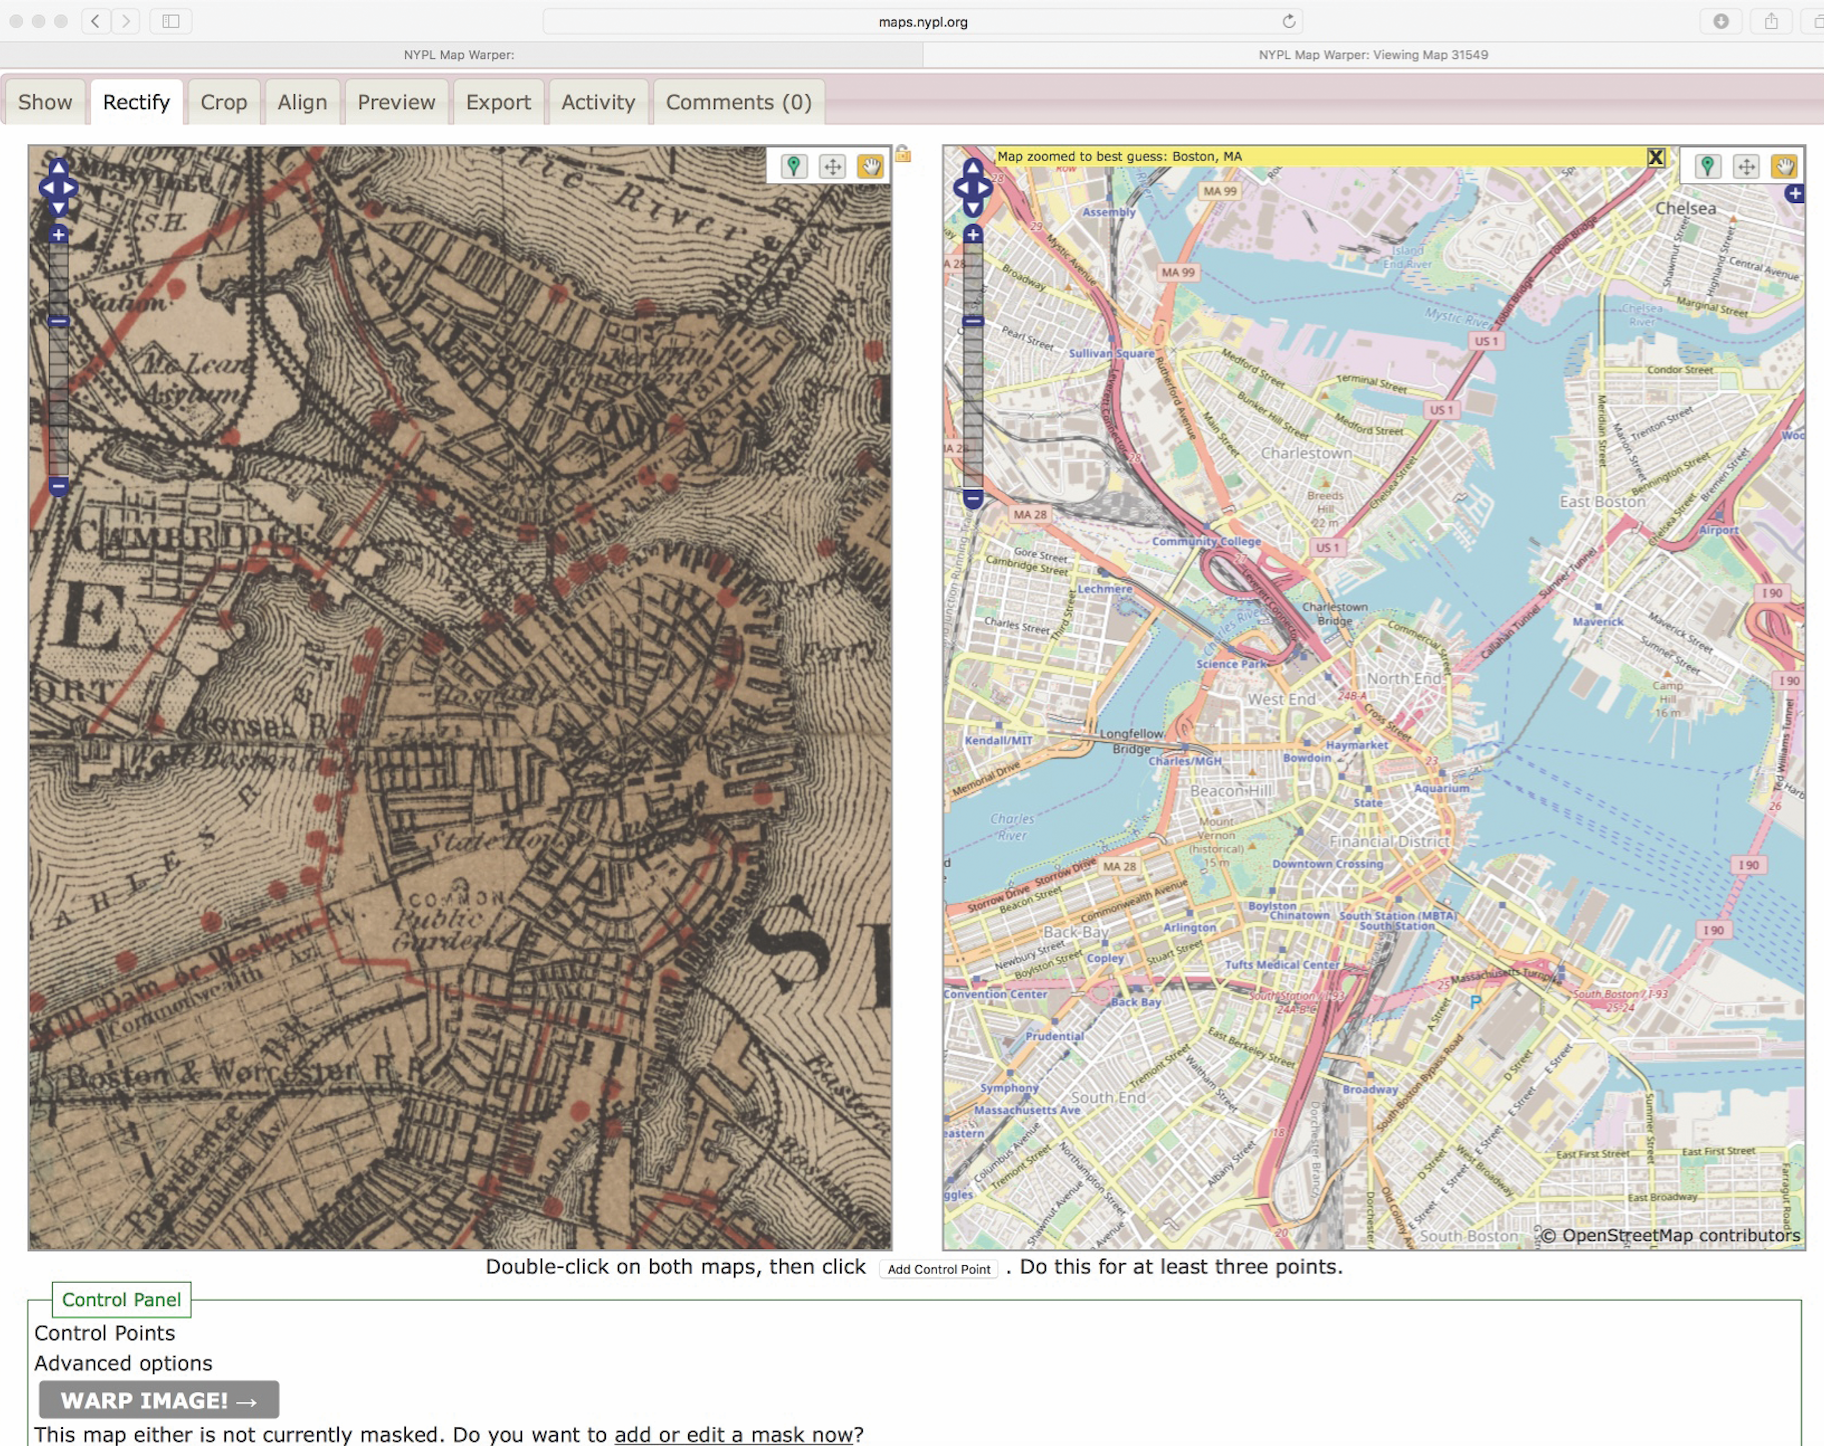
3. If the map you’re interested in hasn’t already been matched to contemporary coordinates, a few more steps will make you a veteran “rectifier.” Once you’ve selected a map to work with, click the “Rectify” tab above it (you must be logged in). This brings up a split screen, with the old map on the left and a modern street map on the right.
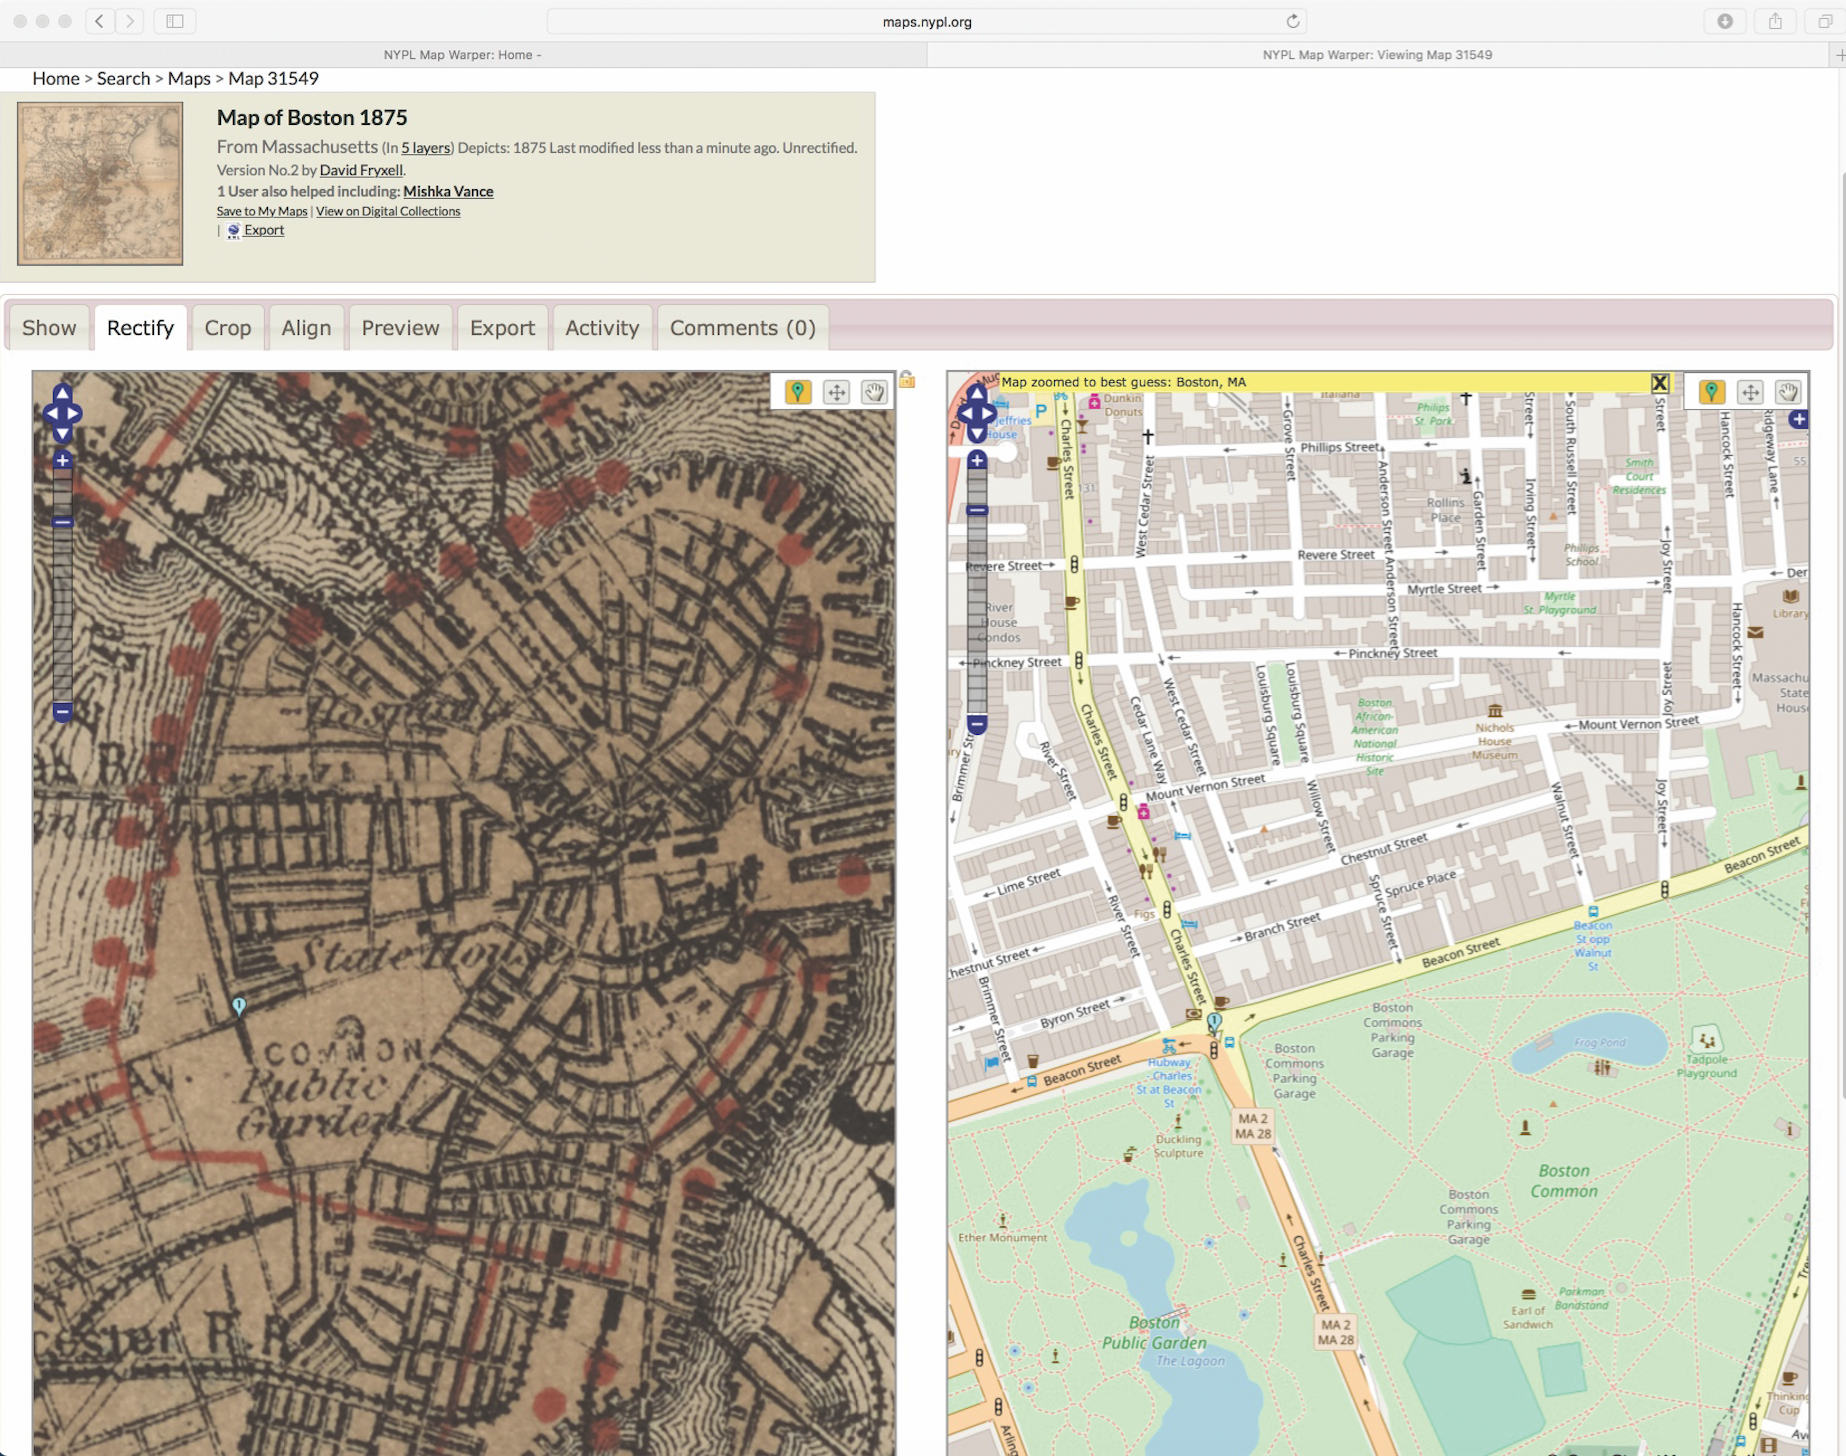
4. Start looking for a location common to both maps, such as a building or intersection (I chose Beacon and Charles streets). You may need to zoom in or pan. To mark matching “control points,” select the green map pin icon on one map and click on the spot you’ve identified; then use the same tool to click the matching spot on the other map. If you misplace a point, just click and drag it to the correct location. When you’re done, click Add control point. You can rectify a map with as few as three points, but aim for four or more if you can. For best results, try to create control points in a square or rectangle.

5. To see how you did, expand the Control Points view below the map and look to the right for the error score; below 10 is acceptable. You can delete a point with too high an error value and choose another one if needed. To clean up your map by cropping out borders and other non-map clutter, select “Apply clipping mask when rectifying?” or click “add or edit a mask now.” Finally, click Warp Image! The rectifying process may take awhile, so be patient.
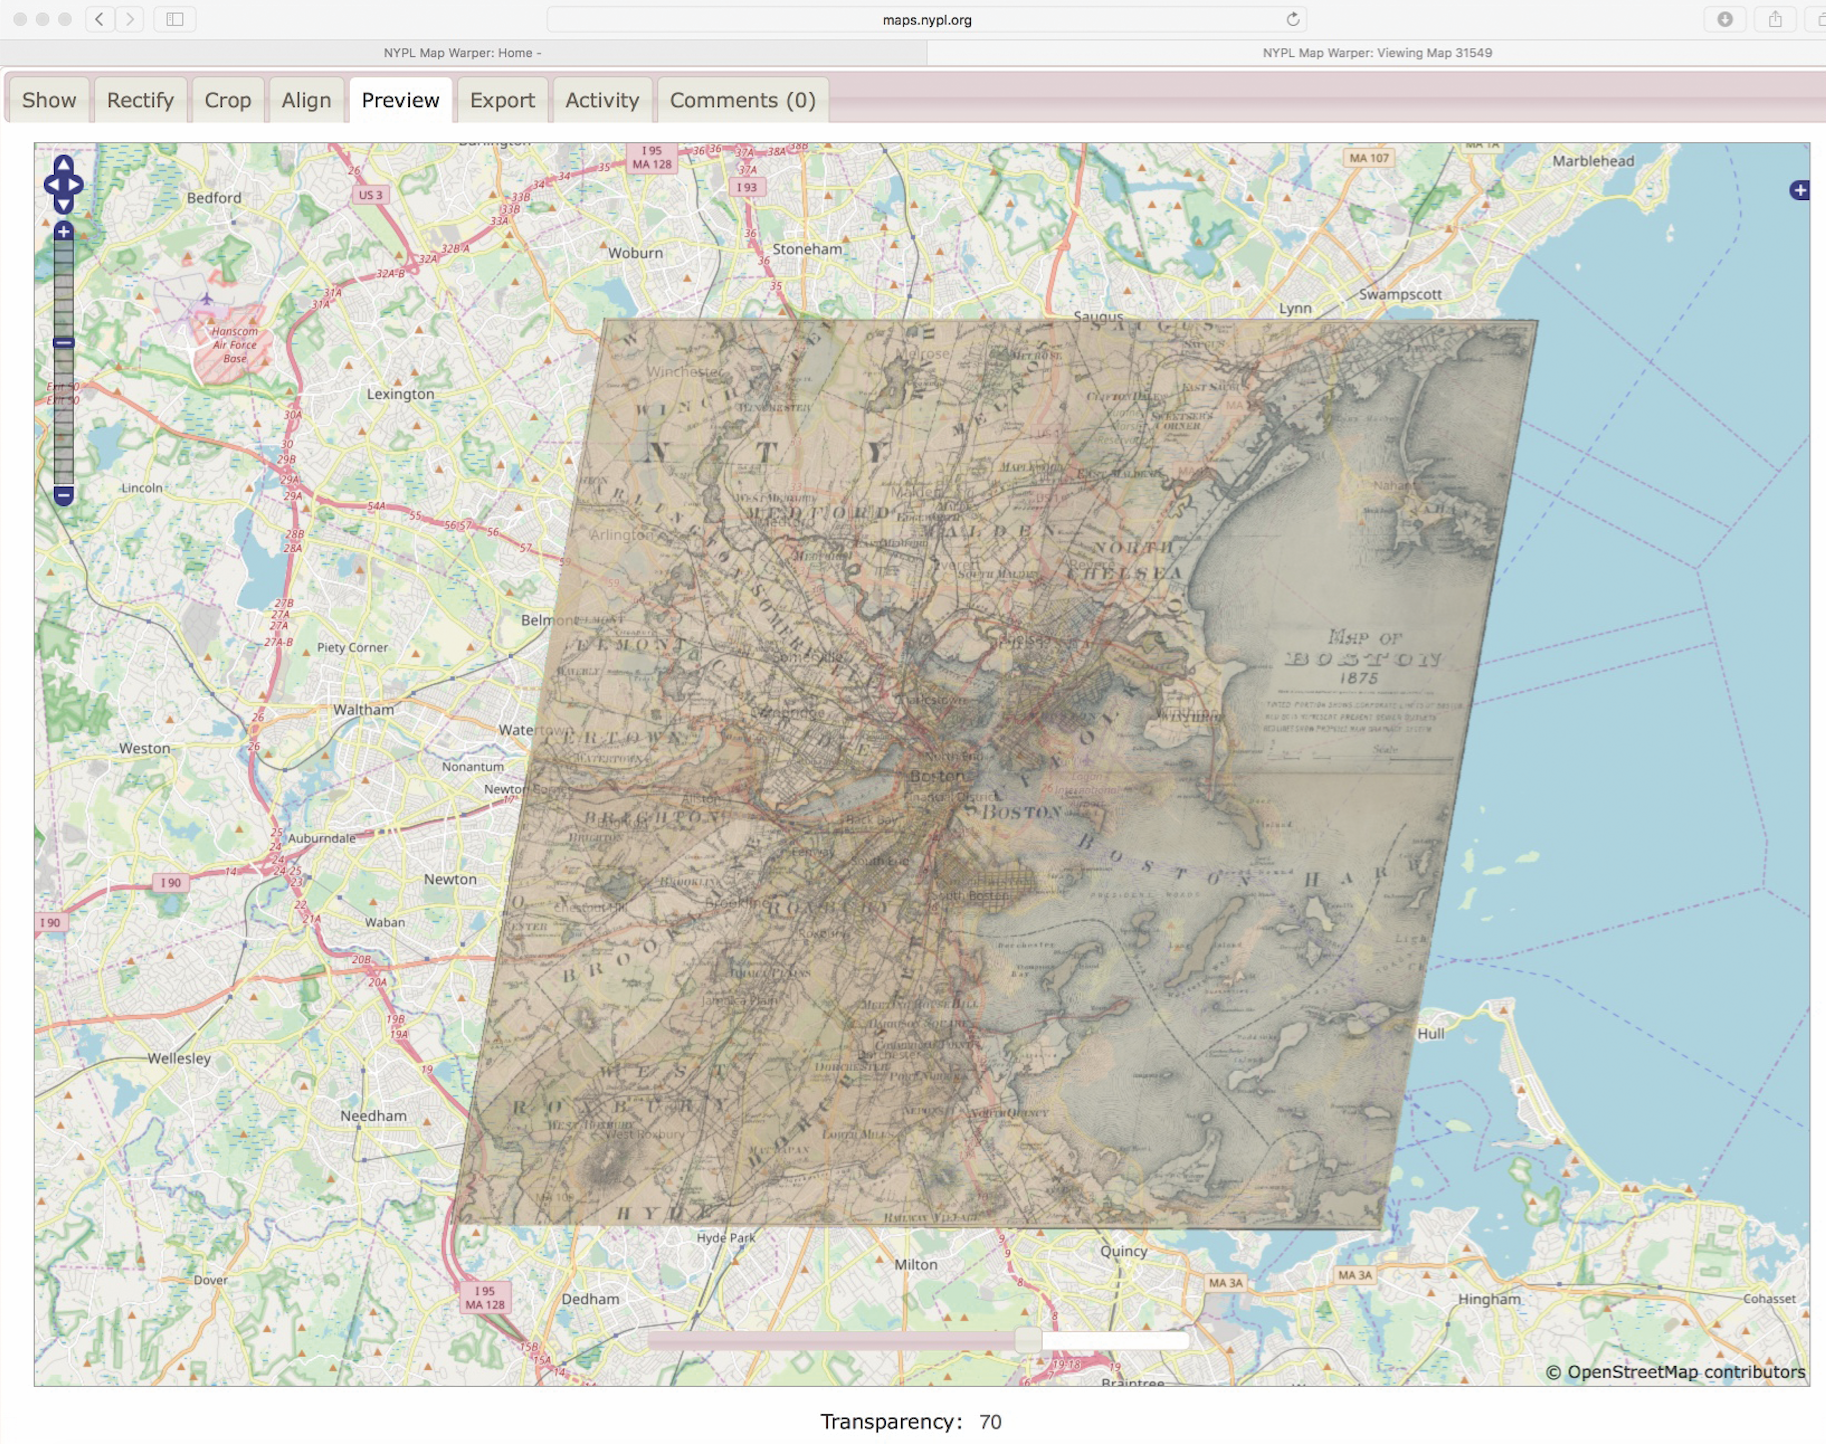
6. Once rectifying is completed, click the Preview tab to see the fruits of your labors. If you haven’t already cropped out extraneous border material, you can choose the “Crop” tab to do so now. Use the Transparency slider to transition between past and present and to see how your ancestral stomping grounds has changed.

7. The “Export” tab lets you save your rectified map (or the original) as a TIFF, PNG, KML (for Google Earth) or WMS (Web Map Service) file. You can view all the maps you’ve rectified by clicking the blue “My Maps” button in the upper right corner next to your user name. Your rectifying work will now be available to view by other Map Warper users. Once you’ve “warped” a few maps, you might even find you’ve discovered a new hobby—one that’s a perfect complement to your genealogical interest in the past.
From the December 2017 issue of Family Tree Magazine.
ADVERTISEMENT